
Size
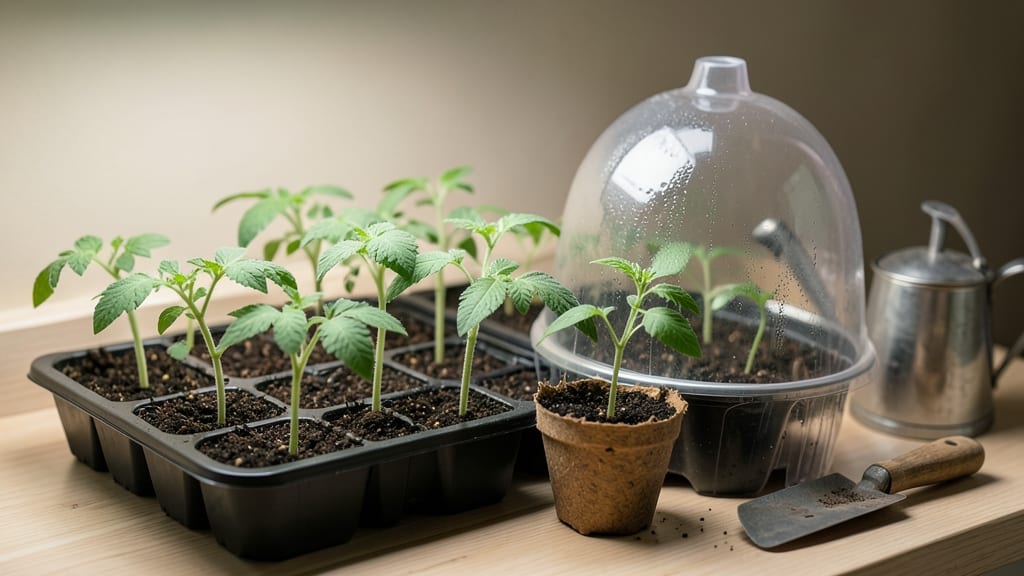
Starting tomato seeds indoors with grow lights cuts germination time from weeks to days. 🌱 I’ve watched trays of seeds sprout in just 5-7 days using this method—no more waiting for slow, uneven starts that leave you scrambling to catch up when spring arrives.
The secret lies in consistent warmth, bright light, and gentle moisture—three things grow lights make effortless. You’ll need a seed-starting tray, sterile potting mix, and a basic LED grow light (1000-2000 lumens) on a timer for 14-16 hours/day. No fancy equipment, just reliable results.
By the time your seedlings hit 2-3 inches tall, they’ll be stocky and ready for transplant. The real magic? You’ll avoid the leggy, weak plants that beginners dread, and your first tomatoes will ripen 2-3 weeks earlier than store-bought starts.
Here’s where it gets interesting—if you set up your lights 8-10 weeks before last frost, you’ll have burly, bushy plants that outperform nursery transplants. No more wilted seedlings or late-season disappointments. Let’s get those seeds going!
📚 In This Guide
- What you need
- Instructions
- Tips and common mistakes
- Wrapping up and next steps
What you need
- ● Tomato seeds: Choose heirloom or hybrid varieties (e.g., Beefsteak, Cherry, or Roma). Buy 5–10 seeds per variety to account for germination variability.
- ● Seed-starting trays or pots: 2–3" deep containers with drainage holes (biodegradable peat pots or plastic cell trays work great). Aim for 12–24 cells per tray.
- ● Seed-starting mix: A sterile, lightweight mix designed for seedlings (avoid garden soil—it’s too dense!). A 10–15 quart bag covers most setups.
- ● Grow lights: LED grow lights: Full-spectrum (red/blue) lights, 12–24" above seedlings. Look for 20–30 watts per square foot (e.g., a 24" x 12" setup needs ~40–60W total).
- ● Fluorescent grow lights: T5 or T8 bulbs (5,000–6,500K color temperature) with reflectors. Use 2–4 bulbs depending on tray size.
- ● Light timer: A plug-in timer to provide 14–16 hours of light daily (critical for strong seedlings!).
- ○ Heat mat (optional but helpful): A seedling heat mat (70–80°F range) to speed up germination (especially for slow starters like heirlooms).
- ● Misting bottle or spray nozzle: For gentle watering to avoid disturbing seeds.
- ● Humidity dome or plastic wrap: To retain moisture during germination (remove once sprouts appear).
- ● Labels & markers: To track seed varieties and planting dates.
- ● pH test kit: Ensure your seed-starting mix is slightly acidic (pH 5.8–6.2).
- ● Fertilizer: A balanced, water-soluble fertilizer (5-10-5 or 3-4-6 ratio) diluted to half-strength for seedlings.
- ● Grow light stand or adjustable clamp: For easy height adjustments as seedlings grow.
- ● Thermometer/hygrometer: To monitor temperature (70–75°F ideal) and humidity (40–60% during germination).
- ● Reflective surfaces: Aluminum foil or white boards to bounce light and maximize coverage.
- ● Gloves & sanitizer: To keep tools and hands clean and prevent mold.
Step-by-step instructions for starting tomato seeds indoors with grow lights
Here’s how I get tomato seeds sprouting in 5-7 days—not the usual 10-14—using grow lights and precise timing.
🌱 Step 1: Prepare Containers and Seed Starting Mix
Fill 4-inch deep containers (one for each seed) with a sterile seed-starting mix—never garden soil, which compacts and blocks roots. I use biodegradable pots to avoid transplant shock later. Moisten the mix until it feels like a damp sponge: squeeze gently, and it should hold its shape but not drip.
Press the soil down lightly with your fingers to eliminate air pockets. Tap the container once on the table to settle it evenly. The goal is firm but not packed—roots need to push through easily. Label each pot with the variety and date (I use toothpicks and a Sharpie).
🌱 Step 2: Sow Seeds at the Right Depth and Temperature
Plant 1-2 seeds per pot at a depth of ¼ inch—any deeper, and they’ll struggle to reach light. Use your finger to make a small hole, drop in the seeds, then cover lightly with a sprinkle of mix. Mist the surface with a spray bottle until the soil looks evenly damp, not soggy.
Cover the containers with a clear plastic dome or plastic wrap to trap warmth and moisture. Place them on a seedling heat mat set to 75-85°F—this boosts germination speed dramatically. Check daily for condensation; if the dome fogs up, lift it for 10 minutes to prevent mold. Expect sprouts in 5-7 days with these conditions.
☀️ Step 3: Introduce Grow Lights Immediately After Germination
The moment you see first true leaves (not the initial seed leaves), remove the dome and move containers under full-spectrum LED grow lights. Position them 2-3 inches above the seedlings—closer than you’d think. Tomatoes need 14-16 hours of light daily, so set a timer if your lights aren’t on a smart system.
Watch for leggy growth (thin, stretched stems) as a red flag—this means the lights are too far away. Raise them gradually as seedlings grow, keeping them just above the tallest leaf. Strong seedlings have dark green leaves and stems thicker than a pencil. If leaves turn pale yellow, the light intensity is too low.
💧 Step 4: Water and Fertilize for Strong Seedlings
Water only when the top inch of soil feels dry—overwatering is the #1 killer of young seedlings. Use a spray bottle to mist the soil gently, avoiding the leaves to prevent disease. Bottom-watering (placing pots in a tray of water for 10 minutes) keeps moisture even without disturbing roots.
After 2-3 weeks, when the first true leaves are fully unfurled, add a diluted liquid fertilizer (half-strength) to encourage robust growth. I use a balanced 10-10-10 formula. Never fertilize before this stage—you’ll burn tender roots. Yellowing leaves at the bottom? You’re overdoing it.
⏰ Step 5: Harden Off and Transplant Outdoors
Start hardening off seedlings 2 weeks before your last frost date. Move them outside to a shaded, sheltered spot for 1 hour the first day, gradually increasing time by 1 hour daily. By day 7, they should tolerate 4-6 hours of direct sun—watch for wilting, which means they’re not ready yet.
Transplant on an overcast afternoon to reduce shock. Bury seedlings deeper than the pot—tomatoes have strong stems that root along buried sections. Water deeply at the base, and mulch with 1-2 inches of compost to retain moisture. Now you’ve got a head start on the neighborhood!
Tips & tricks for perfect indoor tomato seedlings
Here's what I've learned after years of growing tomato seedlings indoors—these tricks help you avoid common pitfalls and get stronger plants faster.
Germination Speed Secret: The 75-85°F heat mat temperature is non-negotiable for that 5-7 day germination window. If your home is cooler, place containers on top of your fridge (not inside) to maintain consistent warmth. I've seen germination times stretch to 10-14 days when seeds sit in cooler conditions—don't let that happen to you!
Light Positioning: When you move seedlings under grow lights after germination, start with 2-3 inches distance—closer than you might expect. I use a small ruler to measure and adjust weekly. The key is keeping lights just above the tallest leaf. If you notice seedlings stretching toward light (leggy growth), lower the lights immediately. This prevents weak stems that'll snap when you transplant.
Watering Technique: That 10-minute bottom-watering method in Step 4 is a game-changer. It prevents surface moisture that causes damping-off disease. I use a shallow tray with ½ inch of water and let pots soak up moisture through drainage holes. This keeps roots consistently moist without the risk of overwatering that kills seedlings.
Fertilizer Timing: Wait for those true leaves (the second set after the initial seed leaves) before fertilizing. I've ruined seedlings by fertilizing too early—yellowing leaves appear within days. Once you add the half-strength 10-10-10 fertilizer, stick to the schedule: every 2 weeks after that initial feeding. More isn't better with young seedlings.
Pro Tips for Starting Tomato Seeds Indoors With Grow Lights
- Here's what I've learned after years of growing tomato seedlings indoors—these tricks help you avoid common pitfalls and get stronger plants faster.
- Germination Speed Secret: The 75-85°F heat mat temperature is non-negotiable for that 5-7 day germination window.
- Light Positioning: When you move seedlings under grow lights after germination, start with 2-3 inches distance—closer than you might expect.
Frequently asked questions
Got questions about starting tomato seeds indoors with grow lights?
You’re not alone! Here are some of the most common concerns—and clear, actionable answers to help you grow strong, healthy seedlings every time.
When should I start tomato seeds indoors?
Timing depends on your last frost date and tomato variety. For most gardeners, start seeds 6–8 weeks before transplanting outdoors. Early varieties (like cherry tomatoes) can go in sooner, while larger types (like beefsteaks) need more time. Check your seed packet for specific recommendations!
How many hours of grow light do tomato seedlings need daily?
Tomato seedlings thrive with 14–16 hours of light per day. If your grow lights aren’t on long enough, seedlings may stretch (leggy growth) or weaken. Use a timer to automate lighting—consistency is key! LED or fluorescent grow lights work well, but avoid heat lamps unless you’re experienced.
Can I use regular LED bulbs instead of grow lights?
Regular LED bulbs can work, but they lack the blue and red spectrums that tomato seedlings need for robust growth. If you’re short on budget, opt for full-spectrum LED bulbs (like those labeled for plants) or supplement with natural sunlight. Just monitor seedlings closely for signs of stress (yellowing or stretching).
Why are my tomato seedlings turning yellow or falling over?
Yellowing leaves often signal overwatering, nutrient deficiency, or weak stems (from poor light). Leggy seedlings usually mean insufficient light or heat. Fix it by:
- Adjusting watering (let soil dry slightly between waterings).
- Moving seedlings closer to the grow light (1–2 inches above leaves).
- Fertilizing lightly with a balanced seedling formula (half-strength).
- Thinning crowded seedlings to improve airflow.
What’s the ideal temperature for germinating tomato seeds?
Tomato seeds germinate best in 70–85°F soil. Use a seedling heat mat (70–80°F) if your home is cooler. Once sprouted, keep temps between 65–75°F during the day and 55–65°F at night. Avoid drafts or extreme fluctuations—consistency keeps seedlings happy!
Wrapping up and next steps
Starting tomato seeds indoors with grow lights is a rewarding way to kickstart your gardening season—faster germination, stronger seedlings, and healthier plants are totally within reach! 🌱 With the right setup, patience, and care, you’ll be transplanting thriving seedlings into your garden in no time.
Now that you’re armed with the know-how, take the next step: grab those seeds, set up your lights, and watch your green thumb grow!