
Propagation
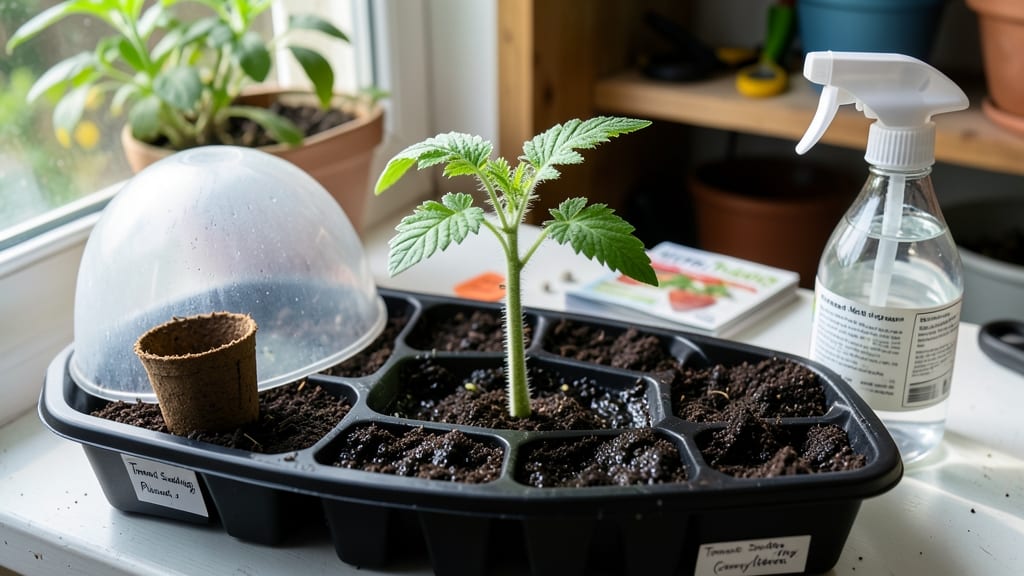
Starting tomato plants from seeds indoors means lightning-fast sprouts in just 4-7 days—no more waiting weeks for stubborn seeds to wake up. 🌱 I learned the hard way that skipping the heat mat leaves you staring at empty seed trays, but once you master this trick, your seedlings will outpace anything from the nursery.
The secret weapon? A heat mat set to 75-85°F, paired with a simple soil mix of 60% peat moss, 30% vermiculite, and 10% perlite. Plant seeds ¼ inch deep in trays with drainage holes, then keep them moist (not soggy) under grow lights or a sunny window.
Most people overwater here—the trays should feel damp, not swampy. By day 10, you'll have sturdy seedlings ready for their first true leaves, and they'll stay ahead of pests like damping-off if you use sterilized soil and avoid crowding. The payoff?
Transplanting 3-4 weeks earlier than store-bought plants, giving your tomatoes a full season to thrive. Works for any tomato variety, from beefsteaks to cherry tomatoes, and adapts to small spaces with LED grow lights. Here's how to avoid the rookie mistakes that kill more seedlings than you'd think.
📚 In This Guide
- What you need
- Instructions
- Tips and common mistakes
- Wrapping up and next steps
What you need
- ● Tomato seeds: 5–10 seeds per variety (start with 2–3 varieties for diversity). Choose heirloom or hybrid seeds based on your preference.
- ● Seed-starting trays or containers: 2–4" deep with drainage holes (e.g., 1020-cell trays or 4–6" pots). Pro tip: Sterilize containers with a 10% bleach solution (1 part bleach to 9 parts water) to prevent mold! 💡
- ● Seed-starting mix: Lightweight, sterile, and well-draining (avoid garden soil—it’s too dense!). Look for mixes labeled "seed-starting" or "organic potting soil."
- ○ Heat mat (optional but highly recommended): 50–70°F range to speed up germination (e.g., 12"x24" mat for trays). Why? Tomatoes germinate faster in warmth—some varieties even double their sprouting speed! 🌡️
- ● Grow lights or sunny windowsill: Full-spectrum LED lights (12–16 hours/day) or a south-facing window with 6+ hours of direct sunlight.
- ● Spray bottle: For gentle watering to avoid disturbing seeds.
- ● Plastic wrap or humidity dome: To retain moisture until germination (remove once sprouts appear).
- ● Labels & marker: To track seed varieties and planting dates.
- ● Fertilizer: Water-soluble, low-nitrogen formula (5-10-10 or 3-4-6 ratio) for seedlings.
- ● Fungicide (e.g., neem oil or copper fungicide): Prevents damping-off disease in humid conditions.
- ● Seedling heaters or bottom watering trays: For extra warmth and convenience.
- ● Transplanting tools: Small trowel or spoon for moving seedlings.
Step-by-Step instructions for starting tomato plants indoors
Here’s how to get your tomato seeds sprouting in record time—no waiting weeks for stubborn germination.
🌱 Step 1: Prep Your Containers and Soil for Speed
Use small, shallow containers (like 2-inch cells or biodegradable pots) with drainage holes—tomato roots need room to spread but won’t outgrow these early on. Fill them with a sterile seed-starting mix (never garden soil—it’s too dense and slows growth). Moisten the mix until it’s damp like a wrung-out sponge, but not soggy. Press it down gently so it’s firm but not compacted.
I always tap the containers on the table once to settle the soil evenly—this prevents air pockets that could delay germination. If you’re using a heat mat (game-changer for speed), place the containers on it now. The goal is to keep soil temps at 75-85°F—that’s the magic range for fast sprouts.
🌱 Step 2: Plant Seeds Shallow and Cover Lightly
Sow 1-2 seeds per cell at a depth of just ¼ inch—deeper planting makes seedlings struggle to reach the surface. I tap the seed packet gently to release one seed at a time (planting too many in one hole leads to weak, crowded seedlings). Cover them with a light dusting of soil—just enough to hide them, no more.
Mist the surface with a spray bottle until it’s evenly damp. Avoid heavy watering here—you’ll wash seeds deeper or create mud. Place a clear plastic dome or wrap over the containers to trap warmth and moisture. Check daily but don’t lift the cover until you see 50% of seeds sprouted—this prevents damping-off, a fungal disease that kills seedlings overnight.
💧 Step 3: Keep Warm and Moist for Lightning Sprouts
Tomato seeds germinate fastest at 75-85°F, so a heat mat is your secret weapon. Without one, germination can take 10-14 days—with one, expect sprouts in 5-7 days. Keep the soil consistently moist (not wet) by misting lightly every 1-2 days until you see the first green tips.
Here’s the thing—once you spot the first sprouts, remove the dome immediately. Trapped humidity around new seedlings invites mold, and you’ll know it’s time when the soil surface looks slightly damp but not glistening. Place the containers under a grow light (or near a south-facing window) for 14-16 hours of light daily—without this, seedlings stretch leggy and never recover.
☀️ Step 4: Move to Bright Light and Strengthen Seedlings
The instant those first true leaves appear (not the tiny cotyledons), move seedlings under a full-spectrum LED grow light positioned 2-4 inches above them. Raise it as they grow to maintain that gap. You’ll see strong seedlings have thick stems, deep green leaves, and compact spacing between leaves—anything leggy or pale needs more light.
Water from the bottom now—place the containers in a tray of ½ inch of water for 10-15 minutes every 2-3 days. This prevents fungal diseases that come from overhead watering. Fertilize lightly with a half-strength liquid fertilizer when the first true leaves appear—this jumpstarts growth without overwhelming tender roots.
⏰ Step 5: Harden Off Before Transplanting Outdoors
Two weeks before your last frost date, start hardening off the seedlings by placing them outside in a sheltered, shaded spot for 1-2 hours the first day. Gradually increase outdoor time by 1 hour daily over 10-14 days, slowly introducing more sun and wind. This toughens stems and prevents shock when they hit the garden.
Skip this step, and you’ll see leaves burn, stems break, or plants wilt dramatically. Once seedlings tolerate a full day outside without wilting, they’re ready. Transplant on an overcast afternoon to reduce stress, and water deeply at the base to help roots establish in their new home.
Tips & tricks for starting tomato plants indoors
Here's what nobody tells you about getting those first sprouts to pop up in record time.
Heat Mat Hack: If your kitchen stays below 70°F, a heat mat becomes non-negotiable. Place it under your containers during Step 1 and leave it on until germination (about 5-7 days with the mat). I've seen germination times cut in half when using one—just make sure the soil stays at that 75-85°F range consistently. Pro move: Use a small thermometer to monitor soil temperature if your home runs cool.
Seed Spacing Secret: In Step 2, when planting those 1-2 seeds per cell, I like to space them slightly apart (about ½ inch) rather than planting them directly on top of each other. This gives you a backup seed and prevents overcrowding when the first sprouts appear. If both seeds germinate, snip the weaker one at the soil line when they're about 1 inch tall—use clean scissors!
Dome Removal Cue: That plastic dome in Step 2 might feel like a good idea, but here's the thing: lift it the second you see 50% of seeds sprouted. The soil surface should look slightly damp but not glistening—this is your perfect humidity signal. I've seen mold take over overnight when people wait too long, and once it starts, it's game over for those tender sprouts. Trust me on this.
Light Positioning: For Step 4, position that grow light 2-4 inches above the seedlings and raise it as they grow. I adjust mine every 3-4 days to maintain that distance. Watch for seedlings that stretch toward the light—this means they're not getting enough intensity. If you notice this, move the light closer or increase daily light hours to 16 hours if possible. The goal is compact, sturdy growth, not tall, spindly plants.
Pro Tips for Starting Tomato Plants From Seeds Indoors
- Here's what nobody tells you about getting those first sprouts to pop up in record time.
- Heat Mat Hack: If your kitchen stays below 70°F, a heat mat becomes non-negotiable. Place it under your containers du...
- Seed Spacing Secret: In Step 2, when planting those 1-2 seeds per cell, I like to space them slightly apart (about ½ ...
Frequently asked questions
Got questions about growing tomato plants from seeds indoors? You’re not alone! Here are answers to the most common concerns—so you can skip the guesswork and get those seedlings thriving.
When is the best time to start tomato seeds indoors?
Start seeds 6–8 weeks before your last frost date—typically mid-February to early March in most zones. Use a heat mat (70–85°F) to speed up germination. If you’re in a warm climate, wait until 8–10 weeks before transplanting to avoid leggy seedlings.
How long does it take for tomato seeds to germinate?
With a heat mat, most seeds sprout in 5–10 days. Without one, germination can take 2–3 weeks. Keep soil consistently moist (not soggy) and maintain warmth—patience pays off! If nothing sprouts after 2 weeks, test seeds in a damp paper towel for viability.
What’s the trick to preventing damping-off in seedlings?
Damping-off (a fungal disease) is deadly but preventable! Use sterilized soil, avoid overwatering, and ensure good airflow. Space seedlings 1–2 inches apart and water from the bottom. A light spray of baking soda solution (1 tsp per quart of water) can also help.
Do I need grow lights, or will natural sunlight work?
Natural light works if seedlings get 12–16 hours of bright, direct sunlight daily. Otherwise, supplement with LED or fluorescent grow lights 12 inches above seedlings. Without enough light, plants grow leggy and weak—adjust lights as they stretch!
Can I reuse seed trays or containers from last year?
Only if you sterilize them first! Soak trays in a 10% bleach solution (1 part bleach to 9 parts water) for 10 minutes, then rinse well. Fungal spores from old soil can survive and infect new seedlings. Better yet, use disposable peat pots for hassle-free transplanting!
Wrapping up and next steps
Starting tomato plants from seeds indoors is a rewarding journey that gives you control, savings, and fresh flavors you won’t find in store-bought plants.
With the right heat mat, patience, and care, you’ll watch tiny seeds transform into thriving seedlings ready for transplanting—proving that great things do come from small beginnings! 🌱
Now that you’re armed with the know-how, take the next step: grab those seeds, set up your heat mat, and start your indoor garden today. Before you know it, you’ll be harvesting juicy tomatoes straight from your own green thumb! 🍅✨