
Container Gardens
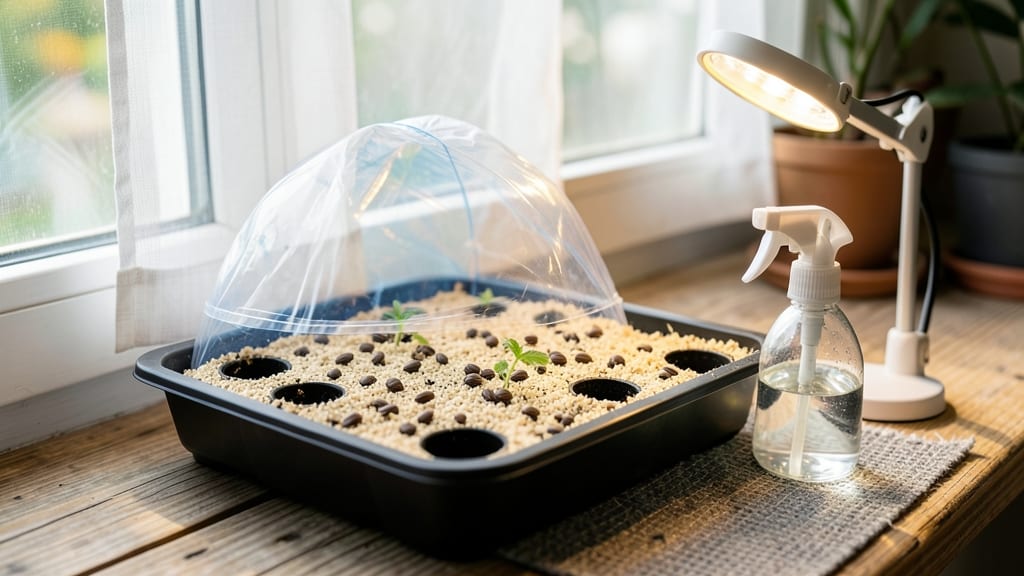
Planting marigold seeds indoors gives you a head start on those bright orange blooms that repel pests and brighten summer borders. 🌱 I’ve started dozens of marigold seedlings, and the secret lies in warm soil, consistent moisture, and a sunny spot—no fancy grow lights needed.
You’ll need small pots or a seed tray, well-draining potting mix, and a spray bottle for gentle watering. Marigolds germinate best in soil that’s 70-75°F, so a seedling heat mat helps if your windowsill is chilly.
Plant seeds just ¼-inch deep and keep them moist until sprouts appear in 7-14 days. Once seedlings have two true leaves, they’re ready for larger pots and more direct light.
By late spring, they’ll be stocky and ready to transplant outside, where they’ll reward you with weeks of bold blooms and fewer garden pests. The biggest mistake? Overwatering or letting soil dry out completely. A humidity dome or plastic wrap speeds up germination, and thinning weak seedlings early prevents competition.
Ready to grow your own? Let’s get started!
📚 In This Guide
- What you need
- Instructions
- Tips and common mistakes
- Wrapping up and next steps
What you need
- ● Marigold seeds: Choose French or African varieties (e.g., 'Bonanza,' 'Tangerine'). Buy 10–20 seeds for a small batch.
- ● Seed-starting trays or small pots: 2–4" deep with drainage holes (biodegradable pots work too!).
- ● Seed-starting mix: Lightweight, sterile mix (avoid garden soil—it’s too dense!).
- ● Grow lights or sunny windowsill: South-facing window (6+ hours of light) or a 12–16 hour LED grow light.
- ● Spray bottle: For gentle watering (avoid drowning seeds!).
- ● Plastic wrap or humidity dome: Keeps moisture in until germination.
- ● Heat mat (70–75°F) to speed up germination.
- ● Fertilizer (balanced 10-10-10 or seaweed extract) for seedlings.
- ● Labels & markers to track varieties.
- ● Tweezers for delicate seed placement.
Step-by-step instructions for planting marigold seeds indoors
Here's how to get those vibrant marigolds blooming strong by summer—no greenhouse needed.
🌱 Step 1: Prepare Your Containers and Seed Starting Mix
Fill small pots or seed trays with a sterile seed-starting mix—never garden soil, as it can compact and harbor diseases. I like to use biodegradable peat pots (about 2-3 inches deep) for each seed since marigolds don’t like being transplanted. Moisten the mix with warm water until it’s damp but not soggy—think of a wrung-out sponge. Tap the containers gently to settle the soil without packing it down.
Marigolds germinate best in loose, airy soil. If your mix feels gritty or heavy, stir in a little perlite (about 10% by volume) to improve drainage. This prevents those tiny roots from suffocating. I always label my pots with the variety and date—marigolds come in so many colors, and you’ll want to keep track!
💧 Step 2: Plant the Seeds at the Right Depth
Marigold seeds are small but sturdy—plant two seeds per pot about ¼ inch deep, roughly the width of a dime. Press them lightly into the soil so they make good contact but don’t bury them too deep, or they’ll struggle to push through. Cover them with a thin layer of the same mix, just enough to hide the seeds completely.
Mist the soil surface with a spray bottle until it’s evenly moist. Avoid soaking the seeds, as this can wash them too deep or create muddy pockets. I like to set the tray on a shallow dish of water for 10 minutes to draw moisture up from below—this keeps the soil consistently damp without overwatering. Place the tray in a warm spot (70-75°F), like on top of the fridge, until germination.
☀️ Step 3: Provide Warmth and Light for Germination
Marigold seeds germinate best in warmth and darkness—cover the tray with a clear plastic dome or plastic wrap to trap heat and moisture. A seedling heat mat (set to 75-80°F) speeds up germination, but even a sunny windowsill will work if your home stays warm. You’ll see tiny sprouts in 5-10 days, though some varieties can take up to 2 weeks—don’t give up!
Once the first true leaves appear (those are the second set, after the initial cotyledons), remove the cover immediately. Too much humidity now invites damping-off, a fungal disease that causes seedlings to collapse overnight. Place the tray under a grow light or in the sunniest window (south-facing is ideal) for 14-16 hours of light daily. If seedlings stretch toward the light (called "legginess"), they’re not getting enough intensity—move the light closer.
🌿 Step 4: Thin and Care for Strong Seedlings
When seedlings have 2-3 sets of true leaves (about 3-4 weeks after planting), thin the weaker one in each pot. Use small scissors to snip at soil level—never pull, or you’ll disturb the roots of the stronger plant. This gives your marigolds room to grow without competing for nutrients. Keep the soil evenly moist but never soggy; let the top ½ inch dry out between waterings.
Fertilize lightly with a balanced liquid fertilizer (10-10-10) diluted to half strength when the second set of true leaves appears. Over-fertilizing now can burn tender roots. Harden off seedlings by placing them outside in partial shade for 1-2 hours a day, starting 10 days before your last frost date. Gradually increase their time outdoors until they’re ready for the garden—this toughens them up for transplanting.
⏰ Step 5: Transplant Outdoors at the Right Time
Wait until nighttime temperatures stay above 50°F and all danger of frost has passed. Choose a sunny spot with well-draining soil—marigolds hate soggy roots. Dig holes twice as wide as the pots but the same depth. Gently remove the seedlings, keeping the root ball intact, and place them in the holes. Fill around the roots with soil and water deeply to settle everything in.
Space plants 12-18 inches apart for bush varieties or 18-24 inches for tall types. Mulch around the base with 1-2 inches of straw or shredded leaves to retain moisture and suppress weeds. Your marigolds will bloom in 6-8 weeks—just keep them well-watered (about 1 inch per week) and deadhead spent flowers to encourage more blooms all season long.
Tips & tricks for sunny windowsill marigold starts
Here's what I've learned from years of growing marigolds indoors—these small details make all the difference between healthy seedlings and sad, leggy failures.
The Heat Factor: That 70-75°F temperature range for germination is non-negotiable. If your home runs cooler, place your seed tray on top of the fridge or use a seedling heat mat set to 75-80°F. I've tried using regular lamps for heat, but they can dry out the soil too quickly—stick with dedicated heat sources. The moment seeds sense warmth, they'll start pushing through the soil faster.
Lighting Strategy: For those critical 14-16 hours of light daily, a simple LED grow light works wonders. Position it just 3-4 inches above seedlings—closer if they're stretching (that's your "legginess" warning). I rotate my trays daily so all sides get even light exposure. South-facing windows are great, but cloudy days mean you'll need to supplement with artificial light to prevent weak growth.
Thinning Technique: When you're thinning those 2-3 sets of true leaves seedlings, use small scissors to cut at soil level rather than pulling. This prevents disturbing the roots of your kept plant. I like to thin on a cloudy day—less stress for the seedlings. After thinning, give the remaining plant a light mist with water to help it recover from the shock.
Transplanting Timing: That 10 days before last frost date for hardening off is perfect. Start with just 1-2 hours of partial shade, then gradually increase exposure. I've seen beginners rush this step and end up with shocked seedlings that wilt in the garden. The key is gradual adaptation—think of it like sunbathing after winter!
Pro Tips for Planting Marigold Seeds Indoors
- Here's what I've learned from years of growing marigolds indoors—these small details make all the difference between healthy seedlings and sad, leggy failures.
- The Heat Factor: That 70-75°F temperature range for germination is non-negotiable.
- Lighting Strategy: For those critical 14-16 hours of light daily, a simple LED grow light works wonders.
Frequently asked questions
Got questions about getting your marigold seeds off to a flying start indoors? You’re not alone—here are some of the most common concerns (and solutions!) from gardeners just like you.
How long before marigold seeds sprout indoors?
Marigold seeds typically sprout in 7–14 days after planting, depending on warmth and moisture. Keep soil consistently damp (not soggy!) and maintain a cozy 70–75°F environment. If you’re impatient, try a heat mat under your tray—it can speed things up!
When should I transplant marigold seedlings outdoors?
Wait until after the last frost and when seedlings have 2–3 sets of true leaves (usually 4–6 weeks after sowing). Harden them off for 7–10 days by gradually exposing them to outdoor conditions. Choose a sunny spot with well-draining soil—they’ll reward you with vibrant blooms!
Why aren’t my marigold seeds germinating?
Common culprits include cold soil, dry conditions, or old seeds. Try these fixes:
- Use a seedling heat mat to warm soil to 70°F+.
- Cover seeds with humid plastic wrap until sprouts appear.
- Test seed viability by soaking a few in water—if they sink, they’re likely good!
Can I grow marigolds from store-bought flowers?
Unfortunately, no—most commercial marigolds are hybrids and won’t produce viable seeds. For indoor starts, stick to packaged seeds labeled for your climate. Pro tip: Save seeds from heirloom varieties next year for free, organic starts!
What’s the best indoor setup for marigold seeds?
A south-facing windowsill (or a grow light) is ideal. Use a small seed tray with drainage holes and a lightweight potting mix. For extra warmth, place a seedling heat mat underneath. Avoid overcrowding—sow seeds ¼ inch deep and 1 inch apart.
Wrapping up and next steps
Growing marigolds from seeds indoors is a rewarding way to kickstart your summer garden with vibrant, pest-repelling blooms! 🌱 With the right setup—like proper lighting, moisture control, and patience—you’ll soon be transplanting sturdy seedlings ready to thrive outdoors. Now’s the perfect time to take that next step: gather your supplies, follow the steps, and watch your sunny windowsill transform into a mini nursery.
Before you know it, your garden will burst with those cheerful, golden faces—and you’ll be the proud gardener who made it happen!