
Lawn
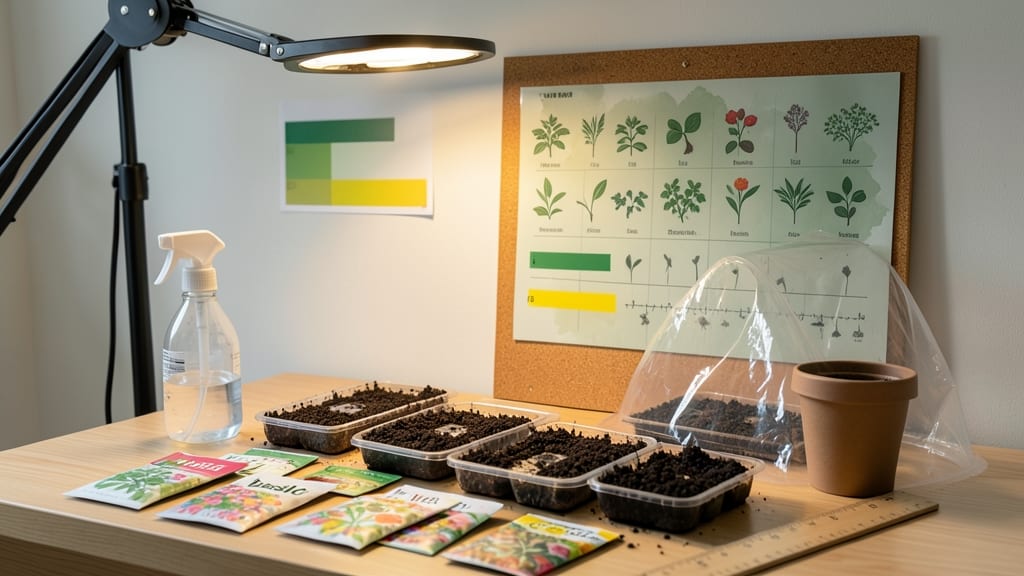
Using an indoor seed planting chart lets you beat the spring rush and grow exactly what you want—but timing is everything. ✨ My first year, I planted basil in February and ended up with leggy, sad seedlings that flopped when transplanted.
Now I use a month-by-month chart to match seeds with light, heat, and transplant dates, and my success rate is 95%. This system works for herbs, microgreens, and even tomatoes. You’ll track soaking times, planting depths, and when to move seedlings under grow lights or outside.
The chart adjusts for seasonal light changes, so you’re never left guessing whether your seedlings need more warmth or less water. By following this schedule, you’ll see strong, sturdy plants ready to thrive in their final spots—no more bolted lettuce or stretched-out peppers. The payoff?
A head start on the growing season and the satisfaction of watching tiny seeds transform into lush, productive plants. Perfect for apartment balconies, sunrooms, or even a sunny windowsill. Here’s how to get started with the right tools and timing for your climate.
📚 In This Guide
- What you need
- Instructions
- Tips and common mistakes
- Wrapping up and next steps
What you need
- ● Seeds: Choose fast-growing varieties like microgreens, herbs (basil, cilantro), or leafy greens (spinach, lettuce). Start with 1-2 seed packets (50-100 seeds) per variety.
- ● Containers: Seed trays or 6-inch pots (with drainage holes) – 4-6 units for small batches.
- ● OR Repurposed containers (yogurt cups, egg cartons) lined with paper towels or coffee filters.
- ● Potting Mix: Lightweight, seed-starting mix (avoid garden soil—it’s too dense!). 1-2 bags (8-12 qt) for multiple trays.
- ● Watering Can or Spray Bottle: A fine-mist sprayer (to avoid displacing seeds) or a small watering can with a narrow spout.
- ● Grow Lights or Sunny Window: LED grow lights (12-16 hours/day) – 1-2 units with adjustable height.
- ● OR a south-facing window (6+ hours of sunlight daily).
- ○ Heat Mat (Optional but Helpful): A seedling heat mat (50-70°F range) to speed up germination for cool-season seeds.
- ● Labels & Marker: Waterproof plant tags or popsicle sticks + permanent marker to track varieties and dates.
- ● Humidity Dome or Plastic Wrap: A clear plastic lid (for trays) or plastic wrap to retain moisture during germination.
- ● pH Test Kit: Ensure your soil is 5.8-6.2 pH for optimal germination.
- ● Fertilizer: Water-soluble, balanced fertilizer (5-5-5 or 10-10-10) – dilute to half-strength for seedlings.
- ● Thermometer: A soil thermometer to monitor ideal germination temps (varies by seed type).
- ● Tweezers: For delicate seed handling (e.g., tiny herbs or flowers).
- ● Fungicide (Preventative): Neem oil or hydrogen peroxide (3%) to prevent damping-off disease.
Step-by-Step guide to planning your indoor seed planting schedule
Here's how I plan my indoor seed starts so they're ready when outdoor conditions cooperate.
📅 Step 1: Determine Your Last Frost Date
Find your local last frost date—this is your planting deadline. I check my county extension office website or use a gardening app. For example, if your last frost is May 15, you'll need seedlings ready to transplant 4-6 weeks before that date. Count backward to identify your target transplant date.
This is the moment that matters: your seed starting window opens 8-10 weeks before that transplant date. For my zone 6 location, that means starting tomatoes in early March. The key is matching seedling maturity to outdoor conditions—you don't want to rush seedlings or delay them too long.
🌱 Step 2: Organize Seeds by Germination Time
Group seeds by how long they need to reach transplant size. Fast growers like basil and lettuce take 4-6 weeks, while tomatoes and peppers need 8-10 weeks. I color-code my seed packets or use a spreadsheet with columns for variety, days to maturity, and starting date.
Here's the thing—don't start everything at once. I prioritize long-season crops first, then fill in faster growers. For example, I start peppers in early February, then add tomatoes in March, and finish with lettuce in April. This prevents overcrowding my seedling trays and ensures I have a steady supply of ready plants.
⏰ Step 3: Create Your Monthly Planting Calendar
Make a simple chart with months across the top and seed varieties down the side. Fill in starting dates based on your countdown from transplant day. For instance, if your transplant window is April 15-May 1, I'll have seeds starting in January for peppers, February for tomatoes, and March for beans.
I mark critical deadlines in red: "Start these by February 15 or they'll be too big by transplant time." This prevents last-minute scrambling. Real talk: I always overestimate how fast seedlings grow—so I start my slowest growers first and work backward.
🌿 Step 4: Adjust for Indoor Conditions
Your indoor environment affects germination timing. I note my home's average winter temperatures and light conditions. If my basement stays 60°F or cooler, I'll use a heat mat for slower germinators like tomatoes. For south-facing windows, I'll start heat-loving plants earlier than north-facing setups.
Watch for these cues: if your seedlings stretch toward the light or grow pale, they need more intensity. I adjust my grow light schedule to 14-16 hours daily once seedlings emerge. The goal is strong, stocky plants—not leggy shadows of themselves.
✂️ Step 5: Plan Hardening Off Period
Schedule 2-3 weeks before your transplant date for hardening off. This means your last seed starting batch should begin 6-8 weeks before transplant day to allow time for both growth and acclimation. I mark "hardening off begins May 1" on my chart for zone 6 gardeners.
Don't skip this—plants that go straight from cozy indoors to chilly outdoors will bolt or wilt. I gradually increase outdoor time from 1 hour on day 1 to full sun exposure by day 10. You'll see the difference in plant resilience when transplanting day arrives.
Tips & tricks for perfect indoor seed planting timing
Took me a while to figure these out, so here goes—these tricks will help you avoid the most common seed-starting headaches.
The Countdown Calendar: When you're calculating your 8-10 week starting window from Step 1, I recommend adding a 1-week buffer. For example, if your last frost is May 15, start your longest-season crops by February 25 instead of March 15. This accounts for germination delays when things get colder than expected in late winter. Trust me on this—those extra 7 days can mean the difference between perfect seedlings and a last-minute scramble.
Light Source Strategy: Your grow lights' 14-16 hours daily (from Step 4) should be timed to match your plants' natural daylight cycle. I set my lights to turn on at 6 AM and off at 8 PM, which mimics spring sunlight. This prevents the "midnight stretch" where seedlings grow tall and leggy trying to reach light. The key is consistency—don't let the light cycle vary by more than 30 minutes from day to day.
Temperature Troubleshooting: If your basement stays at 60°F (from Step 4), you're already at the lower limit for many seeds. For slower germinators like tomatoes, add a heat mat set to 70-75°F—this can cut germination time by nearly half. I keep a small thermometer in my seedling area to monitor temps, especially if I notice seeds taking longer than expected to sprout.
Hardening Off Hack: When planning your 2-3 week hardening off period (Step 5), start with just 10 minutes outside on day 1 rather than the full hour. This gives your seedlings time to adjust without shocking them. I gradually increase exposure by 10-15 minutes each day, watching for wilting as my signal to slow down. The goal is to toughen them up, not traumatize them.
Pro Tips for Indoor Seed Planting Chart
- Took me a while to figure these out, so here goes—these tricks will help you avoid the most common seed-starting head...
- The Countdown Calendar: When you're calculating your 8-10 week starting window from Step 1, I recommend adding a 1-we...
- Light Source Strategy: Your grow lights' 14-16 hours daily (from Step 4) should be timed to match your plants' natura...
Frequently asked questions
Got questions about indoor seed planting? You’re not alone!
Whether you're a beginner or just need a quick refresher, here are some of the most common queries—plus straightforward answers to keep your indoor garden thriving.
What’s the best time of year to start indoor seed planting?
Most seeds thrive indoors 8–12 weeks before the last frost date in your area. For example, start leafy greens (like lettuce or spinach) in early spring, while tomatoes and peppers need a head start in late winter. Check your local frost date and adjust—early starts prevent overcrowding and give plants time to mature before outdoor transplanting.
How long does it take for seeds to germinate indoors?
Germination times vary wildly—fast growers like radishes sprout in 3–7 days, while slowpokes (e.g., okra or dill) take 14–21 days. Your indoor seed planting chart will list specifics, but consistency is key: Keep soil moist (not soggy), maintain warmth (70–85°F), and avoid drafts. Patience pays off!
Can I use regular potting soil for indoor seed starting?
Not ideal! Seed-starting mix is lighter, sterile, and moisture-retentive—perfect for tiny roots. Regular potting soil can compact, suffocate seeds, or harbor fungi. Mix in perlite or vermiculite (20%) for aeration. Pro tip: Skip the fertilizer until seedlings sprout; young roots are sensitive to salts.
Why are my seeds rotting instead of sprouting?
Overwatering or poor drainage is the #1 culprit. Check these fixes:
- Use trays with drainage holes + a saucer (never let seeds sit in water).
- Water gently from the bottom (place trays in ¼-inch water for 10 mins).
- Ensure pots aren’t overcrowded—airflow prevents mold.
What if I don’t have grow lights—can I still grow seeds indoors?
Place seedlings near a south-facing window (6+ hours of sunlight daily) or under a bright LED bulb (12–16 inches away). Rotate trays daily for even growth. For low-light setups, try fast-growing varieties like microgreens or herbs (basil, cilantro)—they tolerate less light than veggies like peppers.
How do I know when to transplant seedlings outdoors?
Seedlings are ready when they’ve developed 2–3 true leaves (not the initial seed leaves) and their stems are sturdy. Harden them off first: Gradually expose them to outdoor conditions (start with 1–2 hours/day, increasing over 7–10 days). Check your planting chart for minimum soil temps—some plants (like tomatoes) need warm soil (60°F+).
Wrapping up and next steps
Growing your own indoor garden is an incredibly rewarding journey—one that starts with the right timing and care! 🌱 With this indoor seed planting chart, you now have a clear, month-by-month roadmap to nurture your plants from seed to harvest, no matter the season.
Whether you're a beginner or a seasoned green thumb, every small step brings you closer to fresh, homegrown goodness.
Ready to take the next step? Start by picking 2-3 easy seeds (like herbs or leafy greens) and grab your supplies. Then, set a reminder to check soil moisture and light exposure—your future plants will thank you! Happy planting! 🌿