
Tools
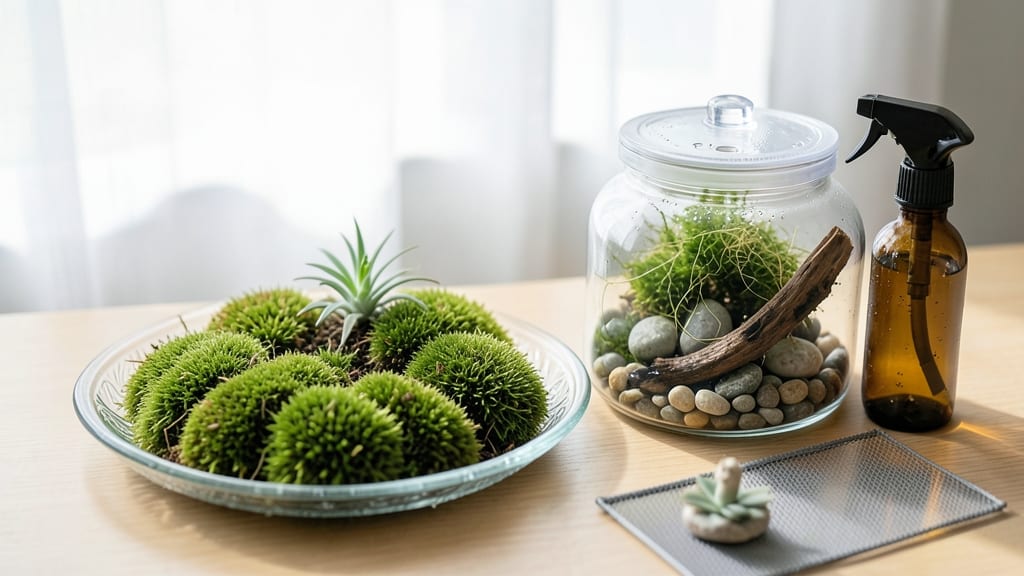
A lush indoor moss garden transforms any room into a serene miniature forest—no green thumb required. ✨ I started mine in a forgotten corner of my living room, and now it’s the most peaceful spot in the house, thriving under dim light where houseplants usually give up.
Moss loves what other plants hate: low light, high humidity, and neglect. All you need is a shallow container (think glass terrarium, ceramic dish, or even a repurposed tray), a handful of moss from a local forest or garden center, and a spray bottle.
The real magic happens when you layer it with tiny rocks, driftwood, or pebbles for texture—suddenly, your shelf looks like a fairy’s secret garden. By week four, your moss will be velvety green and springy to the touch, purifying the air while adding a calming focal point.
It’s the perfect project for small spaces, offices, or bathrooms where sunlight is scarce. The best part? It’s nearly impossible to kill. Here’s how to style it: pair with air plants, miniature ferns, or even a single orchid for drama.
For a Zen vibe, keep it minimal with just moss and smooth stones. The possibilities are endless—and your space will thank you.
📚 In This Guide
- What you need
- Instructions
- Tips and common mistakes
- Wrapping up and next steps
What you need
- ● Moss: 1–2 cups of live sphagnum moss (sterilized and hydrated) or a mix of sheet moss (Hypnum) and cushion moss (Leucobryum) for texture.
- ● Container: A shallow tray, terrarium, or decorative dish (4–6 inches wide) with drainage holes or a moisture-retentive base (e.g., pebbles or a mesh liner).
- ● Substrate: 1 part peat moss or coconut coir + 1 part perlite or coarse sand (for aeration).
- ● Water: Distilled or rainwater (avoid tap water with chlorine).
- ● Light source: A grow light (LED or fluorescent) or a north-facing window (indirect light).
- ● Spray bottle (16 oz, with fine mist nozzle).
- ● Small trowel or spoon for planting.
- ○ Optional: Decorative elements (miniature rocks, driftwood, or figurines).
- ● Humidity dome (for terrariums).
- ● pH test kit (to check substrate acidity, ideal: 5.0–6.5).
- ● Patience! Moss grows slowly—expect lushness in 4–8 weeks. 🌱
- ● Consistent humidity (50–70% ideal) or a humidifier.
- ● Space with stable temperature (50–75°F).
Step-by-Step instructions for creating an indoor moss garden
Here's how to build a thriving miniature moss forest that thrives anywhere indoors.
🌱 Step 1: Gather Materials and Prepare Your Base
For a 4-gallery moss display, you'll need a shallow tray or container with drainage holes, a layer of 1-2 inches of coarse gravel at the bottom, followed by a 1-inch layer of activated charcoal (to prevent odors). I like to use a 5x7-inch wooden frame with glass panels for visibility—it gives a clean, modern look while keeping humidity trapped inside.
Place your container in a spot with indirect light—near a north-facing window works best, or under a grow light set to 12 hours daily. Avoid direct sun, which can dry out moss quickly. The reason for the gravel layer is simple: it prevents root rot by ensuring excess water drains away from delicate moss tissues.
💧 Step 2: Layer Soil and Moss for Optimal Growth
Add a ½-inch layer of sphagnum peat moss over the charcoal—this is your growing medium. Sphagnum holds moisture beautifully while allowing airflow, which is critical for moss health. Next, arrange your moss varieties in small clusters, pressing them lightly into the peat. I like to mix 3-4 types (like feather moss, cushion moss, and sheet moss) for texture and visual interest.
Mist everything thoroughly with room-temperature water until the peat feels damp but not soggy. Here's the thing—moss doesn't like heavy watering. You'll see the peat darken slightly as it absorbs moisture, but it shouldn't pool at the bottom. Let any excess water drain completely before covering the tray with a clear plastic lid or glass panel to maintain humidity.
☀️ Step 3: Maintain Humidity and Light Conditions
Place your moss garden in its permanent spot and mist lightly every 2-3 days—just enough to keep the moss slightly damp to the touch. Watch for condensation on the lid; if it's heavy, you're doing it right. I set a small humidifier nearby (about 6-8 inches away) to keep the air consistently moist, especially in dry winter months.
Check the moss weekly for brown or crispy patches—this means it's too dry. If you see fuzzy growth (mold), it's too wet. Adjust your misting schedule accordingly. The ideal environment mimics a shady forest floor: cool (60-70°F), humid (50-70%), and indirect light. You'll notice new growth within 2-4 weeks as the moss spreads and thickens.
✂️ Step 4: Prune and Refresh for Long-Term Beauty
Every 3-4 months, trim any dead or discolored moss with sharp scissors, cutting just above the peat layer. This keeps your garden looking fresh and encourages new growth. I also rotate the tray ¼ turn weekly so all sides get even light exposure—prevents uneven growth patterns.
If your moss starts looking sparse, add small handfuls of fresh moss to bare spots. The key is patience—moss grows slowly but steadily. With consistent care, your indoor forest will flourish for years, becoming a serene, low-maintenance centerpiece that purifies the air while calming your space.
Tips & tricks for perfect indoor moss garden
Here's what nobody tells you about keeping your moss thriving for years—these little details make all the difference.
Layering Secret: When adding your ½-inch layer of sphagnum peat moss in Step 2, gently press it down just enough to create a smooth surface, but don't compact it too tightly. Think of it like fluffing a pillow—you want air pockets to help with moisture retention and root development. I use the back of a spoon to create shallow dimples where I'll place moss clusters, which helps them establish roots more quickly. This subtle prep work prevents uneven growth patterns down the road.
Lighting Strategy: That 12-hour daily grow light recommendation in Step 1 is perfect, but here's the thing about positioning: if your moss starts leaning toward the light source, it's getting too much direct exposure. Rotate your moss garden tray ¼ turn weekly (as mentioned in Step 4) to ensure even growth. I place my grow light about 12 inches above the moss and angle it slightly to mimic natural dappled sunlight—this creates that beautiful, uneven texture you see in wild forests.
Humidity Hack: The 60-70°F temperature range mentioned in Step 3 is ideal, but humidity is where most people struggle. Instead of just misting every 2-3 days, I place a small pebble tray filled with water beneath my moss garden container. The evaporating water creates a microclimate of consistent moisture without over-saturating the moss. This works especially well in dry climates where maintaining 50-70% humidity feels impossible. Just remember to empty and refill the tray weekly to prevent bacterial growth.
Pruning Wisdom: During your 3-4 month pruning in Step 4, don't throw away those trimmed moss pieces! Place them in a sealed container with a damp paper towel and store in a cool, dark place. You can replant these cuttings to fill in bare spots later—moss has an incredible ability to regenerate. I've successfully revived moss that's been stored this way for up to 6 months. This zero-waste trick saves money and keeps your moss garden looking lush year-round.
Pro Tips for Indoor Moss Garden
- Here's what nobody tells you about keeping your moss thriving for years—these little details make all the difference.
- Layering Secret: When adding your ½-inch layer of sphagnum peat moss in Step 2, gently press it down just enough to create a smooth surface, but don't compact it too tightly.
- Lighting Strategy: That 12-hour daily grow light recommendation in Step 1 is perfect, but here's the thing about positioning: if your moss starts leaning toward the light source, it's getting too much direct exposure.
Frequently asked questions
Got questions about creating your dream indoor moss garden?
Here are answers to the most common ones—so you can dive right in with confidence!
What’s the best moss type for beginners?
Start with Sheet Moss (Hypnum) or Cushion Moss (Leucobryum)—they’re hardy, forgiving, and thrive in low light. Avoid delicate mosses like Peat Moss (it’s not a true moss and dries out fast!). Look for live moss sold in sheets or dried clumps at garden centers or online.
How long does it take to grow an indoor moss garden?
You’ll see noticeable growth in 4–6 weeks with proper care, but full lushness takes 3–6 months. Moss grows slowly—think of it as a living art piece! Patience pays off with vibrant, velvety texture. Pro tip: Mist daily and keep humidity high to speed up early growth.
Do I need a humidifier, or can I just mist?
While misting works, a small humidifier (or pebble tray with water) is ideal for consistent moisture. Moss loves 60–70% humidity. If air is dry (like in winter), mist 2–3 times daily and avoid letting moss dry out completely. Watch out: Overwatering can cause mold—balance is key!
Can I use moss in a terrarium instead?
Moss is perfect for terrariums—it traps moisture and adds texture. Just ensure your setup has indirect light and good airflow. For closed terrariums, mist lightly (condensation helps). Open terrariums need more frequent misting. Bonus: Pair moss with ferns or tiny ferns for a mini rainforest vibe!
What do I do if my moss turns brown or slimy?
Brown patches?
Likely from drying out—trim dead spots and increase humidity. Slimy/moldy? Overwatering or poor airflow. Let it dry slightly, trim affected areas, and improve ventilation. Prevent it: Keep moss in bright, indirect light and avoid soggy substrates.
Can I dye or paint moss for creative projects?
Yes, but use natural dyes (turmeric, beet juice) or non-toxic acrylic paint sparingly. Seal with a waterproof sealant if outdoor use is planned. Avoid harsh chemicals—they’ll kill the moss! Fun idea: Try moss in framed art or as a living centerpiece.
Wrapping up and next steps
Creating an indoor moss garden is more than just a trend—it’s a breath of fresh air (literally!) for your space. With the right materials and a little patience, you’ll cultivate a serene, low-maintenance oasis that purifies the air and soothes the soul.
Whether you’re a seasoned plant parent or a beginner, this project is your chance to bring nature indoors in the most magical way.
Ready to take the next step? Start small—pick your favorite moss type, gather your tools, and let your creativity grow! 🌿✨ Your mini forest awaits!