
Container Gardens
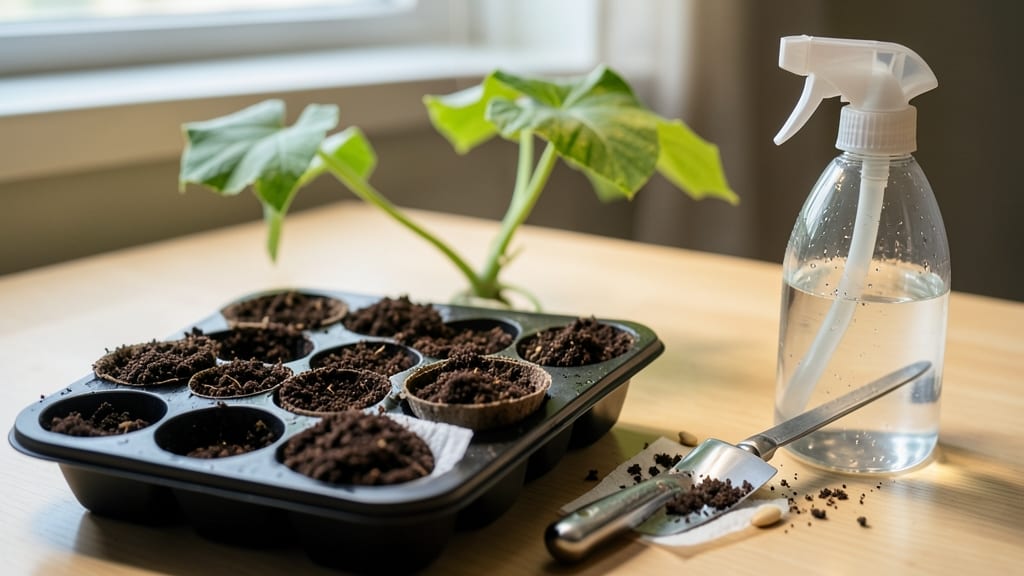
Planting squash seeds indoors gives you a 6-week head start on the garden season—my first batch of butternut seedlings outgrew their pots before I could even transplant them outside. 🌱 The secret to success isn't complicated: timing, warmth, and patience. Most gardeners wait until after the last frost, but starting seeds early means bigger plants that produce earlier and more reliably.
You'll need just a few supplies: biodegradable pots (or recycled containers), seed-starting mix, a heat mat (optional but helpful), and a sunny windowsill or grow light. Squash seeds germinate best when soil stays between 75-85°F—that's why a heat mat makes all the difference.
Plant seeds 1 inch deep, two per pot, and keep the soil lightly moist until sprouts appear in 7-14 days.
Once sprouts emerge, move them to a bright spot with 6-8 hours of light daily—south-facing windows or grow lights work best. Thin to the strongest seedling per pot, and watch for damping off (a fungal disease that causes seedlings to collapse).
The key is airflow: space pots apart and avoid overwatering. By the time seedlings have 2-3 true leaves, they're ready to harden off for transplanting.
Here's where most beginners trip up: rushing the hardening process. Gradually expose seedlings to outdoor conditions over 7-10 days—start with an hour in the shade, then increase exposure. My first year, I skipped this step and lost half my seedlings to shock.
But when done right, you'll end up with stocky, disease-resistant plants that hit the ground running in the garden.
📚 In This Guide
- What you need
- Instructions
- Tips and common mistakes
- Wrapping up and next steps
What you need
- ● Squash seeds: Choose heirloom or hybrid varieties (e.g., butternut, acorn, or zucchini) based on your climate and taste. Quantity: 2–4 seeds per container (or 1 seed per cell in a seed tray).
- ● Seed-starting containers: Biodegradable pots (2–4 inches deep) or
- ● Seed trays with individual cells (1–2 inches deep).
- ● Seed-starting mix: Lightweight, sterile mix designed for seedlings (avoid garden soil—it’s too dense!). Quantity: Enough to fill containers ¾ full.
- ● Grow lights or sunny windowsill: Squash needs 12–16 hours of light daily. A full-spectrum LED grow light (12–24 inches above seedlings) works best.
- ● Spray bottle: For gentle watering to keep soil moist but not soggy.
- ○ Heat mat (optional but helpful): Keeps soil warm (70–90°F) to speed up germination. Note: Only needed if your home is chilly (<60°F).
- ● Humidity dome: Creates a cozy environment for seedlings (remove once sprouts appear!).
- ● Fertilizer: A balanced, water-soluble fertilizer (e.g., 5-5-5 or 10-10-10) diluted to half-strength for first feeding.
- ● Plant labels: Mark containers with seed type and date to avoid mix-ups!
- ● Tweezers or small spoon: For delicate seed placement.
- ● Fan (small, adjustable): Encourages strong stems by simulating wind (use lightly after germination).
Step-by-Step instructions for planting squash seeds indoors
Here's how to get your squash seedlings off to a vigorous start—no weak, leggy plants here.
🌱 Step 1: Prepare Seedling Trays and Mix
Fill your 4-cell seedling trays with a sterile seed-starting mix—never garden soil, which can harbor diseases like damping-off. I like to blend mine with 20% perlite for extra drainage, since squash roots need air to breathe. Moisten the mix until it feels like a damp sponge, not dripping wet.
Tap the trays gently on the counter to settle the soil without compacting it. You want the surface firm enough to hold seeds in place but loose enough for tiny roots to push through. Press down lightly with your fingers—just enough to create a flat planting surface. This prevents seeds from sinking too deep once you add them.
🌱 Step 2: Sow Seeds at Proper Depth
Plant 1-2 seeds per cell at a depth of 1 inch—about three times the seed's diameter. Squash seeds need this depth to establish strong roots before emerging. Use your finger to make a small hole, drop in the seeds, and cover lightly with additional mix. Don't press down hard; you're not burying them, just giving them a cozy spot to germinate.
I tap the tray gently to ensure good seed-to-soil contact, which helps prevent air pockets that could delay germination. Label each cell with the variety and date—after a week, identical green sprouts will look identical until you remember which is which. Mist the surface lightly with water to settle the soil around the seeds.
💧 Step 3: Provide Warmth and Moisture
Cover the trays with a clear humidity dome or plastic wrap to retain warmth and moisture. Squash seeds germinate best at 75-85°F, so a seedling heat mat set to 80°F speeds things up dramatically. Expect sprouts in 7-14 days, depending on your variety—some bush types emerge faster than vining varieties.
Check daily but resist watering until you see condensation form on the dome's underside. This tells you the environment is humid enough. Once 50% of seeds have sprouted, remove the dome immediately—trapped moisture invites fungal diseases that will rot stems overnight. Keep the soil consistently moist but never soggy; squash seedlings wilt faster than you'd expect.
☀️ Step 4: Move to Bright Light Immediately
The instant seedlings break through the soil, they need 12-14 hours of bright light daily. A south-facing window rarely provides enough intensity, so I use a full-spectrum LED grow light positioned 3-4 inches above the plants. Raise it as they grow to maintain that gap. Without sufficient light, seedlings stretch desperately upward (called "leggy"), and their stems never strengthen properly.
You'll know your light setup is right when seedlings have thick stems, deep green leaves, and compact spacing between nodes. If stems grow thin and pale with leaves spaced far apart, your light is too far away. Rotate the trays a quarter turn daily so plants grow straight instead of leaning toward the light source.
⏰ Step 5: Harden Off Before Transplanting
Two weeks before your last frost date, start hardening off the seedlings by placing them outside in a sheltered, shaded spot for 1-2 hours the first day. Gradually increase outdoor time by 1 hour daily over 10-14 days, slowly introducing more sun and wind. Squash seedlings are tender and burn easily if moved too quickly.
Watch for first true leaves (the larger leaves after the initial seed leaves) to develop fully before transplanting. These seedlings are ready for the garden when they tolerate a full day outside without wilting. Transplant on an overcast afternoon to reduce transplant shock and water deeply at the base to encourage root establishment in their new home.
Tips & tricks for planting squash seeds indoors
A few small adjustments can transform your squash seedlings from flimsy sprouts to sturdy, thriving plants ready for transplant. Here's what I've learned from years of trial and error in my own garden.
Soil Mix Precision: The 20% perlite addition in Step 1 is non-negotiable for squash roots, which despise soggy conditions. I sift the mix through a fine mesh screen before planting to eliminate any clumps that could create air pockets around seeds. Also, avoid pressing down too firmly when creating the planting surface—you want just enough firmness to hold seeds in place without compacting the mix, which can suffocate emerging roots.
Germination Temperature Secret: While the instructions recommend 75-85°F, I've found that maintaining a consistent 80°F bottom heat using a seedling heat mat dramatically reduces germination time from the upper end of 14 days to as little as 7 days for bush varieties. The key is placing the mat under the trays (not on top) to create a warm root zone while keeping the soil surface cooler to prevent fungal growth. Monitor closely—if condensation forms on the humidity dome, your environment is too moist.
Lighting Strategy: The 12-14 hours of daily light in Step 4 is crucial, but timing matters just as much. I position my grow lights on a timer set to 6 AM to 6 PM, mimicking natural daylight cycles. For the first 3 days after germination, I keep the lights slightly farther away (5-6 inches) to prevent scorching tender seedlings, then gradually lower them to 3-4 inches as the plants strengthen. Watch for leaves that cup upward—this is your signal to raise the lights immediately.
Harden Off Like a Pro: The gradual 10-14 day hardening process in Step 5 works wonders, but I add one extra step: I place a small fan on low setting near the seedlings during their final 3 outdoor sessions. This mimics wind conditions they'll encounter in the garden and helps toughen their stems. On the final day before transplanting, I give them a gentle misting with water to simulate morning dew, which helps them better handle the transition to outdoor humidity levels.
Pro Tips for Planting Squash Seeds Indoors
- A few small adjustments can transform your squash seedlings from flimsy sprouts to sturdy, thriving plants ready for transplant.
- Soil Mix Precision: The 20% perlite addition in Step 1 is non-negotiable for squash roots, which despise soggy conditions.
- The key is placing the mat under the trays (not on top) to create a warm root zone while keeping the soil surface cooler to prevent fungal growth.
Frequently asked questions
Got questions about starting squash seeds indoors?
You’re not alone! Here are answers to the most common concerns—from timing to troubleshooting—to help you grow a thriving crop.
When is the best time to plant squash seeds indoors?
Plant squash seeds indoors 4–6 weeks before your last frost date. Since squash thrives in warm soil, wait until nighttime temperatures stay above 50°F (10°C) before transplanting outdoors. For most climates, this means starting seeds in late winter to early spring.
How long does it take for squash seeds to germinate indoors?
Squash seeds typically germinate in 7–14 days, depending on warmth and moisture. Keep soil consistently moist (not soggy) and maintain temperatures around 75–85°F (24–29°C). A heat mat can speed up germination if your home is cool.
Can I reuse containers or soil from last year’s squash plants?
No—sterilize containers and soil
to prevent disease. Squash is susceptible to fungal issues like powdery mildew. Wash containers with soap and water, then disinfect with a 10% bleach solution. Use fresh, well-draining potting mix to avoid soil-borne pathogens.
Why aren’t my squash seeds sprouting indoors?
Common culprits: cold soil, dry conditions, or old seeds. Check soil temperature (use a seedling heat mat if needed), ensure moisture, and test seed viability by soaking a few in water—if they sink, they’re likely good. If seeds are over 2 years old, replace them.
What’s the best alternative if I don’t have space for indoor starting?
Try direct sowing outdoors after soil warms (at least 60°F/15°C) or use biodegradable peat pots for compact starts. For small spaces, opt for bush varieties like ‘Eight Ball’ squash, which grow well in containers and don’t need much room.
Wrapping up and next steps
Planting squash seeds indoors is a fantastic way to give your garden a head start and ensure strong, vibrant plants ready for transplanting. With the right containers, soil, warmth, and patience, you’ll be rewarded with thriving vines and bountiful harvests.
Now that you’re equipped with the know-how, grab those seeds and get growing! 🌱
Your next step? Transplant those seedlings outdoors once the weather warms up and the threat of frost has passed. Keep an eye on their progress, and soon you’ll be enjoying homegrown squash straight from your garden!