
Propagation
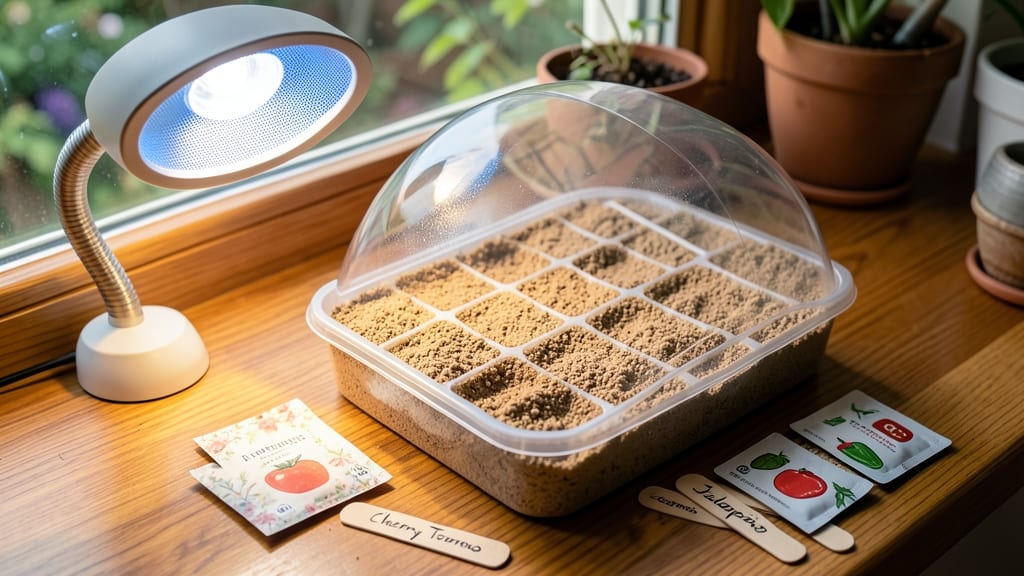
Starting Burpee seeds indoors with a heat mat cuts germination time by nearly half—no more waiting weeks for those first green shoots. 🌱 I learned the hard way that patience only goes so far when you’re staring at damp soil hoping for life.
The secret isn’t just warmth; it’s creating the perfect cozy environment where seeds feel like they’re back in their natural springtime conditions.
You’ll need a seed-starting tray, Burpee’s premium seed mix (or a 50/50 blend of peat and vermiculite), a heat mat set to 70-75°F, and a spray bottle for gentle watering. Most Burpee packets include exact planting depths—follow those like a rule, because too-deep seeds rot before they sprout.
Light comes next, but don’t rush it: seedlings need 12-16 hours of bright light daily, whether from a south-facing window or grow lights. Within 3-7 days (depending on the seed), you’ll see tiny sprouts breaking through the soil—proof that warmth and patience pay off.
The key is consistency: keep the soil moist (not soggy) and avoid moving trays around until roots establish. Burpee’s seeds are bred for reliability, but even their best varieties need this extra boost to perform.
This method works for everything from tomatoes to peppers, and it’s especially game-changing for slow starters like parsley or onions. Once you’ve mastered the heat mat, you’ll never go back to waiting for seeds to germinate on their own schedule.
📚 In This Guide
- What you need
- Instructions
- Tips and common mistakes
- Wrapping up and next steps
What you need
- ● Burpee seeds – Choose your preferred varieties (vegetables, herbs, or flowers) and check the packet for specific spacing and depth requirements.
- ● Seed-starting trays or pots – 2–4 inch cells or small pots (biodegradable or plastic) for individual seedlings. Aim for at least 6–12 trays/pots depending on your seed quantity.
- ● Seed-starting mix – A lightweight, sterile soilless mix (e.g., Burpee Bio Start or a peat/perlite/vermiculite blend). Avoid garden soil—it’s too dense!
- ● Heat mat – A seedling heat mat (100–120°F range) to maintain optimal germination temps. Size depends on tray space (e.g., 10"x20" for small setups or larger for bulk starts).
- ● Thermometer – A digital probe thermometer to monitor soil temps accurately (critical for heat-sensitive seeds like peppers or tomatoes!).
- ● Misting bottle or spray nozzle – For gentle watering to avoid displacing seeds.
- ● Clear plastic dome or plastic wrap – To create a humidity tent until seeds germinate (remove once sprouts appear).
- ● Grow lights or sunny windowsill – A LED grow light (12–16 hrs/day) or a south-facing window for post-germination growth.
- ● Labels and markers – To track seed varieties, planting dates, and care notes.
- ● Bottom watering tray – Keeps moisture consistent without overwatering.
- ● Fertilizer (low-dose) – A balanced seedling fertilizer (e.g., 5-5-5 or fish emulsion) to boost early growth after germination.
- ● Heating pad controller – For precise temperature adjustments if your heat mat lacks one.
- ● Seedling heating cable – For larger setups or extra warmth in cold rooms.
- ● Humidity dome with ventilation holes – Prevents mold while retaining moisture.
Step-by-step instructions for Burpee seed starting indoors
Here's how to turn Burpee seeds into vigorous seedlings in record time—no guesswork, just results.
🌱 Step 1: Prepare Your Heat Mat and Containers
Set up your heat mat on a stable surface and plug it in—it should maintain soil temperatures between 75-85°F. I like to place the mat on a tray to catch any condensation from the humidity dome later. Use seed-starting trays with clear plastic domes or individual 2-3 inch deep cells filled with Burpee's premium seed-starting mix (never garden soil—it's too dense and can harbor diseases).
Moisten the mix with lukewarm water until it's damp like a wrung-out sponge. Press the soil down gently so it's firm but not compacted. This ensures good root contact with the heat mat. I tap the tray lightly on the table to settle everything evenly—no air pockets allowed.
🌱 Step 2: Sow Seeds at the Right Depth and Spacing
Follow Burpee's packet instructions for depth—usually ¼ to ½ inch deep, depending on the seed size. I like to use a toothpick to make small holes in the soil, then drop 1-2 seeds per cell (just in case one doesn't germinate). Cover them lightly with a sprinkle of the same mix—don't pack it down, just enough to hide the seeds.
Mist the surface with a spray bottle until the soil looks evenly damp but not soggy. A heavy watering can will dislodge seeds or bury them too deep, which slows germination. Label each cell with the seed variety and date—after a week, identical green sprouts will all look the same!
💧 Step 3: Cover and Monitor for Germination
Place the clear dome or plastic wrap over the tray immediately to trap warmth and moisture. The heat mat will do most of the work, but check daily to ensure the soil stays consistently moist—not wet, not dry. You'll see condensation on the dome, which is normal. Most Burpee seeds germinate in 5-10 days, but some varieties (like peppers) may take up to 2 weeks.
Remove the dome the moment 50% of seeds sprout—leaving it on too long creates a damp, disease-friendly environment. Watch for first true leaves (the second set after the initial seed leaves) as your signal to start adjusting care. If seeds take longer than expected, gently press them into the soil with a toothpick to ensure good contact with the heat mat.
☀️ Step 4: Transition to Light and Prevent Leggy Growth
The instant seedlings emerge, move them under grow lights (or a south-facing window) for 14-16 hours daily. Without enough light, seedlings stretch toward the source in a condition called "legginess." I use a full-spectrum LED grow light kept 2-4 inches above the plants, raising it as they grow. You'll know the light is right when seedlings have thick stems and deep green leaves spaced closely together.
Rotate the tray a quarter turn daily so plants grow straight instead of bending toward the light. Avoid touching the seedlings—even a gentle brush can damage them. If you notice yellowing lower leaves, it's a sign of overwatering or poor drainage. Reduce watering slightly and let the top inch of soil dry out between waterings.
⏰ Step 5: Harden Off Before Transplanting
Two weeks before your last frost date, begin hardening off seedlings by placing them outside in a sheltered, shaded spot for 1-2 hours the first day. Gradually increase outdoor time by 1 hour daily over 10-14 days, introducing more sun and wind each step. This toughens them up so they don't shock when moved to the garden.
Watch for wilting or leaf burn—if you see either, they're not ready yet. Once seedlings tolerate a full day outside without stress, they're ready to transplant. Water deeply at the base before moving them to the garden, and keep the soil moist for the first week to help them establish roots.
Tips & tricks for perfect seed starting indoors
Here's what nobody tells you about getting every seed to sprout like clockwork.
Heat Mat Placement: Position your heat mat on a stable, insulated surface like a foam board—this prevents heat loss to the table below. I've ruined batches when the mat sat directly on a cold countertop, causing uneven germination. Place a tray underneath to catch condensation from the humidity dome, which keeps your workspace tidy and prevents mold. The 75-85°F range is critical: too cold slows germination, too hot can scorch delicate roots.
Soil Moisture Technique: After sowing, I press a toothpick into the soil near each seed to check moisture—it should hold together when squeezed but not drip water. Overwatering is the #1 killer of young seeds. Use a spray bottle to mist the surface rather than pouring water directly, which can dislodge seeds or create waterlogged pockets. The soil should feel like a wrung-out sponge: damp but not soggy.
Germination Timing: Most Burpee seeds sprout within 5-10 days, but peppers can take up to 2 weeks. If nothing emerges after 14 days, gently press seeds into the soil with a toothpick to ensure contact with the heat mat. I've seen seeds "pop" overnight after this simple adjustment—it's like giving them a little nudge to wake up.
Light Transition Strategy: The moment you see sprouts, move them under 14-16 hours of grow lights immediately. I use a timer to automate this—no more forgetting! Position lights 2-4 inches above seedlings and raise them as plants grow. Watch for "legginess" (tall, thin stems) as your warning sign that light is insufficient. Rotate the tray daily to prevent plants from leaning toward the light source.
Pro Tips for Burpee Starting Seeds Indoors
- Here's what nobody tells you about getting every seed to sprout like clockwork.
- Heat Mat Placement: Position your heat mat on a stable, insulated surface like a foam board—this prevents heat loss t...
- Soil Moisture Technique: After sowing, I press a toothpick into the soil near each seed to check moisture—it should h...
Frequently asked questions
Got questions about starting seeds indoors with a heat mat? Here are answers to the most common concerns—so you can grow confidently!
When is the best time to start seeds indoors with a heat mat?
Aim for 6–8 weeks before your last frost date for most vegetables (like tomatoes and peppers) and 4–6 weeks for herbs. Heat mats speed germination, but timing depends on your crop’s needs. Check Burpee’s seed packet for specifics—earlier is better for slow starters!
What if my heat mat isn’t raising the soil temperature enough?
First, check placement: Ensure the mat is fully under the tray (no gaps!) and the soil is directly on top. If it’s still too cool (<65°F), try:
- Adding a clear plastic dome to trap warmth.
- Placing the tray on a second heat mat (if safe).
- Using a small space heater nearby (keep it 2+ feet away!).
Most mats max out at 80–90°F—if yours is older, consider upgrading!
Can I use a heat mat for all types of seeds?
Heat mats work best for slow-to-germinate seeds like peppers, tomatoes, and basil. For fast germinators (e.g., radishes, lettuce), they’re optional. Avoid using them for seeds that need cold stratification (like some perennials)—they’ll rot instead!
How do I know if my seeds are getting enough heat?
Ideal soil temp for most seeds is 70–85°F. Use a seedling heat mat thermometer (cheap and game-changing!) to monitor. Signs of too little heat:
- Seeds take 2+ weeks to sprout (normal is 5–14 days).
- Sprouts are weak or leggy (they’re stretching for light).
If it’s too hot (>90°F), seeds may dry out or rot—reduce heat or move the tray.
What’s a good alternative if I don’t have a heat mat?
No heat mat? No problem! Try these tricks:
- Top of the fridge (warmest spot in most homes).
- On top of your water heater (wrap seeds in a towel first!).
- DIY heat sink: Fill a plastic bottle with hot water, seal it, and place it near your seed tray.
- Grow lights with warmth (some LED setups emit gentle heat).
Just be patient—germination may take longer (10–21 days vs. 5–7 with a mat).
Wrapping up and next steps
Starting seeds indoors with a Burpee heat mat is your secret weapon for faster, stronger seedlings—no green thumb required! 🌱 With the right setup, you’ll enjoy earlier blooms and healthier plants in just a few short weeks.
The key is consistency: warmth, patience, and a little love for your tiny future garden stars.
Ready to dive in? Grab your seeds, heat mat, and a sunny windowsill—your next step is to review the essential tools and start prepping your seed-starting station. You’ve got this! 🌿