
Container Gardens
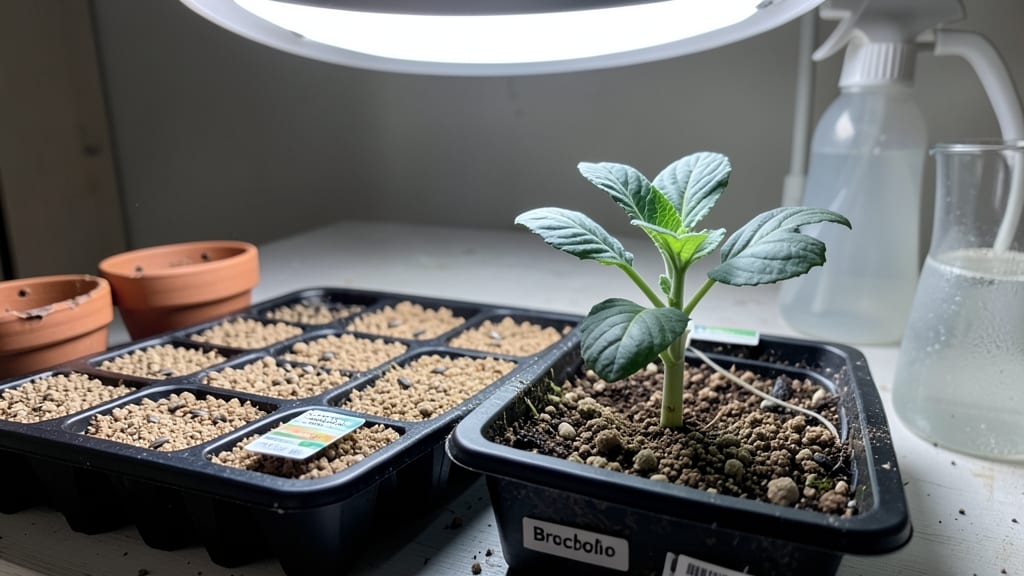
Starting broccoli seeds indoors in early spring gives you a head start on a garden that feeds the family all summer. 🌱 I learned the hard way that timing matters—plant too late, and your harvest shrinks to a sad few stalks.
But with the right setup, you can have robust seedlings ready for transplant in just 6-8 weeks, giving them a fighting chance against pests and weather. The secret isn't complicated: broccoli thrives when you mimic its natural growing conditions.
You'll need a sunny windowsill or grow light, a shallow tray with drainage, and seed-starting mix that's light and fluffy—not the heavy garden soil you'd use outdoors. The key is keeping things moist but not soggy, since broccoli seedlings hate wet feet.
By the time you're ready to move them outside, your seedlings will be sturdy and dark green, not the leggy, weak-looking plants that struggle in the garden. The first harvests arrive in 60-70 days after transplanting, and with proper care, you'll get enough broccoli to share with neighbors.
This method works for any variety—calabrese, purple sprouting, or even the smaller Romanesco. The only real mistake is rushing the process, so take your time with each step. Let's get those seeds sprouting!
📚 In This Guide
- What you need
- Instructions
- Tips and common mistakes
- Wrapping up and next steps
What you need
- ● Broccoli seeds: Choose fast-maturing varieties (e.g., 'De Cicco' or 'Calabrese') for indoor success. Buy 1-2 seed packets (each contains ~50 seeds).
- ● Seed trays or small pots: Use 4–6" deep containers with drainage holes. Opt for biodegradable pots (6–8 per seed packet) or reusable plastic trays.
- ● High-quality seed-starting mix: 1–2 bags (sterilized, peat-based or coco coir blend). Avoid garden soil—it’s too dense!
- ● Grow lights: A full-spectrum LED or fluorescent light (12–16" above seedlings) or a south-facing window (if sunny).
- ● Spray bottle: For gentle watering (avoid over-saturating seeds).
- ○ Heat mat (optional but helpful): A seedling heat mat (70–75°F) speeds germination.
- ● Humidity dome: Keeps moisture in for faster germination.
- ● Fertilizer: Balanced liquid fertilizer (5-5-5 or 10-10-10) for seedlings after sprouting.
- ● pH test kit: Ensures soil pH is 6.0–7.0 (ideal for broccoli).
- ● Tweezers or small shovel: For delicate seedling transplanting.
- ● Timer: Automates grow light cycles (14–16 hours/day).
Step-by-step instructions for planting broccoli seeds indoors
Here's how to get your broccoli seedlings off to a strong start—this method works every time.
🌱 Step 1: Prepare Containers and Seed Starting Mix
Fill clean 2-3 inch deep containers (like cell packs or small pots) with a sterile seed-starting mix. I like to use coconut coir or peat-based mix because it holds moisture well without compacting. Moisten the mix until it feels like a damp sponge—squeeze it gently, and it should hold together but not drip.
Press the soil down lightly with your fingers to remove air pockets. You want it firm enough to support tiny roots but still loose enough for seedlings to push through easily. Tap the container on the table once or twice to settle everything evenly. Broccoli seeds are tiny, so I use a toothpick to make small holes about ¼ inch deep—just enough to drop one seed into each spot.
🌱 Step 2: Sow Seeds and Maintain Moisture
Place 1-2 seeds per hole (you’ll thin later), cover lightly with a sprinkle of additional mix, and mist gently with water until the surface looks evenly damp. Don’t soak it—you’ll wash the seeds too deep. I label each pot with the date and variety right away because broccoli seedlings look identical at first.
Cover the tray with a clear plastic dome or plastic wrap to trap warmth and moisture. Broccoli seeds germinate best at 70-75°F. Place the tray in a warm spot, like on top of the fridge or near a sunny window (but not in direct light yet). Check daily—you’ll see sprouts in 7-10 days.
☀️ Step 3: Provide Light and Prevent Leggy Growth
The moment those first green shoots appear, move them to bright, indirect light immediately. A south-facing window works, but I use a grow light on a timer for 14-16 hours daily. Keep the light 2-3 inches above the seedlings and raise it as they grow to prevent burning.
Watch for leggy seedlings—those stretched, pale stems mean your light isn’t strong enough. If you see this, move the light closer or add a second bulb. Strong seedlings have short, thick stems and dark green leaves. Once they develop their first true leaves (the second set after the initial cotyledons), thin to the strongest seedling per cell.
💧 Step 4: Water and Fertilize for Healthy Growth
Water from the bottom by placing the tray in ½ inch of water for 10 minutes. This prevents disturbing the roots and keeps moisture even. Let the seedlings dry slightly between waterings—you’ll know it’s time when the top inch of soil feels dry to the touch. Overwatering causes damping-off, a fungal disease that collapses seedlings overnight.
After 3-4 weeks, when seedlings have 4-5 true leaves, fertilize lightly with a balanced liquid fertilizer (like 10-10-10) diluted to half strength. Broccoli is a heavy feeder, so I feed every 2 weeks once growth starts. Avoid over-fertilizing—it burns tender roots.
⏰ Step 5: Harden Off Before Transplanting
About 2 weeks before your last frost date, start hardening off seedlings by placing them outside in a sheltered spot for 1-2 hours the first day. Gradually increase time daily, ending with a full day outside by day 7-10. This toughens stems and leaves for the garden.
Choose an overcast day for transplanting to reduce stress. Dig holes slightly larger than the root ball, space plants 18-24 inches apart, and water deeply right after planting. Broccoli thrives in cool weather, so if temperatures rise above 80°F, provide afternoon shade—they’ll bolt (flower prematurely) and lose their flavor.
Tips & tricks for perfect broccoli seedlings indoors
Here's what nobody tells you about getting broccoli seeds to sprout like a pro.
Soil Preparation Secret: Sterilizing your seed-starting mix is non-negotiable. I microwave my mix in a bowl with a splash of water for 2 minutes to kill fungi and bacteria. This prevents damping-off disease that can wipe out seedlings overnight. If you don't have time to sterilize, bake your mix at 200°F for 30 minutes instead—both methods work perfectly. The extra effort pays off with stronger seedlings.
Lighting Strategy: Those 14-16 hours of light are critical, but placement matters just as much. Position your grow light so it's just 2-3 inches above the seedlings at the start. As they grow, raise it gradually to maintain this distance—this prevents burning while ensuring strong stems. I use a simple clip-on LED bulb that costs under $20 and fits perfectly over my seed trays. The key is consistency: seedlings know when they're not getting enough light by stretching toward it.
Thinning Technique: When you're ready to thin to one seedling per cell, don't just pull—snip with clean scissors. This prevents disturbing the roots of your remaining seedling. I mark the strongest seedling with a toothpick before cutting the weaker one at soil level. The sudden change in weight helps the remaining seedling develop stronger roots immediately. This small step makes all the difference when transplanting later.
Fertilizer Timing: That 3-4 week mark for first feeding is perfect, but don't rush it. Wait until you see 4-5 true leaves and the seedlings are touching the sides of their containers. I mix my diluted 10-10-10 fertilizer with water in a spray bottle and apply it directly to the soil surface—this prevents burning the delicate leaves. The 2-week feeding schedule keeps them growing strong without overwhelming their tiny root systems.
Pro Tips for Planting Broccoli Seeds Indoors
- Here's what nobody tells you about getting broccoli seeds to sprout like a pro.
- Soil Preparation Secret: Sterilizing your seed-starting mix is non-negotiable. I microwave my mix in a bowl with a sp...
- Lighting Strategy: Those 14-16 hours of light are critical, but placement matters just as much. Position your grow li...
Frequently asked questions
Got questions about starting broccoli seeds indoors? You’re not alone—growing this cool-weather crop indoors can feel tricky! Here are answers to the most common queries to set you up for success.
How soon can I plant broccoli seeds indoors before the last frost?
Plant broccoli seeds indoors 6–8 weeks before your last expected frost date. This gives seedlings enough time to grow sturdy before transplanting. For example, if frost arrives in early May, start seeds around March 1st. Check your USDA hardiness zone for precise timing!
What’s the best indoor light setup for broccoli seedlings?
Broccoli thrives with 12–16 hours of light daily. Use a grow light (LED or fluorescent) placed 2–4 inches above seedlings and raise it as they grow. South-facing windows may work, but seedlings often stretch (called leggy) without supplemental light. Rotate trays weekly for even growth!
Why are my broccoli seedlings turning yellow or wilted?
Yellowing leaves often signal overwatering or poor drainage. Let soil dry slightly between waterings—broccoli hates soggy roots! Wilting can also mean underwatering or heat stress (keep temps between 60–75°F). Check for pests like aphids or fungal issues (e.g., damping off) if problems persist.
Can I use regular potting soil for broccoli seeds?
Yes, but amend it for better results! Mix in perlite or vermiculite (20%) for drainage and a balanced fertilizer (5-10-5) or compost (10%) for nutrients. Broccoli loves slightly acidic soil (pH 6.0–7.0). Avoid garden soil—it’s too dense and may harbor diseases.
What if I don’t have a sunny window or grow light?
No worries! Try a seedling heat mat (70–75°F) paired with a timed grow light on a budget (e.g., T5 LED bulbs). Alternatively, start seeds in a sunny basement or garage with a portable light. If all else fails, opt for pre-started seedlings from a nursery—just harden them off before transplanting!
How do I prevent broccoli seedlings from getting leggy?
Leggy seedlings stretch toward light. Prevent it by:
- Using bright, full-spectrum lights close to seedlings (but not touching).
- Watering from the bottom (trays) to avoid damp soil that slows growth.
- Thinning seedlings to 1 inch apart once they have 2 true leaves.
- Fertilizing lightly with a low-nitrogen solution (e.g., fish emulsion 1:10) after 2 weeks.
Wrapping up and next steps
Planting broccoli seeds indoors is a rewarding way to jumpstart your garden and enjoy a bountiful, homegrown harvest—even in cooler climates!
With the right setup, patience, and care, you’ll soon be savoring crisp, nutrient-packed florets straight from your windowsill or greenhouse. Now’s your chance to take that first step: gather your supplies, follow the seed-starting process, and watch your little seedlings grow into thriving plants.
Ready to green your thumb? 🌱 Start by reviewing the essentials, then dive into planting—your future broccoli crowns are waiting! For extra tips, check out our FAQ section to troubleshoot like a pro.