
Container Gardens
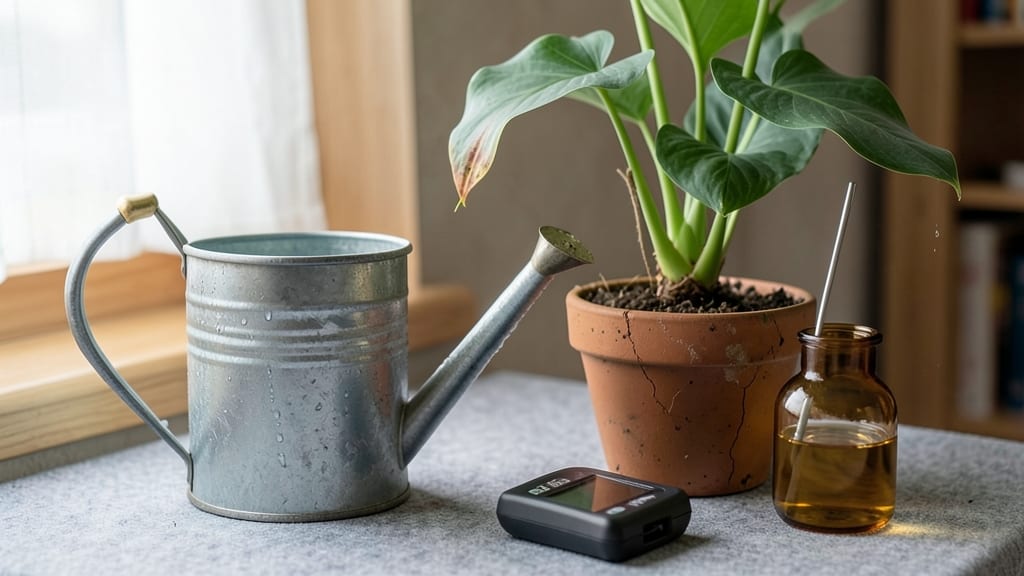
Your calla lily care indoors drooping leaves aren’t a death sentence—just a cry for help. 💚 I've nursed back more than my share of floppy calla lilies, and the fix usually comes down to three simple adjustments that most gardeners overlook.
The key is identifying whether your plant is thirsty, drowning, or just tired from its environment.
First, check the soil: if it's bone-dry two inches down, you're underwatering; if it's soggy, you're overwatering. Calla lilies hate both extremes—they need consistently moist (not wet) soil and a pot with drainage holes.
Then look at the light: too little makes them stretch weak, while harsh afternoon sun burns the leaves. Most indoor calla lilies thrive in bright, indirect light near an east-facing window.
Once you correct the water and light, your plant should perk up within a week. For extra insurance, trim any brown or mushy leaves immediately and give the foliage a gentle spray with water to boost humidity.
The result? Those elegant, upright leaves you fell in love with when you bought it.
Prevent future droops by watering only when the top inch of soil feels dry and rotating the pot weekly for even light exposure. With these adjustments, your calla lily will bounce back—and stay that way for seasons to come.
The secret is paying attention to the small clues your plant gives you before it gets desperate.
Root Causes Of Drooping Callas
When your Zantedeschia aethiopica (calla lily) starts looking sad with drooping leaves, it’s usually a cry for help from its roots—or lack thereof. Understanding the science behind these signals helps you act fast.
Below, we break down the most common reasons your indoor calla lily is wilting, with clear explanations of what’s happening at the cellular or physiological level.
Calla lilies thrive in moist but well-draining soil, and overwatering is the #1 enemy of happy roots. When soil stays soggy for too long, roots suffocate due to hypoxia (lack of oxygen). Without oxygen, root cells can’t respire efficiently, leading to:
- Rot: Anaerobic bacteria thrive in waterlogged soil, breaking down root tissues and releasing toxins like ethanol, which damages cell membranes.
- Nutrient Lockout: Waterlogged soil binds essential nutrients (e.g., nitrogen, phosphorus) to soil particles, making them unavailable to roots.
- Weak Structure: Roots rely on lignin (a structural polymer) for strength. Overwatering weakens lignin production, causing stems to flop.
Pro Tip: 🌡️ Stick your finger 2 inches into the soil—if it’s damp, wait. Callas prefer the "squeeze test": soil should hold moisture like a wrung-out sponge, not a dripping washcloth.
On the flip side, dry soil triggers osmotic stress. When water evaporates faster than roots can absorb it, guard cells in leaves lose turgor pressure (the "plumpness" from water-filled vacuoles). This causes:
- Leaf Wilting: Without turgor, leaves droop like a deflated balloon. In callas, this often starts with the older leaves first.
- Root Shriveling: Roots absorb water via osmosis. When soil dries out, roots shrink, reducing their surface area for absorption—creating a vicious cycle.
- Nutrient Uptake Halt: Roots need a hydrated film around them to absorb minerals. Dry roots "starve" even if fertilizer is present.
Pro Tip: 💡 Use a moisture meter or group callas with other plants to create a humid microclimate (like a pebble tray with water).
Calla lilies are tropical natives, so they hate sudden temperature swings. Roots are especially sensitive to:
- Cold Stress: Below 60°F (15°C), root cell membranes stiffen, disrupting water and nutrient transport. Symptoms include yellowing leaves + droop.
- Heat Shock: Above 85°F (29°C), roots respire too fast, depleting oxygen and producing ethylene gas, which accelerates wilting.
- Drafts: Cold air from AC vents or windows causes transpirational pull—roots can’t keep up with water loss, leading to droop.
Pro Tip: ✨ Keep callas in a consistent 65–75°F (18–24°C) range. Avoid placing them near heaters, vents, or glass doors.
Calla roots need aerated, organic-rich soil to thrive. Compacted or nutrient-poor soil leads to:
- Root Binding: If repotted too late, roots circle the pot, strangling themselves and reducing water/nutrient uptake.
- Fungal Blockage: Heavy clay or peat-based soils (without perlite) trap Phytophthora fungi, which clog root pores and block water absorption.
- Mineral Deficiency: Callas crave potassium (for turgor) and magnesium (for chlorophyll). Poor soil = weak leaves.
Pro Tip: 🔥 Repot every 2–3 years in a mix of 50% peat/coir + 30% perlite + 20% compost. Add a handful of orchid bark for chunky drainage.
Now that you know the why, the next step is fixing it—stay tuned for our 3-step revival guide!
Quick Fixes for Reviving Droopy Callas
Drooping calla lilies can be a heartbreaker, but the good news is most issues are reversible with the right care. Below, we’ve mapped out practical, step-by-step solutions for the most common causes—plus prevention tips to keep your plant perky and thriving. Let’s get those leaves standing tall again!
---
Signs: Yellowing leaves, mushy stems, or a soggy potting mix that smells funky.
How to Fix It: 🔥 Step 1: Drain the Excess Water - Gently remove the calla lily from its pot and inspect the roots. Healthy roots are firm and white; rotten roots are brown, mushy, or smell like vinegar. - If the roots are rotting, trim the damaged ones with clean scissors (sterilize with rubbing alcohol first).
👨🍳 Step 2: Repot in Fresh Soil - Choose a well-draining potting mix (like a blend of peat moss, perlite, and orchid bark).
Avoid heavy garden soil—it traps moisture. - Select a pot with drainage holes (if repotting) and add a layer of gravel or charcoal at the bottom to improve airflow.
🥘 Step 3: Adjust Your Watering Routine - Water only when the top 1–2 inches of soil feel dry to the touch. Stick your finger in—if it’s damp, wait! - Bottom-watering (placing the pot in a tray of water for 10–15 minutes) helps prevent overwatering while keeping roots hydrated.
🌡️ Prevention Tip: - Never let callas sit in standing water. Empty saucers under pots after watering, and avoid misting the leaves (it encourages fungal issues).
---
Signs: Wilting, crispy leaf edges, or leaves curling toward the light (like they’re sunburned).
How to Fix It: 🔥 Step 1: Move to Indirect Light - Callas thrive in bright, indirect light (think east-facing windows or a few feet back from a south window). If outdoors, provide dappled shade (like under a sheer curtain or tree canopy).
🍳 Step 2: Protect from Heat Spikes - If your home gets above 80°F (27°C), move the plant to a cooler spot.
Callas are tropical but hate intense heat—they’ll droop faster in a steamy, stuffy room. - Mist the leaves lightly (in the morning) to boost humidity, but avoid soggy soil.
⏰ Step 3: Gradual Acclimation - If transitioning from indoors to outdoors, harden off the plant over 7–10 days by moving it to shadier spots for increasing lengths of time.
🎯 Prevention Tip: - Rotate the pot weekly so all sides get even light exposure. Uneven growth (like lopsided leaves) often means one side is getting too much sun.
---
Signs: Dry, crispy leaf edges, soil pulling away from the pot, or leaves folding inward like a taco.
How to Fix It: 🔥 Step 1: Soak the Roots - Place the pot in a sink or tray filled with room-temperature water for 15–20 minutes until the soil is evenly moist. Avoid cold water—it can shock the roots.
👨🍳 Step 2: Check Soil Moisture Daily - Callas like consistently moist (not soggy) soil. Stick your finger in daily—if it’s dry past 1 inch, it’s time to water. - Group plants together to create a microclimate with higher humidity.
🥘 Step 3: Adjust for Your Climate - In dry climates, water every 2–3 days (or more in summer). In humid areas, every 4–5 days may suffice. - Top-dress with mulch (like sphagnum moss) to retain moisture.
✨ Prevention Tip: - Use a moisture meter ($10–$15) to avoid guesswork. Stick it in the soil—green means happy; red means thirsty!
--- Signs: Sudden wilting, especially near windows, doors, or vents; leaves turning brown at the tips.
How to Fix It: 🔥 Step 1: Find the Goldilocks Zone - Callas prefer 65–75°F (18–24°C). Keep them away from: - Drafty windows or doors - Air conditioning vents or heaters - Sudden temperature swings (like near a fireplace)
🍳 Step 2: Buffer with Houseplants - Place the calla lily between two other plants (like ferns or peace lilies) to stabilize humidity and temperature.
🥘 Step 3: Use a Heat Mat (If Needed) - If your home runs cold at night, a self-regulating heat mat (set to 65°F) can keep roots warm without overheating.
💡 Pro Tip: - Avoid placing callas in kitchens or bathrooms with fluctuating temps. Stick to consistent spaces like living rooms or offices.
--- Signs: Pale, yellowing leaves (even when soil is moist), stunted growth, or roots circling tightly in the pot.
How to Fix It: 🔥 Step 1: Fertilize Gently - Use a balanced liquid fertilizer (like 10-10-10) diluted to half strength every 4–6 weeks during spring/summer. - Avoid fertilizing in winter—callas rest then!
👨🍳 Step 2: Repot if Root Bound - If roots are crowded or poking out of drainage holes, upgrade to a pot 1–2 inches larger with fresh potting mix. - Loosen the root ball before repotting to encourage new growth.
🥘 Step 3: Boost with Micronutrients - Yellowing leaves? They might need iron or magnesium. Use a chelated iron supplement (like Iron Chelate) or Epsom salt (1 tsp per gallon of water, monthly).
🎯 Prevention Tip: - Flush the soil every 3 months with plain water to prevent salt buildup from fertilizers. Let water run through the pot for 5–10 minutes.
--- Signs: Sticky residue on leaves, tiny bugs, or black spots with yellow halos.
How to Fix It: 🔥 Step 1: Isolate the Plant - Move the calla lily away from other plants to prevent spreading pests (like spider mites or aphids).
🍳 Step 2: Treat Naturally - Spider mites? Wipe leaves with a soapy water solution (1 tsp mild soap per quart of water) or spray with neem oil. - Fungal spots? Remove affected leaves and spray with copper fungicide or a baking soda mix (1 tsp baking soda + 1 quart water + a drop of dish soap).
🥘 Step 3: Prevent Future Infestations - Inspect new plants before bringing them home. - Quarantine any suspicious-looking leaves for a week.
--- | Problem | Fix It With | Prevent It By | |---------------------------|------------------------------------------|--------------------------------------------| | Overwatering | Drain, repot, adjust watering | Check soil moisture daily | | Too much sun | Move to indirect light | Rotate pot weekly | | Underwatering | Soak roots, increase frequency | Group with other plants | | Temperature drafts | Relocate to stable spot | Avoid vents/doors | | Nutrient deficiency | Fertilize, repot, flush soil | Fertilize seasonally | | Pests/disease | Isolate,
Frequently asked questions
Why do calla lily leaves droop more in winter?
Winter drooping often happens because of reduced light and cooler temperatures. Calla lilies enter a natural dormancy phase in cooler months, slowing growth and water absorption. Keep them in the brightest spot available (like near a south-facing window) and maintain 65–75°F (18–24°C) temperatures. Avoid placing them near drafty windows or heat sources that cause temperature swings.
Can I save a calla lily with completely mushy stems?
If the stems are mushy and smell rotten, it’s likely root rot from overwatering. Trim away all mushy stems and roots (use sterilized scissors), then repot in fresh, well-draining soil. Place the pot in bright, indirect light and water only when the top 2 inches of soil are dry. Recovery takes 2–4 weeks, but new growth should emerge if the rhizome (thick underground stem) is still healthy.
How often should I fertilize a drooping calla lily?
Over-fertilizing can burn roots and worsen drooping. Use a balanced liquid fertilizer (10-10-10) diluted to half strength every 6–8 weeks during spring and summer. Skip fertilization in fall and winter when growth slows. For nutrient deficiencies (like yellowing leaves), try a chelated iron supplement or Epsom salt (1 tsp/gallon) monthly instead.
Is it safe to prune drooping calla lily leaves?
Yes! Pruning helps redirect energy to healthier growth. Use clean scissors to cut off any brown, yellow, or mushy leaves at the base. For severely drooping but still green leaves, trim them by one-third to reduce water loss. Sterilize your tools with rubbing alcohol to prevent spreading disease. Avoid pruning more than 30% of the foliage at once.
Why does my calla lily droop after repotting?
Repotting causes transplant shock as roots adjust to new conditions. This is normal and usually temporary—give it 1–2 weeks to recover. Keep the soil consistently moist (not soggy) and place the pot in bright, indirect light. Avoid fertilizing for 4–6 weeks post-repotting to let roots establish. If drooping persists beyond 2 weeks, check for root rot or poor drainage.