
Container Gardens
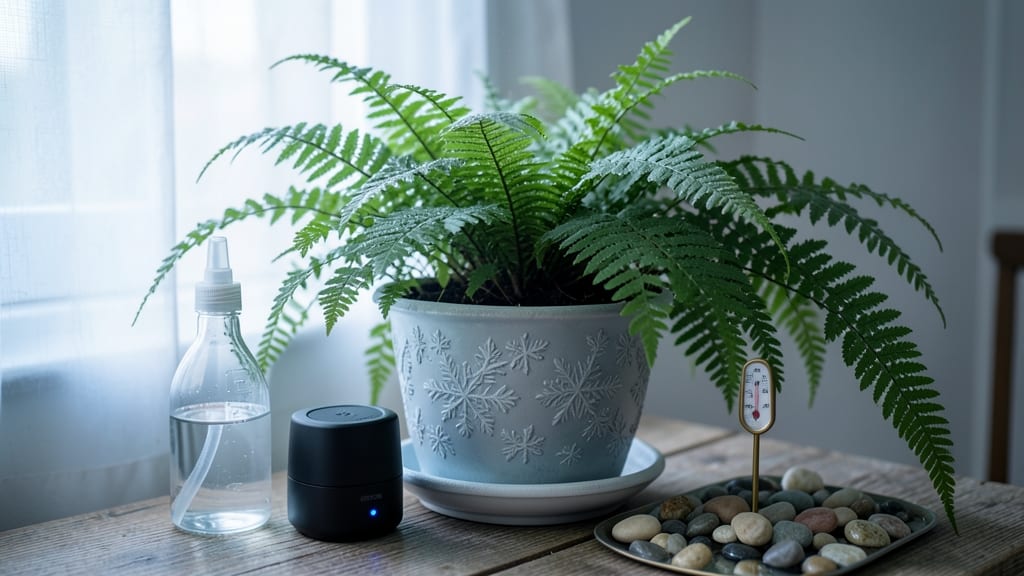
Your Frosty Fern's lush, frosty fronds won't survive indoors without the right care. 🌿 I've battled brown tips and limp leaves with mine, but once I cracked the humidity code, this fern thrived year-round—even in my dry winter home. The secret lies in consistent moisture and high humidity.
These tropical plants need their soil to stay damp (not soggy) and air that feels like a jungle—think 50% humidity or higher. A pebble tray or humidifier works wonders, and misting helps too, though it’s temporary.
Temperature matters too: keep them between 65-75°F, away from drafty windows or heating vents. With proper care, you’ll see vibrant new growth within 4-6 weeks, and those signature frosty-white fronds will stay crisp and stunning.
The key is patience—these ferns grow slowly but reward you with years of lush, dramatic foliage. Troubleshooting is simple: brown tips mean dry air, yellow fronds mean overwatering, and slow growth? Probably low light.
Adjust one thing at a time, and you’ll have a thriving fern that’s the envy of every plant lover.
📚 In This Guide
- What you need
- Instructions
- Tips and common mistakes
- Wrapping up and next steps
What you need
- ● Frosty Fern Plant: A healthy, mature Dryopteris erythrosora (frosty fern) from a nursery or trusted seller.
- ● Pot: A 6-8 inch container with drainage holes (terracotta or ceramic works best).
- ● Well-Draining Soil: A mix of 50% peat moss or coconut coir, 30% perlite or pumice, and 20% orchid bark for aeration.
- ● Distilled or Rainwater: 1 gallon per watering (tap water can harm ferns long-term).
- ○ Humidity Tray or Peat Moss: Optional but ideal for maintaining moisture.
- ● Spray Bottle (8-16 oz): For misting leaves daily (especially in dry climates).
- ○ Humidifier: Optional but highly recommended for homes under 50% humidity.
- ● Fertilizer: Balanced 10-10-10 liquid fertilizer (diluted to half-strength) or slow-release fern pellets.
- ● Pruning Shears: Small, sharp pair for trimming dead fronds.
- ● Bright, Indirect Light Spot: Near a north- or east-facing window (avoid harsh sun!).
Step-by-step instructions for frosty fern care indoors
Here's how I keep my Frosty Ferns thriving—no more brown fronds or crispy edges.
🪴 Step 1: Choose the Right Container and Soil
Frosty Ferns love moisture but hate soggy roots, so pick a terracotta pot with drainage holes—it breathes better than plastic. I use a 6-inch container for each plant since they spread nicely. Fill it with a mix of 50% peat moss and 50% perlite to mimic their humid, airy native environment. This blend holds moisture without suffocating roots.
Tap the pot gently after adding soil to remove air pockets. The surface should feel like a damp sponge—not dripping, but not bone-dry either. Frosty Ferns are sensitive to compacted soil, so avoid pressing down too firmly. If you reuse a pot, scrub it clean to prevent fungal buildup from old soil.
💧 Step 2: Water Deeply and Maintain High Humidity
Water your Frosty Fern once a week (or when the top 1 inch of soil feels dry). Stick your finger in—the moment it pulls away slightly, it's time. I pour water until it drains from the bottom, then empty the saucer after 10 minutes to prevent root rot. These ferns thrive in 60-70% humidity, so mist the fronds daily or place the pot on a pebble tray filled with water.
Here's the thing—if the tips start browning, it's usually low humidity. I group my ferns together to create a microclimate, and I avoid drafty spots near windows or AC vents. A humidifier nearby works wonders if your home runs dry in winter. Watch for yellowing leaves—that’s often overwatering, so let the soil dry out more between waterings.
☀️ Step 3: Position for Indirect, Bright Light
Frosty Ferns need bright, indirect light—think east-facing window or 6 feet from a south window. Direct sun scorches their delicate fronds, so I rotate the pot quarter-turn weekly to ensure even growth. If the fronds look pale or stretch toward the light, it’s too dim. Move it closer or supplement with a grow light for 12 hours daily.
In winter, when natural light fades, I notice my ferns slow down. That’s normal, but if growth stops completely, add a cool-white LED bulb within 12 inches of the plant. Avoid heat-generating bulbs—they dry out the air. You’ll see new fronds unfurling within 2-3 weeks when light and humidity are just right.
✂️ Step 4: Prune and Fertilize for Year-Round Growth
Trim dead or brown fronds at the base with clean scissors to encourage fresh growth. I do this every 2-3 months, and it keeps the plant looking full. Fertilize monthly in spring and summer with a balanced liquid fertilizer (like 10-10-10) diluted to half-strength. Skip fertilizing in fall and winter—they’re dormant then. Overfeeding causes salt buildup, which burns roots.
Real talk: I’ve killed ferns by over-fertilizing. If the tips turn crispy, flush the soil with plain water to rinse out excess salts. After pruning, wipe the fronds with a damp cloth to remove dust—it helps them absorb light better. You’ll notice shinier, more vibrant fronds within a week of cleaning them up.
Tips & tricks for perfect frosty fern care
Between us, these little details make all the difference when keeping your Frosty Ferns lush and thriving. I learned this the hard way after watching fronds crisp up from neglect.
Container and Soil Insights: The 6-inch terracotta pot is ideal because it allows moisture to evaporate at the right rate—plastic holds too much dampness. If you can't find terracotta, glazed ceramic with drainage holes works too. For the soil mix, I've found that adding a handful of orchid bark to the 50/50 peat-perlite blend improves aeration even more. Just don't compact it when planting—tap gently, but don't press down firmly.
Humidity Hack: That daily misting makes a huge difference, but here's what nobody tells you—use room temperature water only. Cold water shocks the delicate fronds and can cause spotting. I keep a spray bottle in the bathroom where the air is naturally more humid, and I mist right after my morning shower when the air is already moist. The 10-minute drainage rule is non-negotiable—standing water is the #1 killer of these ferns.
Light Positioning: The quarter-turn weekly rotation is brilliant because it prevents fronds from leaning toward one light source. I mark the pot's position with a tiny piece of tape on the windowsill to track rotation. For grow lights, I use a simple clip-on LED bulb on a timer set for 12 hours—no fancy equipment needed. The key is keeping it within 12 inches; closer than that can scorch the tips.
Fertilizer Timing: That monthly spring/summer schedule works perfectly, but here's my secret: I mix the fertilizer with water in a spray bottle and mist it onto the soil and fronds. This delivers nutrients directly to the leaves where they're absorbed fastest. When flushing salts, I pour water through the soil until it drains completely—no need to overdo it with gallons.
Pro Tips for Frosty Fern Care Indoors
- Between us, these little details make all the difference when keeping your Frosty Ferns lush and thriving. I learned ...
- Container and Soil Insights: The 6-inch terracotta pot is ideal because it allows moisture to evaporate at the right ...
- Humidity Hack: That daily misting makes a huge difference, but here's what nobody tells you—use room temperature wate...
Frequently asked questions
Got questions about keeping your frosty fern thriving indoors?
You’re not alone! Here are answers to the most common concerns—from humidity hacks to troubleshooting tricks.
How often should I water my frosty fern?
Water your frosty fern when the top inch of soil feels dry. Aim for 1-2 times per week (adjust based on humidity and light). Overwatering is riskier than underwatering—ensure the pot has drainage holes to prevent root rot.
Can frosty ferns survive in low-humidity homes?
While frosty ferns love humidity (60%+), they can adapt to drier air with effort. Group plants together, use a pebble tray with water, or invest in a humidifier. Mist leaves daily in winter when heaters dry the air.
Why are the tips of my frosty fern turning brown?
Brown tips usually mean low humidity or fluoride buildup from tap water. Try these fixes:
- Switch to distilled or rainwater.
- Trim dead tips with clean scissors.
- Boost humidity near the plant.
What’s the best light for frosty ferns indoors?
Place your frosty fern in bright, indirect light—think east or north-facing windows. Avoid harsh sun (like south windows), which can scorch leaves. If growth slows, a grow light 6-12 inches away for 12 hours/day can help.
Can I propagate frosty ferns easily?
Yes! Divide mature plants in spring when repotting. Gently separate the rhizomes, ensuring each section has roots and leaves. Plant in fresh soil and keep humid for 2-3 weeks. Propagation is free and rewarding—share cuttings with fellow plant lovers!
Wrapping up and next steps
Caring for a frosty fern indoors is all about embracing its love for humidity and indirect light—think of it as a tropical guest in your home! With the right setup, you’ll reward yourself with year-round lushness and a touch of nature’s elegance.
Now that you’re armed with the secrets to thrive, why not grab that fern and start your green journey today? 🌿✨
Ready to take the next step? Experiment with placement, misting routines, or even a DIY humidity tray—your frosty fern will thank you with vibrant, thriving fronds!