
How To
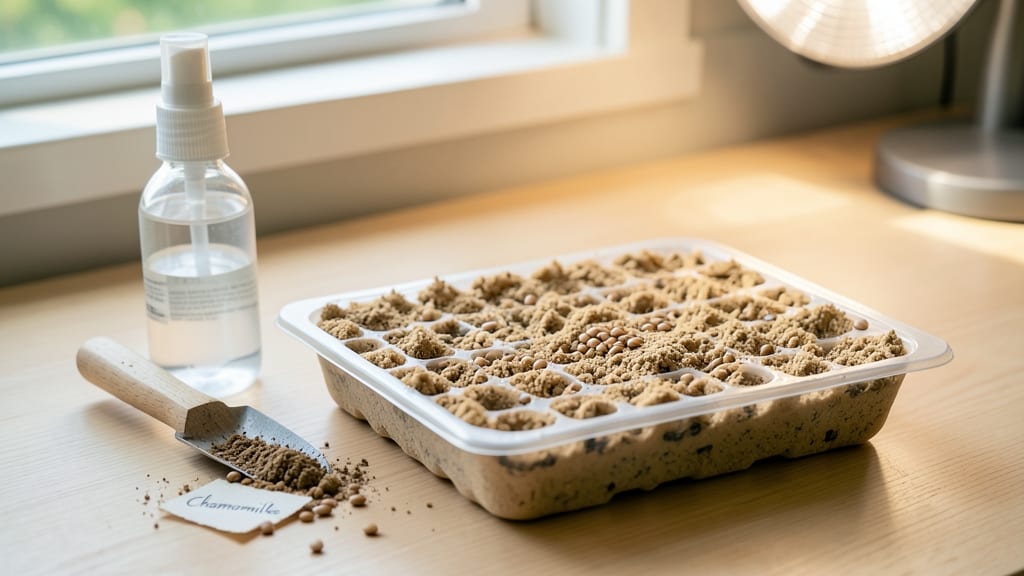
Start chamomile seeds indoors 8 weeks before your last frost date — that’s the magic window to turn tiny seeds into fragrant, blooming 🌼 plants by summer.
Picture this: you’ve waited all winter for that first cup of chamomile tea, only to watch your seedlings stretch like overgrown noodles because you started too late.
Or worse, they bolt before you even get to harvest. Timing isn’t just about numbers—it’s about giving your chamomile the head start it needs to thrive.
Chamomile grows fast but doesn’t wait around. Those delicate white blooms need 60 days from seed to harvest, so if you’re in zone 6a (like me), that means late February starts for a June harvest.
Too early? Your seedlings will outgrow their containers. Too late? You’ll miss the sweet spot for transplanting before the heat sets in.
Below, I’ll walk you through the exact dates for your zone, the light and soil tricks to keep seedlings sturdy, and how to harden them off for a seamless move outdoors—so you’re not left with leggy flops or empty harvests.
Optimal indoor start dates for chamomile seeds by US growing zones
Getting your chamomile seeds off to the right start indoors means timing them perfectly for your US growing zone. Chamomile is a fast-growing herb that thrives with an 8-week head start before transplanting outdoors.
Missing this window can delay blooms or leave seedlings vulnerable to late frost damage. Let’s break down the ideal start dates by zone to ensure your plants mature just in time for spring.
Chamomile’s delicate nature demands precision—it prefers cooler temperatures and well-draining soil. Starting too early risks leggy seedlings, while starting too late may not give your plants enough time to establish roots before the last frost date.
Each zone from 3 to 10 has unique timing needs, influenced by frost dates and local climates. Below, you’ll find the exact weeks to start seeds indoors, tailored to your region.
Key Rule: Aim for 8-10 weeks of indoor growth before transplanting outdoors. Chamomile typically flowers in 60-75 days from seed, so this schedule ensures blooms by early summer. For example, gardeners in Zone 5 should start seeds in early February, while those in Zone 9 can wait until late January.
| US Growing Zone | Indoor Start Window | Last Frost Date | Transplant Outdoors | Estimated Bloom Time |
|---|---|---|---|---|
| Zone 3-4 | Late February to early March | Mid to late May | Early to mid-May | Late June to July |
| Zone 5-6 | Early February to mid-February | Mid to late April | Late April to early May | Early June to July |
| Zone 7-8 | Late January to early February | Mid to late March | Early April | May to June |
| Zone 9-10 | Late January | Mid to late February | Early March | April to May |
Note: Adjust dates 1-2 weeks earlier for early blooms or later for late-season varieties.
If you’re in a warmer zone (9-10), you can start seeds as early as late January to avoid summer heat stress. Chamomile prefers cooler weather, so transplanting too late into hot conditions can stunt growth.
In contrast, gardeners in cooler zones (3-4) should start seeds no later than early March to ensure seedlings are robust enough to handle a longer outdoor season.
For extended blooms, consider starting a second batch of seeds 4-6 weeks after your initial planting. This staggered approach ensures a continuous supply of fresh chamomile flowers from early summer through fall.
Just remember to harden off seedlings for 7-10 days before transplanting—this gradual adjustment to outdoor conditions prevents shock and promotes stronger root development.
Pro Tip: Use a seed heat mat to maintain 65-75°F soil temps during germination. Chamomile seeds germinate best in warm, moist conditions, and a heat mat can speed up the process by 3-5 days.
Once sprouted, move seedlings to a sunny windowsill or under grow lights for 12-14 hours of light daily to prevent legginess.
Regional adjustments are key—if you’re in an area with unpredictable frost dates, err on the side of starting seeds earlier. For example, gardeners in the Pacific Northwest might push start dates to late January, while those in the Southeast can wait until February.
Always check your local USDA zone map and historical frost data for the most accurate timing.
Finally, don’t overlook the importance of soil preparation. Chamomile thrives in well-draining, slightly acidic soil (pH 6.0-7.0). Mix in compost or perlite to improve drainage and prevent root rot. A lightweight potting mix with 20% sand works well for indoor starts, ensuring roots don’t become waterlogged.
With the right timing and care, your chamomile plants will reward you with abundant, fragrant blooms all season long. Whether you’re growing for tea, medicinal uses, or simply to enjoy their beauty, nailing the indoor start date is your first step to success. Happy gardening! 🌼
8-Week pre-sprouting checklist: light, temperature, and soil requirements
Starting chamomile seeds indoors requires precise timing and care to avoid leggy seedlings and ensure strong, healthy plants. With an 8-week pre-sprouting window, you’ll need to master three critical factors: light exposure, temperature control, and soil composition.
Chamomile thrives in 65-75°F soil temps and needs 12-16 hours of light daily—whether from natural sources or grow lights.
Natural sunlight can be tricky, especially in early spring when days are short. A south-facing window provides the best light, but seedlings often stretch toward it, creating weak stems. This is where grow lights become essential.
LED grow lights positioned 2-3 inches above seedlings mimic full sun and prevent legginess. Adjust the height as seedlings grow to maintain consistent light intensity.
Soil mix is just as critical—chamomile seeds need a light, airy medium that drains well to prevent rot. A blend of 50% peat moss, 30% perlite, and 20% compost works perfectly.
Sterilize your mix to avoid fungal issues, and keep it moist but not soggy during germination. Overwatering is a common pitfall that can drown delicate seeds before they sprout.
Your 8-Week Chamomile Sprouting Schedule
-
Step 1
Weeks 1-2: Seed Prep & Planting
Fill seed trays with sterilized soil mix. Plant chamomile seeds ¼ inch deep, spacing them ½ inch apart. Mist lightly with water and cover with plastic wrap to retain moisture. Place in a warm spot (70-75°F).
-
Step 2
Weeks 3-4: Germination & Light Setup
Seeds should sprout in 7-14 days. Once sprouted, remove plastic wrap and place under grow lights (12-16 hrs/day). Keep soil consistently moist but avoid waterlogging. Thin seedlings to 2 inches apart if overcrowded.
-
Step 3
Weeks 5-6: Fertilizing & Hardening
Introduce a balanced fertilizer (5-10-10) at half-strength. Begin hardening off by exposing seedlings to outdoor conditions for 1-2 hours daily. Gradually increase time to prepare for transplanting.
-
Step 4
Weeks 7-8: Transplant Prep
Acclimate seedlings to full outdoor light for 24 hours before transplanting. Choose a partially shaded spot in your garden, as chamomile prefers morning sun and afternoon shade. Transplant after last frost date when soil is warm.
Temperature fluctuations can derail your progress. Chamomile seeds germinate best in consistent warmth (65-75°F). Use a seedling heat mat if your home runs cooler, especially in Zone 3-5 regions. Once sprouted, maintain 60-70°F daytime temps and avoid drafts or cold windowsills, which can stunt growth.
Leggy seedlings are a red flag—usually caused by insufficient light or overcrowding. If you notice elongated stems, immediately adjust your grow light height or supplement with a reflective surface to maximize light exposure.
Pinch back the tops of leggy seedlings to encourage bushier growth, but do this after the first true leaves appear.
With this 8-week checklist, your chamomile seedlings will be robust and ready for transplanting by spring. The key is consistency—monitor light, temperature, and moisture daily. Soon, you’ll be harvesting fragrant blooms for tea or bouquets! 🌼