
Container Gardens
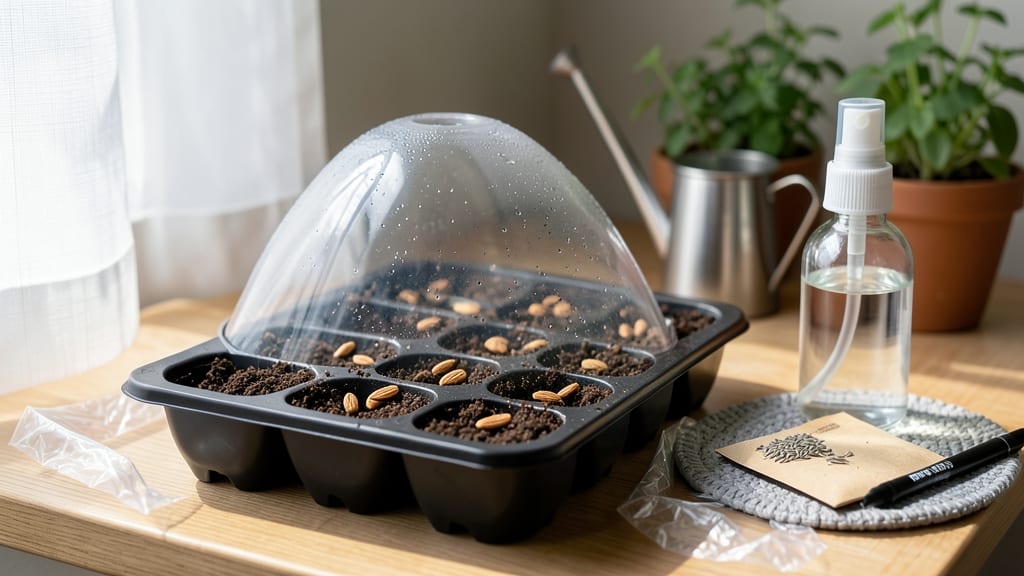
Planting zinnia seeds indoors gives you a head start on those bold summer blooms that make neighbors stop and stare. 🌻 I’ve started zinnias indoors for years, and the secret isn’t complicated—it’s timing, light, and patience.
By the time your friends are still hunting for transplants at the garden center, you’ll already have sturdy seedlings ready to thrive in the garden.
The gear you need is simple: small seed-starting trays, well-draining potting mix, and a sunny windowsill or grow light. Zinnias love warmth, so aim for a cozy spot between 65-75°F—no fancy equipment required.
The biggest mistake? Planting too deep or keeping soil soggy. These seeds need light to germinate, so barely cover them with soil and keep everything moist but not wet.
In just 7-10 days, you’ll see those first green shoots pushing through the soil, and by 6-8 weeks, you’ll be transplanting robust seedlings into your garden. The payoff?
Zinnias that bloom earlier, last longer, and resist those pesky early-season pests. Plus, you get to pick your favorites—from towering Benary’s Giant to delicate Crystal Series with their lacy petals.
Works for any indoor space, whether you’re on a sunny porch or a kitchen counter. Let’s get those seeds going—your summer garden will thank you!
📚 In This Guide
- What you need
- Instructions
- Tips and common mistakes
- Wrapping up and next steps
What you need
- ● Zinnia seeds: Choose fast-growing varieties like Zinnia elegans (e.g., 'Benary’s Giant' or 'Profusion'). Aim for 3–5 seeds per cell (or 1–2 seeds per small pot) for best results.
- ● Seed-starting trays or small pots: Use biodegradable or plastic cell trays (2–4 inches deep) or 4–6 inch pots with drainage holes. Pro tip: 💡 Cell trays save space and make transplanting easier!
- ● Seed-starting mix: A lightweight, sterile mix (e.g., 50% peat moss + 50% perlite/vermiculite) or a pre-made seed-starting soil (avoid garden soil—it’s too dense!).
- ● Drainage layer: Pebbles, perlite, or horticultural sand (¼ inch thick) to prevent root rot.
- ● Spray bottle or watering can: With a fine mist nozzle to avoid disturbing seeds.
- ○ Clear plastic dome or plastic wrap: To create a humidity tent (optional but helpful for germination).
- ● Grow lights or sunny windowsill: Zinnias need 12–16 hours of light daily. A full-spectrum LED grow light (12–24 inches above seedlings) works best if natural light is limited.
- ● Heating mat: Speeds up germination (keep soil at 70–75°F).
- ● Fertilizer: A balanced, water-soluble fertilizer (e.g., 10-10-10) at half-strength after seedlings sprout.
- ● Labels or toothpicks: To mark pots and track varieties.
- ● Fungicide (like neem oil): Prevents damping-off disease in humid conditions.
- ● Tweezers or small spoon: For gently pressing seeds into soil.
Step-by-step instructions for planting zinnia seeds indoors
Here's my foolproof method for getting those vibrant zinnias off to a flying start indoors.
🌱 Step 1: Choose the Right Containers and Soil
Start with small, clean containers—2-3 inches deep works perfectly for zinnias. I like using seedling trays with individual cells because they make transplanting easier later. Fill each cell with a light, sterile seed-starting mix (never garden soil—it's too dense and can harbor diseases). Press the mix down gently so it's firm but still loose enough for roots to grow through.
Moisten the soil with water until it's damp but not soggy. You'll know it's right when a handful of the mix holds together but doesn't drip water. This ensures your seeds won't dry out or rot as they germinate. I always tap the tray gently on the table to settle the soil evenly—this prevents air pockets that can slow down root growth.
🌱 Step 2: Plant the Seeds at the Correct Depth
Zinnia seeds are tiny but easy to handle. Plant 1-2 seeds per cell at a depth of about ¼ inch. Press them lightly into the soil—don't bury them too deep, or they'll struggle to push through. Cover them with a thin layer of soil, just enough to hide them completely. A good trick is to sprinkle a pinch of sand over the seeds first; it makes them easier to see and cover evenly.
Mist the soil surface lightly with water using a spray bottle. You want it damp but not wet, as zinnias hate soggy conditions. Place the tray in a warm spot—70-75°F is ideal for germination. I keep mine on top of my fridge until the seeds sprout, which usually takes 7-10 days. Watch for the first green shoots to appear; that's your signal everything is working!
☀️ Step 3: Provide Light and Care for Germination
Once those first leaves appear, move your zinnias to a bright spot with 12-14 hours of light daily. A south-facing window is great, but if your light is weak, supplement with a grow light placed 2-3 inches above the seedlings. Keep the light on a timer to mimic natural daylight cycles—zinnias grow best with consistent light.
Water gently from the bottom by placing the tray in a shallow dish of water for 10-15 minutes. This prevents disturbing the delicate seedlings and ensures even moisture. You'll know they're getting enough water when the soil feels damp 1 inch down. Avoid overhead watering, as it can cause damping-off, a fungal disease that turns seedlings into sad, mushy stems.
🌿 Step 4: Thin and Harden Off Seedlings
When your zinnias have 2-3 true leaves (the first set of leaves after the initial sprouts), it's time to thin them. Use a small pair of scissors to snip the weaker seedling at soil level, leaving the strongest one in each cell. This might sound harsh, but it gives your zinnias room to grow strong and healthy—crowded seedlings compete for nutrients and light, leading to leggy, weak plants.
About 2 weeks before your last frost date, start hardening off your seedlings. Place them outside in a sheltered spot for 1-2 hours the first day, gradually increasing their time outside over 7-10 days. This helps them adjust to wind, sun, and temperature changes. By the time you're ready to transplant, your zinnias will be tough little survivors, ready to thrive in the garden.
🪴 Step 5: Transplant Outdoors at the Right Time
Wait until the soil is warm—60°F or above—and all danger of frost has passed before transplanting. Dig small holes in your garden bed, about twice as wide as the root ball of your seedlings. Gently remove each seedling from its container, being careful not to disturb the roots, and place it in the hole. Fill in around the roots with soil and press lightly to secure the plant.
Water deeply right after transplanting to help the roots settle in. Space your zinnias 8-12 inches apart to give them room to grow and bloom. Mulch around the base with a thin layer of organic material to retain moisture and keep weeds at bay. With proper care, your zinnias will reward you with bold, cheerful blooms all summer long!
Tips & tricks for planting zinnia seeds indoors
Here's what nobody tells you about getting those zinnias to sprout like clockwork.
Soil Prep Secret: Before filling your containers with seed-starting mix, give it a quick microwave treatment for 90 seconds to sterilize it. This eliminates any hidden pathogens that could cause damping-off disease, which turns your seedlings into sad, mushy stems. I do this for all my seed-starting mixes—it's a game-changer for germination rates.
Lighting Hack: If you're using a grow light for those critical 12-14 hours of daily light, position it just 2-3 inches above the seedlings. Too high and they'll stretch toward the light (leggy seedlings), too low and you'll burn them. I keep mine on a timer set to 14 hours on/10 hours off to mimic summer daylight perfectly.
Watering Wisdom: That 10-15 minute bottom-watering method works wonders, but here's the thing—after watering, always let the tray sit for 5 minutes before returning it to its growing spot. This prevents water from pooling in the bottom, which can lead to root rot. I use a shallow tray with drainage holes to catch any excess water that might fall through.
Transplant Timing: When checking soil temperature for transplanting, use a soil thermometer—it's the only reliable way to confirm that 60°F minimum. I've learned the hard way that relying on outdoor temps can be misleading, especially in spring. The roots need warm soil to establish properly, and a thermometer gives you the exact reading you need to make that call.
Pro Tips for Planting Zinnia Seeds Indoors
- Here's what nobody tells you about getting those zinnias to sprout like clockwork.
- Soil Prep Secret: Before filling your containers with seed-starting mix, give it a quick microwave treatment for 90 seconds to sterilize it.
- Lighting Hack: If you're using a grow light for those critical 12-14 hours of daily light, position it just 2-3 inches above the seedlings.
Frequently asked questions
Got questions about starting zinnia seeds indoors? You’re not alone! Here are some of the most common concerns—and quick answers—to help you grow confidently.
When is the best time to start zinnia seeds indoors?
Plant zinnia seeds indoors 6–8 weeks before your last frost date. For most regions, this means starting in early March or late February. Seedlings grow fast, so timing ensures they’re sturdy enough for transplanting by spring.
Do zinnia seeds need light to germinate?
Nope! Zinnia seeds don’t need light to sprout—just warmth and moisture. Keep them in a cozy spot (70–75°F) under a damp paper towel or in soil. Once they’ve sprouted (in 7–14 days), move them to a sunny windowsill or grow light.
Can I use regular potting soil for zinnia seeds?
Yes! A light, well-draining potting mix works perfectly. Avoid heavy garden soil—it can compact and suffocate tiny roots. Mix in a bit of perlite or vermiculite for extra airflow if your soil feels dense.
Why aren’t my zinnia seeds germinating?
Check these 3 culprits:
- Cold soil: Keep seeds warm (use a heat mat if needed).
- Too wet/dry: Soil should stay consistently moist, not soggy.
- Old seeds: Zinnia seeds lose viability after 1–2 years—test freshness!
How do I harden off zinnia seedlings before outdoor planting?
Start 1–2 weeks before transplanting by placing seedlings outside for 1–2 hours daily, gradually increasing time. Shield them from harsh sun/wind at first. By day 7, they should handle full outdoor conditions—just water them in well!
Wrapping up and next steps
Planting zinnia seeds indoors is your fast track to vibrant summer blooms—no green thumb required! With the right setup, warmth, and a little patience, you’ll soon be rewarded with cheerful, sun-driving flowers that brighten up containers, borders, and even bouquets. 🌻
Now that you’re armed with tips and tricks, take the next step: grab your supplies, set up those seed trays, and watch your tiny seeds transform into a burst of color. Happy planting—and enjoy your future garden’s star attraction!