
Plants
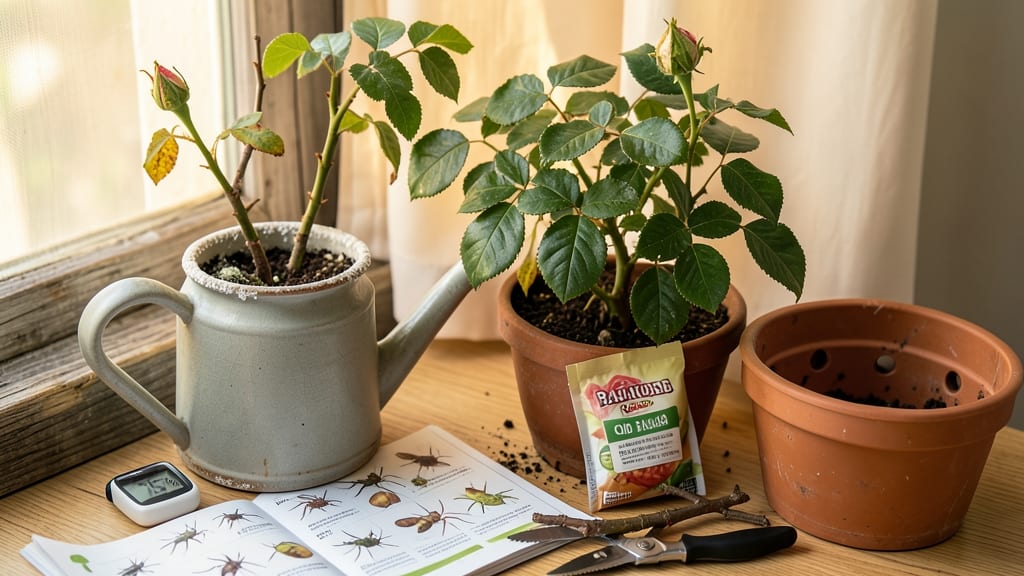
Your indoor rose plant dying doesn't mean it's game over—it’s just calling for a little troubleshooting. 🌹 I’ve nursed back more drooping roses than I can count, and the fixes are simpler than you’d think.
Most problems boil down to three core issues: water, light, or hidden pests lurking in the leaves.
Start by checking the soil—if it’s bone-dry or soggy, that’s your first clue. Overwatering drowns roots, while underwatering leaves them parched. Then inspect the leaves for tiny webs or sticky residue (pests love roses!).
Finally, move it closer to a bright window—roses crave 6+ hours of sunlight daily, but direct afternoon sun can scorch leaves.
With the right adjustments, you’ll see new buds within 2-3 weeks. Prune dead blooms to redirect energy, mist leaves for humidity, and keep the soil consistently moist (not soggy). The key? Consistency—roses reward patience with lush, repeat blooms all season.
Works for mini roses, climbers, or hybrid teas—just tweak care based on your plant’s size. Let’s bring that rose back to life!
Root Causes Of Wilted Roses
When your indoor rose plant starts looking sad—droopy stems, yellowing leaves, or no blooms—it’s usually a cry for help from the roots (or lack thereof). 🌱 Understanding why this happens is the first step to bringing it back to life.
Roses are delicate but resilient, and their decline often boils down to a few key issues: environmental stress, poor care habits, or hidden pests. Let’s break down the science behind each culprit so you can diagnose (and fix!) the problem fast.
Roses hate soggy feet. When soil stays too wet, roots suffocate from lack of oxygen and develop root rot, a fungal infection that cuts off nutrient uptake. Here’s how it happens:
- Waterlogged soil: Overwatering (or pots without drainage holes) traps excess moisture, drowning roots in anaerobic conditions—where bacteria thrive and release toxic byproducts.
- Compacted soil: Heavy, clay-based mixes or reused potting soil (without amendments) prevent water from draining, leading to stagnation.
- Cold roots: If the pot sits in a drafty or damp spot (like a cold windowsill), roots slow down, making them vulnerable to rot.
🔍 Tell-tale signs: Black, mushy roots; a foul smell from the soil; or stems that wilt even when the soil is wet.
On the flip side, roses need consistent moisture—especially in dry indoor air. When soil dries out too much, roots shrink and die back, leaving the plant unable to absorb water or nutrients. Here’s the breakdown:
- Rapid moisture loss: Indoor heating or AC systems suck humidity from the air, causing soil to dry out faster than outdoor roses.
- Shallow root systems: Roses develop most of their roots in the top 6–12 inches of soil. If this layer dries out, the plant wilts even if deeper soil still has moisture.
- Transpiration stress: Hot sunlight + dry air = leaves lose water faster than roots can replace it, leading to wilting.
🔍 Tell-tale signs: Dry, crispy leaf edges; soil pulling away from the pot; or stems that feel hollow when squeezed.
Roses are sun-worshippers, and too little (or too much) light throws their growth off balance. Here’s how lighting affects them:
- Leggy, weak stems: Low light causes etiolation, where stems stretch toward any light source, making them top-heavy and prone to snapping.
- Burnt leaves: Direct midday sun (especially through glass) creates heat stress, causing leaf scorch (brown, crispy patches).
- No blooms: Roses need 6+ hours of bright, indirect light daily to trigger flowering. Without it, they focus energy on leaves instead of buds.
🔍 Tell-tale signs: Yellowing leaves (chlorosis) on lower stems; stems leaning toward a window; or buds dropping before opening.
Tiny invaders can wreak havoc on roses by sucking sap, spreading disease, or laying eggs in the soil. Common culprits include:
- Aphids: Cluster on new growth, injecting toxins that cause curling leaves and sticky honeydew (which attracts mold).
- Spider mites: Thrive in dry air, creating fine webbing on undersides of leaves and causing stippling (tiny white dots).
- Scale insects: Attach to stems/leaves like tiny bumps, draining nutrients and leaving black sooty mold on surfaces.
- Root-knot nematodes: Microscopic worms in soil that gall roots, reducing water/nutrient uptake.
🔍 Tell-tale signs: Sticky residue on leaves; visible bugs; or sudden wilting despite proper watering.
Roses need a balanced diet, but too little or too much fertilizer throws them off. Here’s how imbalances show up:
| Deficiency | Symptoms | Cause |
|---|---|---|
| Nitrogen (N) | Yellow lower leaves (older growth first), stunted growth | Poor soil or over-fertilizing with low-N mixes |
| Phosphorus (P) | Purple-tinged leaves, weak stems, no blooms | Old soil or overwatering (leaches P away) |
| Potassium (K) | Brown leaf edges, weak stems, susceptibility to disease | Salty soil or underwatering (stresses roots) |
| Magnesium (Mg) | Yellow veins with green patches between (interveinal chlorosis) | Alkaline soil or over-fertilizing with synthetic salts |
💡 Pro Tip: If your rose’s leaves show yellowing between veins, it’s often a magnesium deficiency—fix it with Epsom salt (1 tbsp per gallon of water, applied monthly).
Now that you know the why, the next step is the how. Stay tuned for actionable fixes to revive your rose’s health—starting with the 3 easiest fixes to try today! 🌸
Reviving Your Rose Plant Step-by-Step
Don’t let a drooping rose plant signal the end—with the right care, you can bring it back to life! Below are practical, actionable solutions tailored to the most common causes of indoor rose plant decline.
Follow these steps to diagnose and fix the issue, plus prevent future problems so your plant thrives for years.
---
Signs: Yellowing leaves, mushy stems, or soil that stays soggy even after watering.
Fix It: 🔥 Step 1: Let It Dry Out – Stop watering immediately and allow the top 2–3 inches of soil to dry completely. Stick your finger in the soil—if it’s damp past 1 inch, wait longer. 🍳 Step 2: Check the Pot – Ensure your rose has drainage holes in the bottom. If not, repot it into a container with holes or add a layer of gravel/pebbles at the base for airflow. 👨🍳 Step 3: Repot if Needed – If roots are rotting (black, smelly, or mushy), trim them with sterilized scissors, then repot in fresh, well-draining potting mix (like a cactus/succulent blend mixed with perlite). 🥘 Step 4: Adjust Watering – Water only when the top inch of soil is dry, and use the "soak-and-dry" method: Water thoroughly until it drains from the bottom, then empty the saucer to prevent root rot.
💡 Prevention Tips: ✔ Use a moisture meter to track soil dryness. ✔ Choose pots with larger drainage holes for better airflow. ✔ Avoid saucers without drainage—opt for decorative trays instead.
---
Signs: Crispy leaf edges, wilting despite dry soil, or dusty leaves.
Fix It: 🔥 Step 1: Deep Watering – Soak the pot until water runs out the drainage holes. Let it drain completely, then place it in a shallow tray of water for 10–15 minutes to hydrate roots fully. 🍳 Step 2: Increase Humidity – Roses love 40–60% humidity. Place the pot on a pebble tray with water (not touching the pot) or use a humidifier nearby. 👨🍳 Step 3: Mist Gently – Lightly mist the leaves 2–3 times a week (avoid over-misting, which can cause fungal issues). 🥘 Step 4: Adjust Light – If leaves are pale or stretched, move the plant closer to a bright, indirect light source (south or west windowsill is ideal).
💡 Prevention Tips: ✔ Group plants together to create a microclimate of higher humidity. ✔ Rotate the pot weekly for even light exposure. ✔ Use a spray bottle with distilled water to avoid mineral buildup on leaves.
---
Signs: Leaf drop, brown spots, or weak stems—especially near drafts, AC vents, or direct sun.
Fix It: 🔥 Step 1: Ideal Temperature Range – Keep your rose between 60–75°F (15–24°C). Avoid cold drafts (like near doors/windows) or hot spots (direct sunlight or heating vents). 🍳 Step 2: Light Adjustment – If leaves are scorched, move it away from harsh midday sun. For leggy growth, supplement with a grow light 12–14 hours/day. 👨🍳 Step 3: Acclimate Gradually – If moving outdoors, harden off the plant by placing it in partial shade for 1–2 hours daily, increasing time over a week. 🥘 Step 4: Prune Damaged Leaves – Trim any yellow, brown, or wilted leaves with clean scissors to redirect energy to healthy growth.
💡 Prevention Tips: ✔ Avoid sudden temperature swings—keep the plant in a stable environment. ✔ Use sheer curtains to filter intense sunlight. ✔ Rotate the pot monthly for balanced light exposure.
--- Signs: Sticky residue, holes in leaves, white webbing, or black spots.
Fix It: 🔥 Step 1: Isolate the Plant – Move it away from other plants to prevent spreading. 🍳 Step 2: Inspect & Remove Pests – - Aphids/Mealybugs: Wipe off with a soapy water cloth (1 tsp mild soap + 1 cup water). - Spider Mites: Spray with neem oil solution (1 tsp neem oil + 1 quart water). - Fungal Issues (black spots): Prune affected areas and spray with baking soda mix (1 tsp baking soda + 1 quart water + a drop of soap). 👨🍳 Step 3: Sterilize Tools – Clean pruners with rubbing alcohol to avoid reinfection. 🥘 Step 4: Improve Airflow – Thin out crowded foliage and space plants apart to reduce humidity-related diseases.
💡 Prevention Tips: ✔ Quarantine new plants for 2 weeks before introducing them to your collection. ✔ Wipe leaves monthly with a damp cloth to remove dust (which attracts pests). ✔ Use beneficial insects like ladybugs to control pests naturally.
--- Signs: Pale yellow leaves (nitrogen deficiency), weak stems, or slow growth.
Fix It: 🔥 Step 1: Test the Soil – Use a simple soil test kit to check pH (ideal: 6.0–6.5 for roses). 🍳 Step 2: Fertilize Properly – - For new growth: Use a balanced liquid fertilizer (10-10-10) diluted to half strength every 4–6 weeks. - For blooms: Switch to a high-phosphorus fertilizer (5-10-5) when buds form. 👨🍳 Step 3: Organic Boost – Mix compost or worm castings into the topsoil for slow-release nutrients. 🥘 Step 4: Avoid Over-Fertilizing – More isn’t better! Flush the soil every 2 months with water to prevent salt buildup.
💡 Prevention Tips: ✔ Fertilize in spring/summer—roses go dormant in fall/winter. ✔ Use slow-release granules for steady nutrition without burning roots. ✔ Water before fertilizing to prevent root damage.
--- Before calling it quits, run through this quick recovery checklist: 1. Trim dead/damaged parts (encourages new growth). 2. Repot if soil is compacted or diseased (fresh mix = fresh start).
3. Adjust watering (soak-and-dry method). 4. Boost humidity (pebble tray or humidifier). 5. Check light exposure (bright but indirect). 6. Fertilize lightly (only if leaves are pale or weak).
With patience and these fixes, your rose should perk up within 2–4 weeks. 🌹 If it still struggles, consider propagating healthy cuttings to start fresh!
Frequently asked questions
Why are my indoor rose leaves turning yellow?
Yellowing leaves usually signal overwatering or nutrient deficiencies. Check the soil first—if it's soggy, your rose may have root rot from too much moisture. For yellowing between veins, it's often a magnesium deficiency—try a monthly Epsom salt spray (1 tbsp per gallon of water). Always use pots with drainage holes!
How often should I water my indoor rose plant?
Water when the top 1-2 inches of soil feel dry to the touch. Indoor roses need consistent moisture but hate soggy roots. Use the "soak-and-dry" method: Water thoroughly until it drains, then wait until the top layer is dry before watering again. In winter, reduce watering by half since growth slows.
What's the best light for indoor roses?
Indoor roses need 6+ hours of bright, indirect light daily. South or west-facing windows work best. If leaves are pale or stems stretch (leggy growth), move it closer to the light or supplement with a grow light. Avoid harsh midday sun, which can scorch leaves—use sheer curtains if needed.
How do I know if my rose has pests?
Look for these red flags: sticky residue (aphids), fine webbing (spider mites), or tiny bumps on stems (scale). Check leaf undersides and new growth first. If you spot pests, isolate the plant and treat with soapy water (aphids) or neem oil spray (mites). Wipe leaves monthly with a damp cloth to prevent future infestations.
Can I revive a rose that's completely wilted?
Yes! First, trim any mushy stems and repot in fresh, well-draining soil if needed. Place the pot in a shallow tray of water for 10-15 minutes to fully hydrate roots, then move to bright, indirect light. Increase humidity with a pebble tray and avoid fertilizing until new growth appears. With patience, you'll see recovery within 2-4 weeks!