
Container Gardens
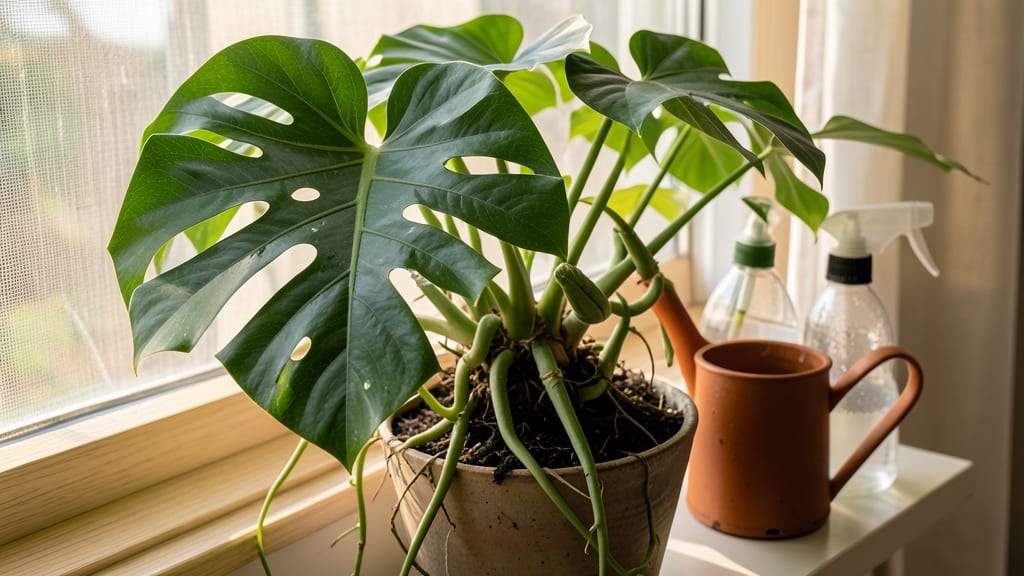
Holes in your indoor plant leaves are like tiny battle wounds—except they’re not from combat, they’re from pests, stress, or something you might’ve missed. 🌿 I’ve seen everything from spider mite Swiss cheese to thrips’ ragged edges, and the good news is most fixes are simpler than you’d think.
First, grab a magnifying glass (or just your phone’s camera) to spot the culprit: tiny webs mean mites, speckled damage suggests thrips, while clean holes could be environmental stress or even your cat’s sharp claws. The key is acting fast—before the damage spreads to your whole collection.
You’ll restore those leaves to smooth perfection with targeted solutions: isolation for pests, neem oil sprays, or adjusting light/water habits. By the end, your plants will look like they never saw a battle at all—just thriving, hole-free foliage. Works for any houseplant, from ferns to fiddle-leaf figs.
Let’s turn those wounds into a win!
Root Causes Of Leaf Damage
When your beloved indoor plants start showing up with mysterious holes in their leaves, it’s often a cry for help from the plant itself. Understanding the why behind these unsightly marks is the first step to restoring your green buddy’s health.
Below, we break down the most common culprits—each with a distinct "signature" that can help you diagnose the issue accurately.
If the holes in your plant’s leaves look like they were made with tiny scissors or needle-like punctures, insects are likely the culprits. Here’s how to spot them:
- Spider Mites: These microscopic pests create stippled holes (tiny white or yellow dots) and leave behind fine webbing, especially on the undersides of leaves. They thrive in dry, warm conditions—common in homes with low humidity.
- Caterpillars & Larvae: Look for irregular, jagged holes along leaf edges or scattered across the surface. These pests often leave behind frass (tiny black droppings) and may even hide among the foliage during the day.
- Leafhoppers & Aphids: These sap-suckers may not always cause holes but can weaken leaves, making them more susceptible to tearing. Check for sticky residue (honeydew) or distorted growth.
💡 Pro Tip: Shine a flashlight on the undersides of leaves at night—many pests are nocturnal and will reveal themselves!
Plants are sensitive to their surroundings, and extreme conditions can lead to physical damage, including holes. Here’s what to watch for:
| Cause | Signs | Fix It |
|---|---|---|
| Direct Sunlight (Sunburn) | Holes or crispy, white patches on leaves exposed to harsh light (common in south-facing windows). | Move the plant to indirect light or use sheer curtains to diffuse sunlight. |
| Drafts or Cold Shocks | Holes or brown, dead spots near vents, doors, or AC units. Cold drafts can cause cell death in sensitive plants. | Keep plants away from drafts and avoid placing them near heating/cooling sources. |
| Overwatering or Poor Drainage | Soft, mushy holes or yellowing leaves (a sign of root rot spreading to foliage). | Let the top inch of soil dry out between waterings and ensure pots have drainage holes. |
✨ Warning: Some plants, like Calathea or Ferns, are extra sensitive to temperature fluctuations. If you notice holes appearing after a recent move or seasonal change, adjust their environment gradually.
Too much of a good thing—or the wrong thing—can burn leaves from the inside out, creating holes or necrotic spots. Here’s how to identify chemical damage:
- Fertilizer Burn: Holes or brown, crispy edges on leaves, often accompanied by yellowing. Over-fertilizing disrupts the plant’s ability to absorb water, leading to osmotic damage in leaf cells.
- Pesticide/Herbicide Residue: Irregular holes or bleached patches if the plant was sprayed with harsh chemicals (even from nearby plants or garden tools).
- Hard Water or Chemical Buildup: White, crusty deposits on leaves or soil can clog stomata (pores), causing leaf tissue to die in patches.
🔥 Quick Fix: If you suspect fertilizer burn, flush the soil with water to leach out excess salts. For chemical exposure, isolate the plant and wipe leaves gently with a damp cloth.
Not all leaf holes are caused by pests or disease—sometimes, it’s good old human error. Here’s how to tell if your plant is a victim of mishandling:
- Physical Trauma: Ragged or clean-cut holes (like those from pets, kids, or even your own fingers while pruning). These lack the precision of insect damage.
- Transplant Shock: Newly repotted plants may develop small tears or holes if roots were disturbed too roughly, stressing the foliage.
- Vibration or Wind: In high-traffic areas (like near fans or open windows), leaves can rub against surfaces, creating abrasions over time.
🎯 Prevention Tip: If you have curious pets or kids, opt for pet-safe plants like Spider Plants or Boston Ferns, which are harder to "damage" accidentally.
Now that you know the why, the next step is to diagnose and treat your plant’s specific issue. Most of these problems are reversible with the right care—so don’t panic, just act!
Quick fixes for damaged leaves
Now that you’ve identified the culprit behind those pesky holes in your indoor plants’ leaves, it’s time to take action! The good news? Most leaf damage is reversible with the right care.
Below, we’ve mapped out practical, step-by-step solutions for each common cause—plus prevention tips to keep your plants thriving long-term.
---
If tiny critters like spider mites, aphids, or mealybugs are the culprits, act fast to prevent further damage.
🔥 Step 1: Quarantine the Plant Move the affected plant away from others to stop pests from spreading. Check nearby plants for signs of infestation (sticky residue, webbing, or tiny moving dots).
🍳 Step 2: Clean the Leaves Use a neem oil solution (1 tsp neem oil + 1 tsp mild soap + 1 quart water) or insecticidal soap to wipe down leaves with a soft cloth or spray bottle. For stubborn pests, rinse leaves under lukewarm water to dislodge them.
👨🍳 Step 3: Treat the Soil Pests often hide in the soil. Drench the roots with the same neem oil mixture or apply beneficial nematodes (microscopic predators of pests) to the topsoil. For severe infestations, repot the plant in fresh, sterile soil.
⏰ Step 4: Monitor and Repeat Check the plant every 3–5 days. If pests persist, try a horticultural oil spray (follow label instructions). Most infestations clear up within 2 weeks with consistent treatment.
💡 Prevention Tip: Keep humidity moderate (40–60%) and avoid overcrowding plants. Regularly inspect leaves—early detection saves your plant!
---
Soggy soil and root rot can lead to weak, hole-prone leaves. Here’s how to reset your watering habits.
🔥 Step 1: Let the Soil Dry Out Stop watering immediately and allow the top 1–2 inches of soil to dry completely before watering again. Stick your finger in the soil—if it’s damp past your first knuckle, wait longer.
🍳 Step 2: Improve Drainage Ensure your pot has drainage holes (if not, repot). Use a well-draining potting mix (add perlite or orchid bark for aeration). Terra cotta pots help wick away excess moisture.
👨🍳 Step 3: Check the Roots Gently remove the plant from its pot and inspect the roots. Healthy roots are white or light brown; mushy, black, or smelly roots need trimming. Snip off damaged roots with sterilized scissors, then repot in fresh soil.
✨ Step 4: Water Wisely Water thoroughly but less frequently. Aim for the "soak and dry" method: Water until it runs out the drainage holes, then wait until the soil is dry to the touch before repeating. Avoid misting leaves if your plant prefers dry foliage (e.g., snake plants).
🌡️ Prevention Tip: Group plants with similar water needs together and use a moisture meter or the "finger test" to avoid guesswork. Overwatering is the #1 killer of indoor plants—when in doubt, wait!
---
Too much direct sun can scorch leaves, creating crispy or hole-like damage. Adjust lighting to revive your plant.
🔥 Step 1: Move the Plant Relocate your plant to indirect, bright light (e.g., near an east-facing window). If it’s currently in harsh afternoon sun, shift it to a north-facing spot or a few feet back from the window.
🍳 Step 2: Acclimate Gradually If your plant was recently moved or brought indoors, harden it off by slowly increasing its light exposure over 1–2 weeks. Start with 2–3 hours of indirect light daily and monitor for stress.
👨🍳 Step 3: Protect Sensitive Leaves For plants prone to sunburn (e.g., calatheas, ferns), use a sheer curtain to diffuse light or rotate the pot weekly so all sides get even exposure.
🎯 Prevention Tip: Research your plant’s light requirements—most tropicals thrive in bright, indirect light, while succulents need morning sun. When in doubt, underlighting is safer than overlighting.
---
Sudden changes in temperature or dry air can weaken leaves, making them vulnerable to holes or tears.
🔥 Step 1: Regulate Temperature Keep your plant in a consistent 65–75°F range (most indoor plants prefer this). Avoid drafts from AC vents, heaters, or open windows. Use a thermometer to track conditions.
🍳 Step 2: Boost Humidity If the air is too dry (common with central heating), place a pebble tray under the pot or use a humidifier nearby. Grouping plants together also creates a microclimate.
👨🍳 Step 3: Shield from Drafts Keep plants away from doors, windows, or vents that cause temperature swings. If you must place them near a window, use a thermal curtain to moderate temperature drops at night.
💡 Prevention Tip: Monitor your home’s humidity with a hygrometer—ideal levels are 40–60%. For tropical plants, misting leaves (gently!) can help, but avoid soggy foliage.
---
Accidental damage from pets, kids, or clumsy pruning can create holes. The fix? Prevention and gentle care.
🔥 Step 1: Trim Damaged Leaves Use sterilized scissors to snip off severely torn leaves at the base. For minor damage, leave it—new growth will fill in gaps.
🍳 Step 2: Protect Your Plant Keep pets and children away from fragile plants (e.g., pothos, peace lilies). Place them in out-of-reach spots or use bamboo stakes to support tall, delicate leaves.
👨🍳 Step 3: Prune Strategically When pruning, cut at a 45-degree angle just above a leaf node to encourage bushier growth. Avoid tearing leaves—sharp tools prevent ragged edges.
🎯 Prevention Tip: If your plant is a magnet for pets or kids, opt for tougher varieties like snake plants, ZZ plants, or spider plants, which are more resilient to handling.
--- 🌟 Pro Tip for All Causes: Once you’ve treated the issue, fertilize lightly (with a balanced, diluted fertilizer) to help your plant recover. Avoid fertilizing if the plant is still stressed—focus on stability first!
Frequently asked questions
Why do some indoor plants develop holes while others stay perfectly smooth?
Plant resilience varies by species! Delicate varieties like ferns or calatheas show holes faster when stressed, while tougher plants (snake plants, ZZ plants) often hide damage until it's severe. Also, pests target weaker plants first—healthy foliage repels them better. Check your plant's care needs to match its natural toughness.
Can I save a plant with severe holes from spider mites?
Yes, but act fast! Isolate the plant immediately and treat with neem oil (1 tsp in 1 quart water). For bad cases, prune heavily damaged leaves and repot in fresh soil. Most plants recover in 2-3 weeks if you catch it early—just don't fertilize until new growth appears.
How do I tell if holes are from pests vs. environmental stress?
Look closely! Pest holes are usually tiny, precise punctures (like Swiss cheese) with webbing or frass (tiny black dots). Environmental holes appear as irregular tears, crispy patches (sunburn), or soft spots (overwatering). Check leaf undersides for hidden pests—no critters? It's likely environmental.
Will new leaves grow back smooth if I fix the problem?
Once you address the root cause (pests, light issues, etc.), your plant will produce fresh, hole-free growth. Damaged leaves won't recover, but new ones will emerge smooth if conditions stabilize. Just be patient—some plants take 4-6 weeks to show noticeable improvement.
Are there any indoor plants that naturally resist leaf holes?
Yes! Try these tough varieties: snake plants (nearly indestructible), pothos (fast-growing and resilient), or spider plants (hardy and pest-resistant). Even if they get holes, they bounce back quickly. For extra protection, keep them in bright, indirect light with moderate humidity.