
Size
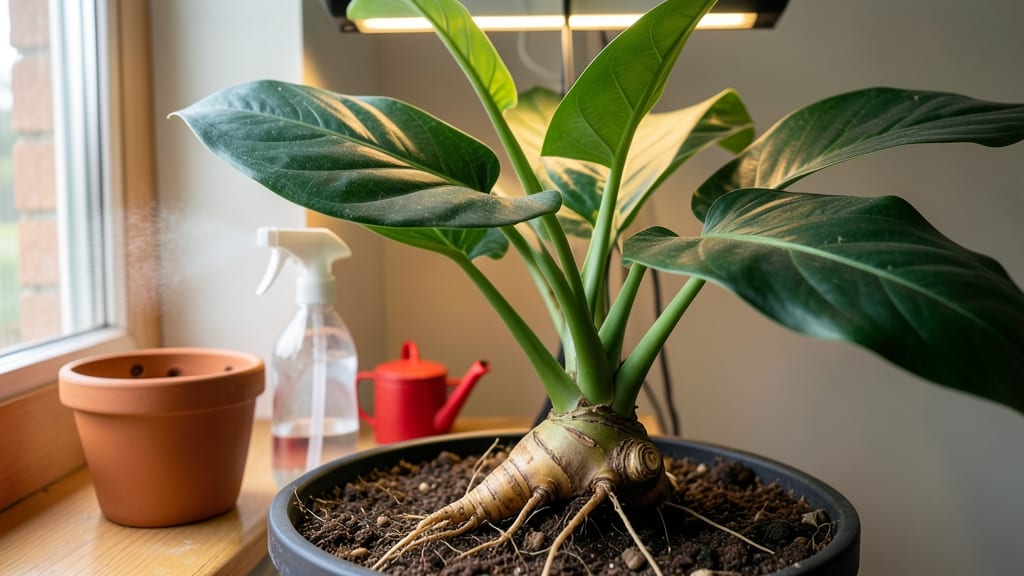
Growing turmeric indoors lets you harvest golden rhizomes from a sunny windowsill. 🌱 I've turned my kitchen into a mini spice farm by following a few key rules about light, warmth, and patience—no greenhouse required.
The first harvest will take 8-10 months, but the process is simpler than you'd think.
You'll need a 6-inch pot with drainage, well-draining potting mix, and a spot with 6+ hours of bright light daily. Turmeric thrives in warmth (70-85°F) and humidity, making it perfect for kitchens or bathrooms with good airflow.
Start with a piece of rhizome—no need for expensive starter plants from nurseries.
Keep the soil consistently moist but never soggy, and watch for new shoots emerging within 2-3 weeks. The plants will reward you with broad, banana-like leaves before finally producing rhizomes underground. When leaves yellow and die back, it's time to harvest your golden prize.
This method works even in small apartments or offices with proper light. The key is consistency—turmeric is forgiving but rewards attention to detail. Ready to grow your own spice?
📚 In This Guide
- What you need
- Instructions
- Tips and common mistakes
- Wrapping up and next steps
What you need
- ● Turmeric rhizomes: 1–2 fresh, organic turmeric rhizomes (preferably with "eyes" or buds). Avoid pre-sprouted or dried pieces.
- ● Containers: 1–2 pots (6–8 inches in diameter) with drainage holes. Use ceramic, terracotta, or fabric pots for best results.
- ● Well-draining potting mix: 2–3 gallons of a mix designed for herbs or vegetables. Add perlite or coconut coir (20–30%) to improve aeration.
- ● Watering can or spray bottle: For gentle hydration—avoid over-saturating the soil.
- ● Bright, indirect sunlight: A south- or west-facing window (or a grow light for 12–14 hours/day if natural light is limited).
- ○ Humidity tray or pebble tray: Optional but helpful for maintaining moisture levels (especially in dry climates).
- ● Fertilizer: A balanced liquid fertilizer (e.g., 10-10-10) or organic options like compost tea or fish emulsion.
- ● Pruning shears: For trimming yellow or dead leaves.
- ● Soil moisture meter: To check moisture levels without overwatering.
- ● Support stakes or trellis: If your turmeric grows tall (though it’s not always necessary).
- ● Spray bottle with neem oil: For pest prevention (e.g., spider mites or fungus gnats).
Step-by-step guide to growing turmeric indoors
Here's how to cultivate vibrant turmeric plants at home—no greenhouse needed.
🌱 Step 1: Select and Prepare Turmeric Rhizomes
Choose firm, disease-free turmeric rhizomes from a specialty store or online. Look for pieces with multiple "eyes" (small buds) and avoid any that feel soft or moldy. Cut larger rhizomes into smaller sections, ensuring each piece has at least 2-3 eyes and a small root base. Let the cut pieces dry for 24 hours—this prevents rot when planting.
I like to soak the prepared rhizomes in lukewarm water for 10 minutes before planting. This kickstarts root growth and helps them establish faster. After soaking, rinse them thoroughly to remove any residue. The goal is to start with healthy, hydrated rhizomes ready to sprout.
🪴 Step 2: Choose Containers and Soil Mix
Turmeric thrives in well-draining containers at least 12 inches deep with drainage holes. I use terracotta pots because they breathe and prevent root rot. Fill the bottom 2 inches with gravel or perlite to improve drainage—turmeric hates soggy roots.
Use a light, airy potting mix that mimics tropical soil conditions. A blend of 50% peat moss, 30% perlite, and 20% compost works perfectly. Avoid garden soil—it compacts too easily and suffocates roots. Moisten the mix until it’s evenly damp but not soggy, then add a slow-release fertilizer (like 5-10-5) to give your plants a nutrient boost.
☀️ Step 3: Plant Rhizomes and Provide Warmth
Place the prepared rhizomes 2 inches deep in the soil, with the eyes facing upward. Space them 4-6 inches apart—this gives roots room to spread. Cover lightly with soil and water gently until the surface feels moist. Avoid soaking the soil, as turmeric rhizomes rot easily in waterlogged conditions.
Turmeric loves warmth—keep the soil at 75-85°F for optimal growth. A seedling heat mat or placing the pots on top of the fridge works well. Place the containers in a bright, indirect light spot (like a south-facing window). Avoid direct sun at first—it can scorch young leaves. You’ll see first sprouts in 2-4 weeks—patience is key!
💧 Step 4: Water and Care for Established Plants
Once sprouts emerge, water when the top 1-2 inches of soil feel dry. I use a spray bottle for gentle hydration—this prevents disturbing the delicate roots. Turmeric needs moderate moisture but never soggy soil. Overwatering is the #1 killer of indoor turmeric plants, so always check soil moisture before watering.
After 4-6 weeks, when plants reach 6-8 inches tall, fertilize with a balanced liquid fertilizer (like 10-10-10) every 4 weeks. Rotate the pot quarter-turn weekly to ensure even growth. Turmeric plants grow tall and leafy—if they lean toward the light, move them closer to the window or add a grow light for 12-14 hours daily.
⏰ Step 5: Harvest and Encourage Regrowth
Turmeric rhizomes take 8-10 months to mature indoors. When leaves yellow and die back, it’s time to harvest. Gently dig up the rhizomes, rinse them, and dry in sunlight for 2-3 days. The golden color deepens as it dries—this is your cue it’s ready!
If you want a second harvest, cut back the above-ground growth by half after the first harvest. Keep the plant in bright light and warm conditions, and it may produce smaller rhizomes in 4-6 months. Store dried turmeric in an airtight container away from light—it’ll keep for up to a year!
Tips & tricks for growing turmeric indoors
Real talk: Indoor turmeric cultivation rewards patience and attention to detail—here's how to optimize every step.
Rhizome Preparation: The 24-hour drying period after cutting is non-negotiable—it's what prevents that dreaded rot. Pro tip: Place your cut rhizomes on a wire rack or paper towel in a warm, dry spot. I've found that a slightly elevated surface with good airflow speeds up this process without risking mold. And that 10-minute lukewarm soak? Think of it as giving your rhizomes a spa treatment—it jumpstarts root activity while being gentle enough to avoid shocking the delicate tissue.
Container Selection: While terracotta pots are ideal, don't dismiss other options completely. Any container with drainage holes will work—just ensure it's at least 12 inches deep. I've successfully grown turmeric in plastic nursery pots with drainage holes added. The key is that 2-inch gravel layer at the bottom: it's not just for drainage, but also creates an air pocket that prevents waterlogging. For multiple plants, use separate containers rather than crowding—turmeric roots spread aggressively and need room to breathe.
Light Management: That 12-14 hours of daily light requirement is crucial, but don't panic if your natural light falls short. LED grow lights are a game-changer for indoor growing—they're energy-efficient and can be positioned just 6-8 inches above your plants. For supplemental light, I recommend a full-spectrum bulb that covers the blue (for growth) and red (for flowering) spectrums. And remember: indirect light first! Direct sun can scorch those tender new shoots, especially in the early stages when they're most vulnerable.
Harvesting Timing: The 8-10 month timeline might seem long, but there's a visual cue that takes the guesswork out: when the leaves start yellowing and dying back, that's your harvest signal. The rhizomes will have developed their signature golden color by this point. For drying, I've found that a well-ventilated area with indirect sunlight works best—direct sun can cause uneven drying and potential burning. The 2-3 day drying period is perfect for developing that rich color and preserving the medicinal properties.
Pro Tips for Grow Turmeric Indoors
- Real talk: Indoor turmeric cultivation rewards patience and attention to detail—here's how to optimize every step.
- Rhizome Preparation: The 24-hour drying period after cutting is non-negotiable—it's what prevents that dreaded rot. P...
- Container Selection: While terracotta pots are ideal, don't dismiss other options completely. Any container with drai...
Frequently asked questions
Got questions about growing turmeric indoors?
You’re not alone! Here are answers to the most common concerns—from timing to troubleshooting—so you can confidently grow your golden root at home.
How long does it take for indoor turmeric to grow?
Indoor turmeric is a slow grower—expect 8 to 12 months until harvest. The first shoots (rhizomes) may sprout in 4-6 weeks, but full maturity (ready for digging) takes patience. Keep soil consistently moist and warm for steady progress!
Can I grow turmeric from store-bought root?
Yes! Use organic, unpeeled turmeric root (not powder). Cut a rhizome into 2-inch pieces with at least 1 "eye" (bud) per piece. Soak in water for 24 hours to soften before planting. Avoid non-organic roots—they’re often treated to prevent sprouting.
Why isn’t my turmeric growing? Common fixes?
Check these fixes if growth stalls:
Not enough light? Move to a south-facing window or use a grow light 12+ hours/day.
Overwatering? Let soil dry slightly between waterings (finger-test the top inch).
Cold drafts? Keep temps 70–85°F—turmeric hates chilly spots.
No buds? Ensure rhizomes have eyes (growth nodes) and aren’t rotting.
What if my indoor turmeric gets yellow leaves?
Yellow leaves usually mean overwatering or nutrient deficiency. Adjust care:
Drainage issue? Repot in fresh, well-draining soil (mix potting soil with perlite).
Nutrients low? Feed with a balanced liquid fertilizer (diluted to half-strength) every 4–6 weeks.
Pests? Check for aphids or fungus gnats—spray with neem oil if needed.
Can I grow turmeric indoors in winter?
Winter is perfect for indoor turmeric—just supplement light if days are short. Place near a sunny window and use a grow light if natural light fades below 6 hours/day. Keep humidity up (mist leaves or use a pebble tray) to combat dry indoor air.
Wrapping up and next steps
Growing turmeric indoors is a rewarding journey that brings a piece of the tropics right to your kitchen windowsill! 🌱 With the right setup—like bright light, consistent warmth, and a little patience—you’ll soon enjoy fresh, organic turmeric for cooking, remedies, or even gifting.
Start small, stay consistent, and soon you’ll be harvesting golden roots that rival store-bought quality.
Ready to take the next step? Experiment with flavors—try adding your homegrown turmeric to golden milk, curries, or smoothies. Or, if you’re feeling adventurous, share your success with friends or even start a tiny indoor herb garden for other spices! 🌟