
Tools
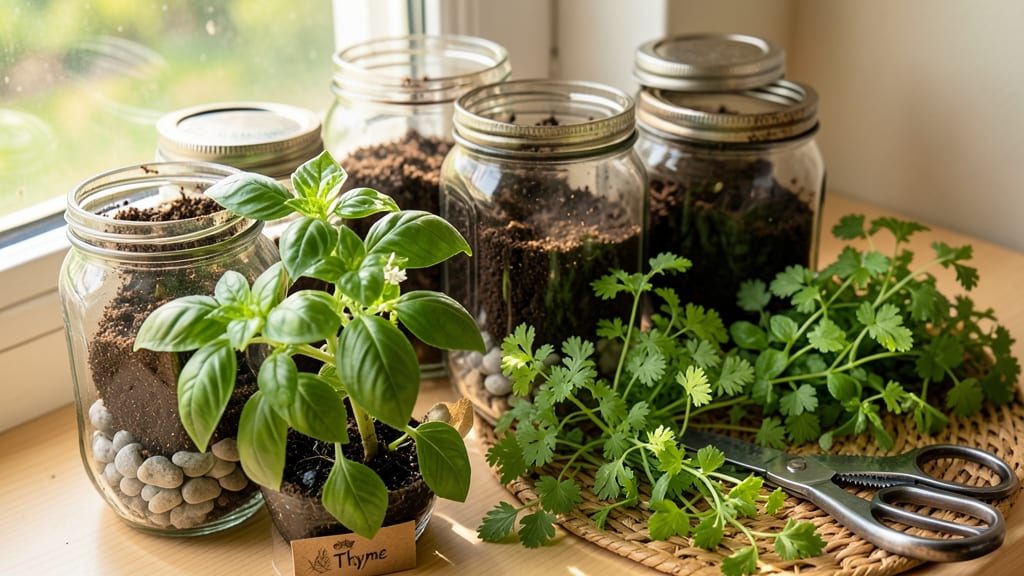
A mason jar indoor herb garden turns your kitchen windowsill into a fragrant, productive green space—simple enough to start today. 🌿 I’ve watched my basil and thyme grow from tiny seedlings to snippable stalks right above my stove, saving me trips to the store and giving my cooking a fresh, homegrown boost.
The magic is in the setup: clear jars let you watch roots grow, while the wide mouths make watering and harvesting effortless. You’ll need jars with lids (to keep humidity in), potting soil, and herbs that thrive in bright but indirect light—basil, mint, and parsley are the easiest starters.
Group them by sunlight needs, and soon you’ll have a living spice rack that doubles as decor. Within weeks, you’ll be harvesting fresh herbs for meals, and the jars will look like little terrariums. The best part? No green thumb required—just water, light, and a little patience.
Even my once-killed-off herbs are now thriving, and so will yours. This setup works year-round, whether you’re in a tiny apartment or a sprawling kitchen. Here’s how to get started without overcomplicating it.
📚 In This Guide
- What you need
- Instructions
- Tips and common mistakes
- Wrapping up and next steps
What you need
- ● Mason jars: 4–6 wide-mouth quart-sized jars (with lids, but you won’t need them for planting!)
- ● Herb seeds or seedlings: Choose fast-growing herbs like basil, mint, parsley, or chives (1–2 seeds per jar or 1 small seedling).
- ● Potting soil: Lightweight, well-draining organic potting mix (1 bag, ~1 cubic foot).
- ● Watering can or spray bottle: A fine-mist sprayer works best for gentle hydration.
- ● Scissors or knife: For trimming herbs or cutting drainage holes (if needed).
- ○ Optional: Small pebbles or gravel (½ cup) for drainage at the jar’s base.
- ● Label markers or tags: To keep track of your herbs (e.g., chalkboard labels or popsicle sticks).
- ○ Fertilizer (optional): A balanced liquid fertilizer (like fish emulsion) for a nutrient boost.
- ● Tray or saucer: To catch excess water and protect surfaces.
- ● Bright light source: A sunny windowsill (south-facing is ideal) or a grow light for 6+ hours/day.
Step-by-step instructions for creating a mason jar indoor herb garden
Here's the simple, foolproof method I use to grow fresh herbs in my kitchen—no green thumb required.
🪴 Step 1: Gather Your Supplies and Prep the Jars
You'll need 4 clean mason jars (pint or quart size), 4 herb plants (basil, parsley, chives, or thyme), potting soil, and a sharp knife. Rinse the jars thoroughly to remove any labels or residue—herbs hate lingering chemicals. I like to soak them in warm water for 5 minutes to ensure they're spotless.
Fill each jar about 3/4 full with potting soil, leaving space at the top for water. Tap the jar gently on the counter to settle the soil—this prevents air pockets that can suffocate roots. Leave the lids off for now; herbs need air circulation to thrive.
🌱 Step 2: Plant the Herbs and Water Gently
Remove each herb from its container and gently loosen the roots if they're tightly bound. Place the plant in the jar, pressing the soil around the base until it stands upright. The roots should sit just below the soil surface—burying the stem too deep can cause rot.
Water until the soil feels evenly moist but not soggy. I use a small watering can with a fine rose attachment to avoid disturbing the soil. Place the jars in a sunny spot near a kitchen window—6+ hours of sunlight daily is ideal. If your herbs start leaning toward the light, rotate the jars every few days for even growth.
💧 Step 3: Maintain Moisture and Light Consistently
Check the soil every 2-3 days—herbs in jars dry out faster than in pots. Water when the top inch of soil feels dry, but don’t let the soil stay wet longer than 24 hours. Overwatering is the #1 killer of mason jar gardens, so I always check with my finger before adding more water.
If you notice yellowing leaves, it’s usually a sign of too much water. Trim the affected leaves and adjust your watering schedule. For extra humidity (especially in dry climates), place the jars on a tray filled with 1 inch of water and pebbles—this mimics a natural moisture-rich environment without drowning the roots.
✂️ Step 4: Harvest and Prune for Continuous Growth
Once your herbs reach 3-4 inches tall, you can start harvesting! Snip the outer leaves with clean scissors, leaving the inner stems intact. This encourages bushier growth and keeps your herbs productive. I harvest basil every 2-3 weeks and parsley every 4-5 weeks—just don’t take more than 1/3 of the plant at once.
If your herbs look leggy or sparse, trim them back by 1/3 to encourage new growth. This is especially helpful in winter when light is weaker. With regular pruning, your mason jar garden will stay lush and full of flavor all year.
☀️ Step 5: Rotate and Refresh Seasonally
Every 3-4 months, swap out one or two herbs for a new variety—this keeps your garden exciting and prevents disease buildup in the soil. I rotate basil in summer for mint in winter, since mint thrives in cooler temperatures. When refreshing, rinse the jars again and replenish the soil to give your new herbs a fresh start.
Watch for pests like spider mites or aphids—if you spot them, wipe the leaves with a damp cloth and spray with neem oil (a natural, herb-safe pesticide). With proper care, your mason jar herb garden will stay vibrant and ready for cooking all season long.
Tips & tricks for perfect mason jar herb gardens
Here's what I wish I knew before starting my first mason jar herb garden—these little details make all the difference.
Light is Everything: While 6+ hours of sunlight is ideal, if your kitchen only gets a few hours, supplement with a grow light for 8-10 hours daily. I place mine about 6-12 inches above the jars—too close and you'll burn the leaves, too far and growth slows. A simple LED grow bulb works perfectly for this setup.
Soil Settling Secret: After filling your jars with potting soil, don't skip the tapping step! Gently tap the jar on the counter to settle the soil—this eliminates air pockets that can suffocate roots. I tap each jar 3-4 times until the soil feels firm but not compacted. This small step prevents future watering issues.
Root Health Check: When planting, make sure the roots are just below the soil surface—not buried too deep. If roots are exposed after planting, add a tiny bit more soil to cover them completely. I like to press the soil gently around the base to eliminate air gaps that can cause rot.
Harvesting Hack: Always use clean scissors or pruning shears when harvesting—dull blades can crush stems and damage your plants. I keep a small pair of scissors dedicated just to my herb garden. After harvesting, rinse the leaves under cool water to remove any soil particles before using in cooking.
Pro Tips for Mason Jar Indoor Herb Garden
- Here's what I wish I knew before starting my first mason jar herb garden—these little details make all the difference.
- Light is Everything: While 6+ hours of sunlight is ideal, if your kitchen only gets a few hours, supplement with a gr...
- Soil Settling Secret: After filling your jars with potting soil, don't skip the tapping step! Gently tap the jar on t...
Frequently asked questions
Got questions?
Here’s what you need to know before diving into your mason jar herb garden! Whether you’re a beginner or just want to troubleshoot, we’ve got you covered.
What herbs are best for a mason jar indoor garden?
Start with easygoing herbs like basil, parsley, chives, mint, or cilantro—they thrive in small spaces and don’t need deep roots. Avoid larger plants like rosemary (they need more room) unless you’re using a taller jar or container. Pro tip: Leafy herbs like thyme or oregano also do well in jars!
How long does it take for herbs to grow in a mason jar?
Most herbs sprout within 7–14 days, but full harvest-ready growth takes 4–6 weeks, depending on light and care. Basil and cilantro grow faster (3–4 weeks), while parsley may take longer (6+ weeks). Watch for new leaves! They’re your cue to snip and enjoy.
How often should I water my mason jar herbs?
Check soil moisture every 2–3 days—stick your finger in the top inch. If it’s dry, water until it drains from the jar’s bottom. Avoid overwatering! Empty the jar’s saucer after 10 minutes to prevent root rot. Herbs like mint need more moisture, while thyme prefers drier soil.
Can I use artificial light instead of sunlight?
Yes! If your kitchen lacks sunlight, use a grow light (LED or fluorescent) 6–8 inches above the jars for 12–16 hours daily. Place jars near a sunny window first to test growth—if they thrive, you can transition to artificial light. Rotate jars weekly for even growth.
What should I do if my herbs get pests or mold?
Pests (like aphids) or mold (fuzzy white/green spots) mean your jar needs a reset. Remove affected leaves immediately, then wipe the jar with a 50/50 water-vinegar mix. For pests, spray herbs with neem oil (diluted). Prevent future issues by ensuring good airflow and avoiding overwatering.
Still stuck?
Drop your question in the comments—we’re happy to help your green thumbs grow!
Wrapping up and next steps
Creating a mason jar indoor herb garden is more than just a trend—it’s a fresh, rewarding way to bring greenery into your kitchen while enjoying homegrown flavors. With minimal space and effort, you can harvest vibrant herbs year-round, saving money and adding a splash of life to your meals. 🌿
Ready to take the next step? Start with one jar, experiment with your favorite herbs, and watch your confidence (and harvests!) grow. Before you know it, you’ll be sharing jars with friends—or swapping recipes with pride!