
Flowers
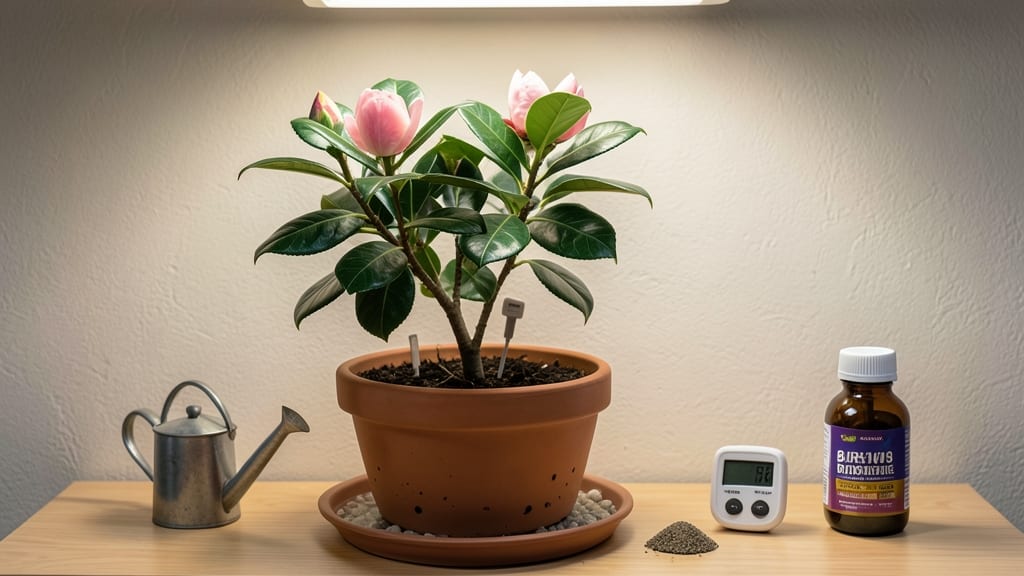
Growing camellias indoors lets you enjoy their lush blooms even when winter chills the outdoors. 🌿 I’ve watched these elegant plants transform a dim corner into a fragrant display—all it takes is the right light, soil, and a little patience.
The key isn’t complicated: match their natural tropical habits to your indoor space, and you’ll coax vibrant blooms year-round.
Start with a well-draining pot and acidic soil (pH 5.0-6.5), since camellias hate soggy roots. Place your plant near a south- or west-facing window where it gets 4-6 hours of indirect light daily—no harsh afternoon sun.
Humidity is the secret weapon: mist leaves regularly or set the pot on a tray of pebbles and water to mimic their misty native forests.
You’ll reward yourself with glossy leaves and stunning flowers by late winter or early spring, depending on the variety. Japanese and sasanqua camellias adapt best indoors, while larger hybrids may need extra care.
Prune lightly after blooming to shape the plant, and fertilize monthly in growing season with an acid-loving plant food.
Watch for yellow leaves (overwatering) or brown buds (drought stress)—both fix easily with adjusted care. With these basics, your camellia will thrive indoors for years, turning any room into a serene garden escape. Let’s get those blooms going!
📚 In This Guide
- What you need
- Instructions
- Tips and common mistakes
- Wrapping up and next steps
What you need
- ● Camellia plant: Choose a dwarf or semi-dwarf variety (e.g., Camellia japonica or Camellia sasanqua) for indoor growing. Look for a healthy plant with lush foliage and buds.
- ● Pot: A container with drainage holes (12–18 inches in diameter for mature plants). Terracotta or ceramic pots work well.
- ● Well-draining potting mix: A blend of peat moss, perlite, and pine bark (or a pre-mixed acid-loving plant soil). Aim for a pH of 5.0–6.0.
- ● Watering can with a narrow spout: Ensures precise watering without disturbing the soil.
- ● Humidity tray or pebble tray: Helps maintain 50–70% humidity (critical for camellias!).
- ○ Grow lights (optional but recommended): A full-spectrum LED grow light (12–16 hours/day) if natural light is insufficient.
- ● Fertilizer: A balanced, acid-loving plant fertilizer (e.g., 10-10-10 or 20-20-20) or a fish emulsion for organic growth.
- ● Pruning shears: Sharp, clean shears for shaping and maintaining the plant.
- ● Misting bottle: For daily humidity boosts (especially in dry climates).
- ● Soil pH test kit: Ensures your mix stays in the ideal acidic range.
- ● Support stake or trellis: If your camellia grows tall and needs structural support.
Step-by-step instructions for growing camellias indoors
Here's how to coax those lush, velvety blooms indoors—no greenhouse needed.
🌱 Step 1: Select the Right Camellia Variety and Pot
Choose a compact, dwarf camellia like 'Elegans' or 'Yuletide' for indoor growing—they stay manageable in pots. Avoid large varieties like 'Spring's Promise' unless you have a spacious conservatory. A 10-12 inch pot with drainage holes is ideal for your first plant, giving roots room to establish without overwhelming the space.
Camellias thrive in acidic soil (pH 5.0-6.5), so use a premium peat-based potting mix blended with 30% perlite or orchid bark. This prevents compaction and mimics their natural woodland habitat. I always add a handful of sulfur granules to the mix to maintain acidity—indoor plants lose this naturally over time.
☀️ Step 2: Position for Bright, Indirect Light
Place your camellia in the brightest window you have—south or west-facing is perfect. Direct midday sun will scorch the glossy leaves, so position it 3-4 feet back from the glass. You'll know the light is right when leaves stay deep green without yellowing or browning at the edges.
If your space only offers low light, supplement with a grow light (12-14 hours daily). LED bulbs with a cool white spectrum work best—avoid warm tones, which encourage leggy growth. Rotate the pot quarter-turn weekly so the plant grows evenly toward the light source.
💧 Step 3: Master the Watering Routine
Camellias hate soggy roots but also despise dry soil. Water when the top 1-2 inches feel dry to touch—stick your finger in to check. In winter, when growth slows, you'll water every 7-10 days; in summer, every 3-5 days. Always use room-temperature water (cold shocks roots) and pour until water drains freely from the bottom.
Here's the trick: Never let the plant sit in standing water. Empty the saucer 30 minutes after watering to prevent root rot. Yellowing leaves? You're either overwatering or underwatering—check the soil moisture before panicking. I use a moisture meter to avoid guesswork, especially in dry winter air.
✂️ Step 4: Prune and Fertilize for Blooms
After flowering, prune spent blooms back to the nearest leaf node using clean, sharp scissors. This encourages new growth and prevents leggy stems. Avoid heavy pruning—camellias bloom on old wood, so trim only to shape or remove dead branches. The best time to prune is late winter or early spring, just as buds begin to swell.
Feed with an acid-loving plant fertilizer (like 8-3-9 or 10-10-10) every 4-6 weeks during growing season (spring-fall). In winter, reduce to every 8-10 weeks. I mix fertilizer with water and apply it to moist (not soggy) soil to prevent root burn. Too much fertilizer causes salt buildup—flush the soil occasionally with plain water to cleanse it.
🌿 Step 5: Maintain Humidity and Watch for Pests
Indoor air is often too dry for camellias. Place the pot on a tray filled with pebbles and water (keep pebbles above water level) to create 60-70% humidity. Mist the leaves 2-3 times weekly with room-temperature water, but avoid wetting the blooms—this shortens their lifespan. You'll see new leaves stay plump and glossy when humidity is right.
Check the undersides of leaves weekly for pests—camellias attract spider mites and scale. Wipe leaves with a neem oil solution (1 tsp neem oil + 1 quart water) if you spot webbing or sticky residue. Isolate the plant immediately if pests appear, as they spread quickly to other houseplants. A strong blast of water can dislodge early infestations before they take hold.
Tips & tricks for perfect indoor camellia care
Between us, these little details make all the difference when growing camellias indoors.
Selection Tip: When choosing your compact camellia variety, look for plants with tight, glossy leaves and firm stems—these are signs of good health. Avoid plants with yellowing leaves or brown tips, which often indicate stress from poor growing conditions. I've found that 'Yuletide' varieties handle indoor conditions particularly well, with their smaller size and vibrant blooms.
Light Strategy: That 3-4 feet back from the window rule is critical—direct sun creates hot spots that burn leaves. If your camellia starts developing pale or crispy patches, it's getting too much direct light. For low-light situations, position the grow light 6-12 inches above the plant rather than directly touching it. The 12-14 hours of light should be spread evenly throughout the day, not just concentrated in morning or evening hours.
Soil Maintenance: The peat-perlite mix you use will compact over time, so refresh it every 1-2 years by mixing in 20% new potting soil with the existing mix. This prevents nutrient depletion and maintains proper drainage. I've learned the hard way that skipping this step leads to root-bound plants that struggle to bloom. The sulfur granules you add will maintain acidity for about 6 months, but test your soil pH annually—it's easy to do with a simple soil test kit from your garden center.
Watering Wisdom: The top 1-2 inches dry test works best when you check the soil at the same time each week. I've found that morning is ideal—it gives the roots time to absorb moisture before the day's heat. For extra insurance, especially in winter when indoor air is dry, water slightly less frequently but more thoroughly each time. The roots need that deep hydration to reach down and establish properly in the pot.
Pro Tips for Grow Camellias Indoors
- Between us, these little details make all the difference when growing camellias indoors.
- Selection Tip: When choosing your compact camellia variety, look for plants with tight, glossy leaves and firm stems—...
- Light Strategy: That 3-4 feet back from the window rule is critical—direct sun creates hot spots that burn leaves. If...
Frequently asked questions
Got questions about growing camellias indoors? You’re not alone! Here are answers to the most common queries to help you nurture your blooming beauty with confidence.
Can I grow camellias indoors from seeds?
While possible, it’s not recommended for beginners. Camellias grown from seeds take 3–5 years to bloom and often don’t match the parent plant’s traits. Instead, opt for bought plants or layering (a propagation method for cuttings) for faster, predictable results.
How long does it take for an indoor camellia to bloom?
With proper care, most indoor camellias bloom within 1–3 years. Patience is key—ensure they get bright, indirect light (like an east or south-facing window) and consistent moisture to encourage flowering. Pro tip: Fertilize lightly in spring/summer to boost growth!
Why are my camellia leaves yellowing?
Yellow leaves usually signal overwatering or nutrient deficiency. Check the soil—it should stay slightly moist but not soggy. If roots smell rotten, repot in fresh, well-draining mix. For yellowing between veins, it may be iron deficiency—try a chelated iron supplement.
Do indoor camellias need a winter dormancy period?
Yes! Mimic their natural cycle by reducing water slightly and lowering temps to 50–60°F (10–15°C) in winter. Avoid drafts or heat vents, and skip fertilizing during this time. This helps them rebloom vigorously in spring!
What’s a good alternative if camellias are too tricky?
If camellias seem high-maintenance, try these low-light, flowering indoor plants:
- African Violet – Thrives in bright indirect light, blooms year-round.
- Peace Lily – Tolerates low light and occasional neglect.
- Orchids (Phalaenopsis) – Easy care with stunning blooms.
Wrapping up and next steps
Growing camellias indoors is a rewarding way to enjoy their stunning blooms year-round—just remember, they thrive with bright, indirect light, consistent humidity, and patience! With the right care, you’ll soon be rewarded with lush foliage and breathtaking flowers that brighten any space. 🌸
Ready to take the next step? Start with a healthy camellia plant and give it the love it deserves—your indoor garden will thank you! For extra tips, check out our care guide or share your progress with fellow plant lovers. Happy growing! 🌱