
Size
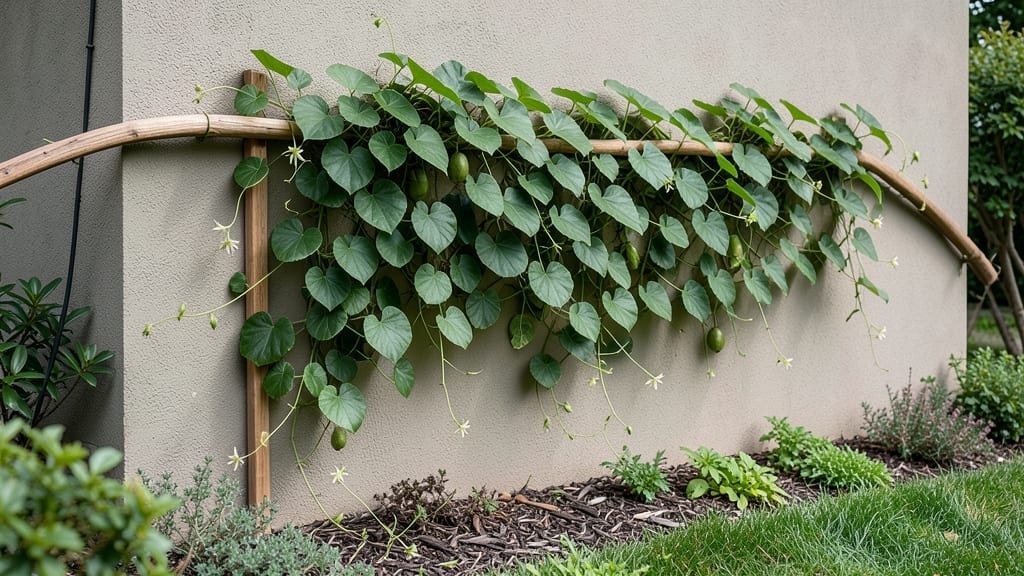
Growing kiwi indoors means sweet fruit and lush vines in just a few square feet. 🌱 I learned the hard way that not all kiwis thrive inside—hardy kiwi (Actinidia arguta) is your best bet for containers, while fuzzy kiwi (Actinidia deliciosa) needs a greenhouse.
The key is mimicking their natural climbing habits with sturdy supports and bright, indirect light.
You’ll need a 10-15 gallon container with drainage, well-draining potting mix, and a trellis or strong stakes for those vigorous vines to climb. Place it near a south- or west-facing window where it gets 6+ hours of sunlight daily, or supplement with a grow light.
The soil should stay moist but not soggy, and humidity levels above 50% will keep your plant happy—especially in dry winter air.
With proper care, you’ll see new growth within weeks and tiny flowers by spring. Pollination is tricky indoors, so hand-pollinate with a soft brush if you want fruit. Even without fruit, the glossy leaves and fragrant blossoms make it a stunning houseplant.
The real magic? Harvesting your own kiwis by next summer—right from your living room.
Troubleshooting is simple: yellow leaves mean too much water, brown tips mean dry air, and slow growth means more light. Start small with one plant, and you’ll have a thriving vine that doubles as decor. Here’s how to keep it flourishing all year.
📚 In This Guide
- What you need
- Instructions
- Tips and common mistakes
- Wrapping up and next steps
What you need
- ● Kiwi plant: A hardy kiwi vine (Actinidia deliciosa) or Actinidia arguta (small-fruited kiwi) from a nursery. Choose a female vine (for fruit) or a male vine (for pollination if growing multiple plants).
- ● Large container: A 15–20 gallon pot (minimum 18" deep) with drainage holes. Terracotta or fabric pots work best!
- ● High-quality potting mix: A well-draining, nutrient-rich mix (e.g., 60% potting soil + 30% compost + 10% perlite or coconut coir). Avoid garden soil—it compacts too easily!
- ● Support system: Trellis or sturdy stakes: A 6–8 ft tall trellis or 3–4 wooden stakes (1–2" diameter) to train vines vertically.
- ● Twine or soft plant ties: For securing vines as they grow.
- ● Fertilizer: Balanced fertilizer (10-10-10 or 20-20-20): Use every 4–6 weeks during growing season (spring–fall).
- ● Organic option: Compost tea or worm castings for a gentler boost.
- ● Pruning tools: Bypass pruners: For clean cuts on stems.
- ● Garden shears: For larger branches.
- ● Misting bottle or spray nozzle: Kiwi vines love humidity!
- ○ Grow lights (optional but helpful): A full-spectrum LED grow light (12–16 hours/day) if natural light is less than 6 hours/day.
- ● Self-watering pot: Keeps soil consistently moist without overwatering.
- ● Humidifier or pebble tray: Boosts humidity for tropical vines (aim for 50–70% humidity).
- ● Soil moisture meter: Prevents root rot by tracking hydration levels.
- ● Kiwi pollination kit: If growing Actinidia deliciosa, you’ll need a male vine nearby (or hand-pollinate with a small brush).
- ● Epsom salt: A monthly magnesium boost (1 tbsp per gallon of water) for lush foliage.
Step-by-step instructions for growing kiwi indoors
Here's how to cultivate sweet kiwi fruit from vines thriving in your home.
🌱 Step 1: Select and Prepare Your Kiwi Vine
Start with a hardy kiwi variety like 'Issai' or 'Arctic Kiwi'—these are self-pollinating and perfect for indoor growing. Look for a 1-year-old vine with 3-4 healthy stems and no signs of disease. Soak the roots in lukewarm water for 10-15 minutes before planting to encourage root growth.
Fill a 12-15 inch diameter pot with well-draining potting mix (avoid garden soil—it compacts too easily). Make a hole in the center and place the vine so the crown sits just above soil level. Press the soil gently around the roots to secure the plant without packing it down too firmly.
☀️ Step 2: Position for Maximum Light
Kiwi vines need 6-8 hours of bright, indirect sunlight daily—a south- or west-facing window is ideal. If natural light is insufficient, supplement with a grow light placed 12-18 inches above the plant. You’ll know the light is right when the leaves stay deep green and compact—no stretching or yellowing.
Rotate the pot a quarter turn weekly so the vine grows evenly toward the light. Avoid direct midday sun, which can scorch tender leaves. If you notice leaves curling or browning at the edges, move the plant slightly farther from the window.
💧 Step 3: Water and Maintain Humidity
Water when the top 1-2 inches of soil feel dry to the touch—kiwi vines hate soggy roots. Use room-temperature water and pour until it drains freely from the bottom. Empty the saucer after 10 minutes to prevent root rot. In dry climates, mist the leaves 2-3 times weekly or place the pot on a pebble tray with water to boost humidity.
Kiwi vines thrive in 60-75°F temperatures—keep them away from drafts, heaters, or air conditioning vents. If the air feels dry (like in winter), a small humidifier nearby helps prevent leaf drop. Watch for yellowing leaves, which often signal overwatering or low humidity.
✂️ Step 4: Prune and Train for Fruit Production
Prune in early spring to shape the vine and encourage fruiting. Cut back overly long stems to 12-18 inches, leaving 3-5 buds per stem. Remove any dead, yellow, or crossing branches—this improves airflow and fruit quality. Pinch off the first few flowers in the first year to strengthen the vine; it’ll reward you with more abundant fruit later.
Train the vine along a trellis or sturdy support to grow upward. As it matures, tie new growth gently to the trellis with soft plant ties. You’ll see small green flowers in spring—hand-pollinate them with a soft brush to ensure fruit set. If flowers drop without fruiting, the vine may need more sunlight or warmth.
🍈 Step 5: Harvest and Overwinter for Next Year
Kiwi fruit ripens in late fall to winter, typically 8-12 months after flowering. Harvest when the fruit detaches easily from the vine and smells sweet. Store in a cool, dark place (like a pantry) until fully ripe—unripe kiwis won’t soften like store-bought ones. Cut open a test fruit after 2-3 weeks; if the flesh is bright green and sweet, they’re ready.
In winter, reduce watering slightly but keep the soil moist (not soggy). If your vine drops leaves, it’s normal—kiwi vines are semi-deciduous. Trim back weak or tangled growth in late winter to prep for spring’s new flush. With patience, your indoor vine will produce harvests for years.
Tips & tricks for growing kiwi indoors
Real talk: Indoor kiwi growing is all about patience and precision. These tricks will help your vine thrive—and actually produce fruit—without the common pitfalls that trip up beginners.
Light is Everything: That 6-8 hours of bright, indirect light is non-negotiable. If your window isn't cutting it, invest in a quality LED grow light—those cheap ones won't cut it. I've seen vines stretch toward weak light like sad puppies, so test your setup first by placing the vine near the window for a day. If leaves look pale or leggy after 24 hours, you're not getting enough.
Root Soaking Secret: The 10-15 minute lukewarm water soak before planting isn't just busywork—it jumpstarts root growth. I've noticed my vines establish faster when I do this, especially if the roots look dry. Pro tip: Use filtered or dechlorinated water if possible, as chlorine can stress young roots. This small step makes all the difference in the first few critical weeks.
Pruning Payoff: Don't skip that early spring pruning! Cutting back overly long stems to 12-18 inches might seem harsh, but it forces the plant to put energy into stronger growth. I learned this the hard way—my first vine grew wild and produced tiny, sad-looking fruit. Now I prune aggressively in spring and get plump, sweet kiwis. Also, those 3-5 buds per stem? They're your future fruit, so leave them be.
Winter Survival: When your vine drops leaves in winter, don't panic—it's normal! But keep that soil just moist (not soggy) and reduce watering by about 20%. I've seen vines recover beautifully from winter dormancy when given this gentle care. The key is consistency: same temperature range (60-75°F), same indirect light exposure, just less water. Think of it as hibernation mode.
Pro Tips for Grow Kiwi Indoors
- Real talk: Indoor kiwi growing is all about patience and precision.
- Light is Everything: That 6-8 hours of bright, indirect light is non-negotiable.
- Root Soaking Secret: The 10-15 minute lukewarm water soak before planting isn't just busywork—it jumpstarts root growth.
Frequently asked questions
Got questions about growing kiwi indoors?
Here are answers to the most common ones—so you can enjoy homegrown kiwi without the guesswork!
Can I grow a kiwi plant indoors year-round?
Yes! Hardy kiwi varieties like Actinidia arguta (hardy kiwi) thrive indoors with proper care. Use a sunny window or grow lights (12+ hours/day) and keep temps between 50–75°F. Just ensure your plant gets a dormant winter period (cooler temps, less water) to mimic outdoor cycles.
How long does it take for an indoor kiwi plant to bear fruit?
Patience is key—indoor kiwi vines typically take 3–5 years to fruit, depending on variety and care. Some dwarf or self-pollinating types (like 'Issai') may fruit faster (2 years). Pro tip: Use a fan to pollinate flowers manually if bees aren’t an option!
What’s the best indoor kiwi variety for small spaces?
Opt for compact or self-fertile types:
- 'Issai' – Dwarf, self-pollinating, and fruit-bearing (great for pots!)
- 'Ken’s Red' – Hardy kiwi with smaller leaves and faster growth
- 'Ananasnaya' – Cold-hardy and productive in containers
Why aren’t my kiwi leaves turning yellow or dropping?
Yellow leaves usually signal overwatering or nutrient deficiency. Check:
- Water: Let soil dry 1–2 inches between waterings (kiwis hate soggy roots!).
- Nutrients: Feed with a balanced fertilizer (10-10-10) in spring/summer.
- Light: Brown edges? Move closer to sunlight or add grow lights.
Can I eat kiwis straight from the indoor plant?
Indoor-grown kiwis are just as edible as store-bought—sweeter and fresher. Wait until they’re soft to the touch and change color (green to brown for hardy kiwi). Fun fact: They’re packed with vitamin C, fiber, and antioxidants—perfect for smoothies or snacking!
Wrapping up and next steps
Growing kiwi indoors is a rewarding adventure that proves even small spaces can yield big results! 🌱 With the right light, support, and care, you’ll enjoy fresh, homegrown fruit year-round. Start small—plant a single vine, experiment with varieties, and let your indoor garden flourish.
Ready to take the next step? Pick a spot, gather your supplies, and get growing! Share your progress or ask questions—your indoor kiwi journey starts now.