
Container Gardens
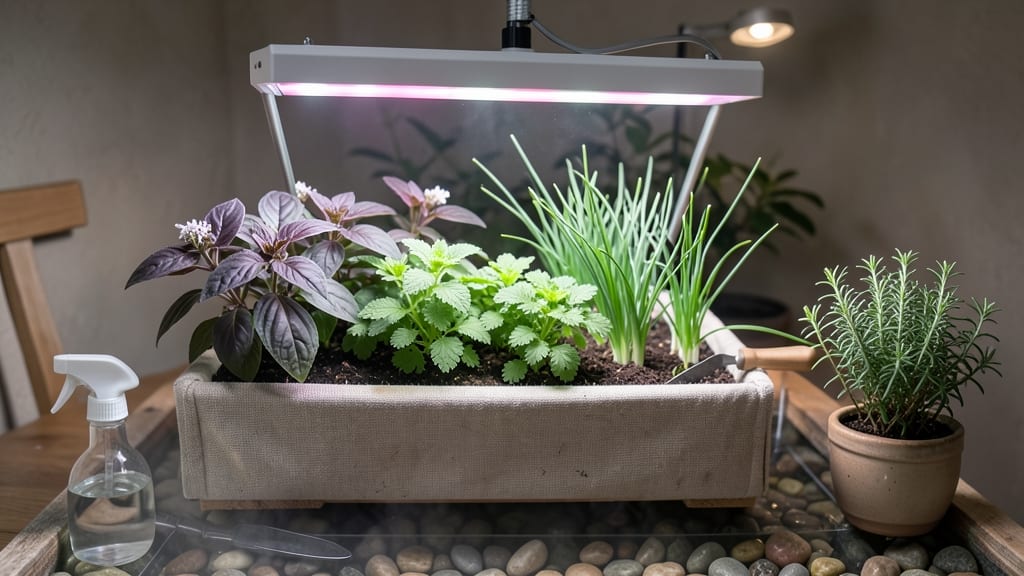
Your indoor garden bed transforms a tiny corner into a fragrant herb factory—no yard required. 🌿 I built mine after realizing my kitchen windowsill couldn’t handle all the basil I wanted, and now I harvest fresh cilantro, thyme, and parsley year-round without stepping outside.
The secret lies in vertical space: stackable planters or wall-mounted beds let you grow 10x more than a single shelf. Start with a 12-inch-deep container for herbs (succulents need shallower), drill drainage holes if your planter doesn’t have them, and use lightweight potting mix that stays moist but not soggy.
By week 6, you’ll have lush, vibrant green plants ready for cooking—no wilting, no pests, just endless freshness. The setup costs under $50 and fits in apartments, kitchens, or even bathrooms with the right lighting. This works for microgreens, salad greens, and even dwarf fruit trees. Let’s design yours!
📚 In This Guide
- What you need
- Instructions
- Tips and common mistakes
- Wrapping up and next steps
What you need
- ● Container or Planter: Depth: At least 6–12 inches (deeper for root veggies like carrots or potatoes)
- ● Size: 12"–18" wide (adjust based on herbs; e.g., basil thrives in 6" pots)
- ● Material: Fabric grow bags, wood, plastic, or metal (ensure drainage holes!)
- ● Growing Medium: 6–8 quarts of high-quality potting mix (avoid garden soil—it compacts!)
- ○ Perlite or vermiculite (½ cup) for aeration (optional but recommended)
- ● Compost or worm castings (1 cup) for nutrients
- ● Drainage: Pebbles or broken pottery (1–2 inches) at the container’s base
- ● Drainage tray (to catch spills and prevent water damage)
- ● Herb Starters: Young plants or seeds (choose compact herbs like basil, thyme, or parsley)
- ● 3–5 plants per 12" container (space them 4–6" apart)
- ● Trowel or small hand shovel (for planting)
- ● Spray bottle (gentle watering for seedlings)
- ● pH testing kit (ensure soil is 6.0–7.0 for herbs)
- ● Self-watering system (e.g., wicking fabric or a drip tray)
- ● LED grow lights (if natural light is limited; 12–16 hours/day)
- ● 🔥 Light Check: Place your garden bed near a south-facing window or under grow lights.
- ● 🌡️ Temperature: Most herbs love 65–75°F—avoid drafty spots!
- ● ✨ Style It Up: Use decorative trays or stackable planters to save space and add flair.
Step-by-Step design for a vertical indoor herb garden
Here's how to create a space-saving, high-yield herb garden that thrives indoors year-round.
🪴 Step 1: Choose and Prepare Your Vertical Structure
Select a sturdy frame—wall-mounted pallet shelves, a tiered wooden planter, or a freestanding vertical pocket planter all work well. I prefer 2-3 tiered shelves because they maximize vertical space while keeping maintenance manageable. Ensure each shelf has proper drainage holes or use waterproof trays underneath to catch excess moisture.
Clean the structure thoroughly with a 10% bleach solution to prevent mold or bacterial buildup. Let it dry completely before adding soil. If using a pre-made vertical planter, check the manufacturer’s weight limit—herbs are lightweight, but soil gets heavy when wet. For DIY wooden frames, line the bottom with landscape fabric to prevent soil from falling through gaps.
🌱 Step 2: Layer Soil and Select Complementary Herbs
Fill each shelf or pocket with high-quality potting mix—avoid garden soil, which compacts and suffocates roots. I blend two parts potting mix with one part perlite for better drainage. For a 4-tier system, you’ll need about 1 gallon of mix per shelf to ensure roots have room to spread without crowding.
Choose herbs with similar light and water needs to simplify care. Basil, parsley, and chives thrive together under bright light, while mint and thyme tolerate slightly lower light. Plant 3-4 herbs per shelf, spacing them 4-6 inches apart to allow airflow and prevent fungal diseases. Press seeds or seedlings gently into the soil—no need to bury them deeply.
☀️ Step 3: Position for Optimal Light and Humidity
Place your vertical garden near a south-facing window where it receives at least 6 hours of direct sunlight daily. If natural light is insufficient, supplement with a full-spectrum LED grow light positioned 6-12 inches above the top shelf. Adjust the light height as herbs grow to maintain consistent coverage—too close causes leaf burn, too far leads to leggy growth.
Herbs appreciate moderate humidity, especially in dry indoor air. Mist the leaves lightly every 2-3 days or place a shallow tray of water with pebbles beneath the shelves to increase ambient moisture. Watch for yellowing leaves or crispy edges—these are signs the air is too dry, and your herbs need more humidity or less direct light.
💧 Step 4: Water and Maintain for Long-Term Growth
Water from the bottom up by placing the entire structure in a tray of 1 inch of water for 10-15 minutes. This ensures even moisture distribution without over-saturating the top layers. Check soil moisture by pressing your finger 1 inch deep—water when it feels dry but not bone-dry. Overwatering is the fastest way to kill indoor herbs, so let the top layer dry slightly between waterings.
Fertilize every 4-6 weeks with a balanced liquid fertilizer (10-10-10) diluted to half-strength. I skip fertilizer in winter when growth slows, but resume in spring to encourage new foliage. Prune herbs regularly by snipping stems just above a leaf node—this encourages bushier growth and prevents legginess. Harvest leaves in the morning for the strongest flavor and to avoid disrupting the plant’s natural rhythm.
✂️ Step 5: Rotate and Refresh for Seasonal Success
Rotate your vertical garden a quarter turn weekly so all shelves receive even light exposure. This prevents herbs from leaning toward the window and ensures uniform growth. In late winter or early spring, refresh the soil by removing the top 2 inches of old mix and replacing it with fresh potting mix. This replenishes nutrients and improves drainage for the new growing season.
Watch for pests like aphids or spider mites, which thrive in indoor environments. Wipe leaves with a soapy water solution (1 tsp mild dish soap per quart of water) if you spot tiny webs or sticky residue. With proper care, your vertical herb garden will stay productive for years, providing fresh flavors and lush greenery without taking up floor space.
Tips & tricks for perfect vertical herb gardens
Here's what I've learned after keeping my own vertical herb garden for years—these tricks will help you avoid common pitfalls and maximize your harvest.
Drainage is Non-Negotiable: In Step 1, when preparing your vertical structure, I can't stress enough how critical proper drainage is. If you're using a DIY wooden frame, drill extra holes along the bottom edges—don't just rely on the manufacturer's specifications. I've seen many gardeners assume their setup is fine only to have roots rot because water pooled in hidden corners. For extra insurance, add a layer of landscape fabric over the drainage holes before adding soil to prevent clogging.
Light Quality Matters More Than Quantity: While we focus on the 6 hours of direct sunlight in Step 3, remember that quality matters just as much. South-facing windows provide the best light spectrum for herbs, but if you're using a grow light, invest in a full-spectrum LED rather than a basic white bulb. I've noticed my basil grows significantly more robust under full-spectrum lighting, even with slightly less total hours. Position your light so it covers the entire garden evenly—uneven light causes herbs to grow toward the light source, creating lopsided plants.
Soil Refresh Timing is Strategic: The instructions mention refreshing soil in late winter or early spring, but here's the secret: I actually do a partial refresh every 3 months by removing just 1 inch of old soil and replacing it with fresh mix. This keeps nutrients balanced without disrupting the established root systems. The top 2 inches you remove in spring is perfect for this quarterly maintenance—just save it in a bag and use it for your next full refresh. This continuous renewal prevents nutrient depletion and keeps your herbs thriving year-round.
Pest Prevention Starts with Cleanliness: When cleaning your structure with the 10% bleach solution in Step 1, don't stop there. I also recommend wiping down all surfaces with rubbing alcohol after cleaning. This extra step eliminates any residual bacteria that might survive the bleach wash. For ongoing prevention, I've found that rotating your herbs weekly (as mentioned in Step 5) disrupts pest life cycles—aphids and spider mites can't establish colonies when their food sources keep moving. This simple rotation also prevents fungal diseases by improving air circulation around all plants.
Pro Tips for Indoor Garden Bed
- Here's what I've learned after keeping my own vertical herb garden for years—these tricks will help you avoid common ...
- Drainage is Non-Negotiable: In Step 1, when preparing your vertical structure, I can't stress enough how critical pro...
- Light Quality Matters More Than Quantity: While we focus on the 6 hours of direct sunlight in Step 3, remember that q...
Frequently asked questions
Got questions about indoor garden beds?
Here are answers to the most common ones to help you grow herbs year-round with confidence!
What’s the best location for an indoor garden bed?
Place your indoor garden bed near a south-facing window (or under grow lights) for 6–8 hours of sunlight daily. Avoid drafts, air conditioning vents, or direct heat sources. A kitchen windowsill or a dedicated grow station works best for herbs like basil, mint, and parsley.
How long does it take for herbs to grow in an indoor garden bed?
Most herbs sprout within 7–14 days and reach harvestable size in 4–8 weeks, depending on the variety. Fast growers like cilantro and chives may be ready in 3–4 weeks, while slower ones like rosemary take 8–12 weeks. Prune regularly to encourage bushier growth!
How often should I water an indoor garden bed?
Check soil moisture daily—herbs need water when the top inch feels dry. Overwatering is common! Use a self-watering planter or place a tray under pots to catch excess water. Most herbs prefer moderate moisture (avoid soggy soil). A spray bottle works well for delicate leaves like basil.
Can I use regular potting soil for an indoor garden bed?
Not quite! Opt for a lightweight, well-draining mix like cactus/succulent soil or a herb-specific blend (50% potting soil + 50% perlite/pumice). Regular soil retains too much moisture, risking root rot. Add a slow-release fertilizer at planting for a nutrient boost.
What should I do if my herbs get pests or diseases?
Isolate affected plants immediately. Common fixes:
- Spider mites/aphids: Wipe leaves with neem oil or a soapy water spray (1 tsp mild soap per quart of water).
- Fungal issues (e.g., powdery mildew): Improve airflow, reduce watering, and spray with baking soda solution (1 tsp baking soda + 1 quart water + few drops of soap).
- Yellowing leaves: Check for overwatering or nutrient deficiency—adjust care or fertilize lightly.
How do I extend the life of my indoor garden bed?
Rotate herbs seasonally (e.g., swap heat-loving basil in summer for cold-hardy parsley in winter). Repurpose containers—clean and reuse pots for new plants. Every 3–6 months, refresh soil to prevent nutrient depletion. Prune herbs regularly to encourage regrowth and maximize space!
Wrapping up and next steps
Creating an indoor garden bed for year-round herbs is a rewarding way to bring fresh greens into your home while maximizing limited space. Whether you’re a seasoned gardener or just starting out, this vertical approach makes growing herbs easier, cleaner, and more accessible—no matter the season! 🌱
The key takeaway? With the right materials, a little creativity, and consistent care, you can enjoy a thriving herb garden that’s as beautiful as it is functional.
Ready to take the next step? Start small—pick one or two herbs to begin, monitor their progress, and gradually expand your indoor oasis. Happy gardening! 🌿