
Container Gardens
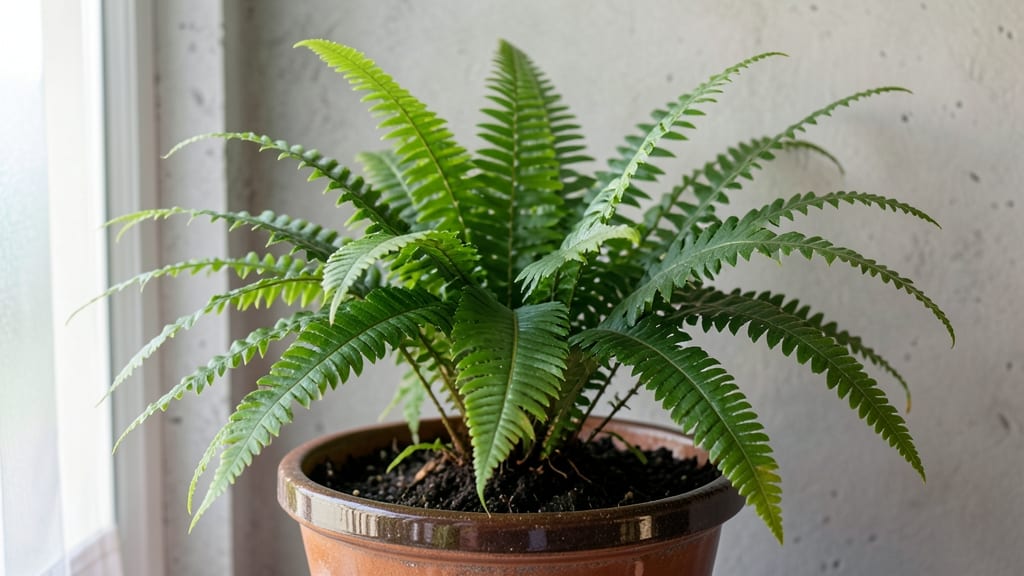
Your Kimberly Queen fern indoors can stay shockingly lush all year with just three smart trimming moves. 🌿 I’ve learned the hard way—over-trimming turns these ferns into sad, scraggly shadows, while the right cuts keep them bushy and vibrant. The secret lies in timing, tools, and knowing when to stop.
Start with bright, indirect light—these ferns tolerate low light but truly thrive near east or north windows. Water when the top inch of soil feels dry, and use room-temperature water to avoid shocking the roots.
Humidity is key: mist daily or place the pot on a pebble tray to mimic their jungle origins.
Those feathery fronds? Trim them back by one-third in early spring to encourage fresh growth, and snip any brown or crispy tips year-round. The result? A fern that looks like it’s straight from a botanical garden, not your living room.
Even black thumbs can master this—just avoid fertilizing in winter and watch for spider mites on the undersides of fronds. With these tweaks, your Kimberly Queen will be the green showstopper of your space.
📚 In This Guide
- What you need
- Instructions
- Tips and common mistakes
- Wrapping up and next steps
What you need
- ● Kimberly Queen Fern: 1 healthy plant (check for lush, green fronds and no brown spots)
- ● Pot: 1 container with drainage holes (6–8 inches in diameter for mature plants; 4–6 inches for smaller ones)
- ● Potting Mix: 1 bag of well-draining, peat-based or orchid mix (avoid heavy garden soil)
- ● Watering Can or Spray Bottle: 1 (for gentle hydration—ferns hate soggy roots!)
- ○ Humidity Tray or Pebbles: 1 (optional but helpful for maintaining moisture levels)
- ● Fertilizer: 1 balanced liquid fertilizer (10-10-10 or similar, diluted to half-strength)
- ● Scissors or Pruners: 1 pair (sterilized with rubbing alcohol for trimming)
- ● Grow Lights: 1–2 LED or fluorescent lights (if natural light is limited)
- ● Moss or Sphagnum: 1 small bag (for extra humidity and aesthetic appeal)
- ● Decorative Pot: 1 outer cache pot (for a polished look while keeping drainage intact)
- ● Plant Stand or Shelf: 1 (to elevate the pot and improve air circulation)
Simple trimming guide for your Kimberly Queen fern
Here’s how to keep your fern thriving with minimal effort—no green thumb required.
✂️ Step 1: Identify and Trim Dead or Brown Fronds
Start by inspecting your Kimberly Queen fern for any fronds that have turned crispy, yellow, or brown. These are dead and won’t recover—removing them prevents energy drain from the plant. Use clean, sharp scissors or pruning shears to snip the frond at the base, just above where it meets the crown.
I like to work in natural light so I can see exactly where the frond meets the stem. Cut cleanly at a 45-degree angle to avoid tearing the tissue. If a frond is only partially brown, you can trim just the damaged section, but it’s easier to remove the whole frond if it’s mostly dead.
🌿 Step 2: Prune Overgrown or Leggy Growth
The Kimberly Queen fern grows quickly, and if it gets too leggy or crowded, it loses its lush, full appearance. Look for fronds that are stretching too far from the center or growing in a way that makes the plant look sparse. With your shears, trim these back to just above a set of healthy leaves or a leaf node.
This isn’t about drastic cuts—think of it as giving your fern a little haircut to encourage bushier growth. After trimming, you’ll notice new fronds emerging from the center, filling in any gaps. If you’re unsure where to cut, err on the side of leaving a little more frond—your plant will bounce back quickly.
💧 Step 3: Refresh the Fern’s Shape for Fullness
Every few months, give your Kimberly Queen fern a light shaping trim to maintain its full, rounded form. Focus on the outer fronds—trim the tips of the longest ones by about one-third to encourage denser growth. This also helps the plant focus its energy on producing fresh, vibrant fronds rather than stretching.
Here’s the thing—your fern will tell you when it needs this step. If it starts looking a little sparse or the fronds are leaning too much in one direction, it’s time for a refresh. Work slowly, and don’t worry about perfection. The goal is to keep the plant looking lush and healthy, not like a meticulously pruned topiary.
☀️ Step 4: Clean Up and Encourage New Growth
After trimming, take a moment to tidy up any debris or fallen fronds around the base of your plant. This keeps pests away and prevents rot. Once you’ve finished, give your fern a light misting with room-temperature water to help it recover from the pruning.
Within a few weeks, you’ll see new fronds emerging from the center, and your Kimberly Queen will look fuller than ever. This is the moment that matters: your fern isn’t just surviving—it’s thriving. Keep it in bright, indirect light and maintain consistent moisture, and you’ll have a lush, year-round green beauty with minimal effort.
Tips & tricks for perfect Kimberly Queen fern care
Here's what nobody tells you about keeping your fern looking fresh without the fuss.
Tool Selection: Don't use dull scissors or garden shears—they crush delicate fronds and create jagged cuts that invite disease. Invest in a pair of clean, sharp pruning shears specifically for your fern. I keep mine in a small container with rubbing alcohol between uses to prevent cross-contamination. The clean cut at a 45-degree angle (as mentioned in Step 1) is crucial for healthy regrowth.
Seasonal Timing: The best time to refresh your fern's shape (Step 3) is during its active growing season—spring and summer. In winter, when growth slows, focus only on removing dead fronds (Step 1). I've learned this the hard way after over-trimming in winter and watching my fern struggle to recover. The plant's natural growth cycle should guide your trimming schedule.
Visual Growth Cues: Your fern will tell you when it's ready for a refresh. Look for these signs before trimming: fronds leaning heavily to one side, new growth emerging from the center but not filling gaps, or fronds stretching more than 6 inches beyond the plant's natural shape. These are clear indicators it's time for Step 3 shaping. The goal is to maintain that full, rounded form without overdoing it.
Pro Tips for Kimberly Queen Fern Indoors
- Here's what nobody tells you about keeping your fern looking fresh without the fuss.
- Tool Selection: Don't use dull scissors or garden shears—they crush delicate fronds and create jagged cuts that invit...
- Seasonal Timing: The best time to refresh your fern's shape (Step 3) is during its active growing season—spring and s...
Frequently asked questions
Got questions about keeping your Kimberly Queen Fern thriving indoors? Here are some of the most common ones—and their easy fixes!
How often should I trim my Kimberly Queen Fern?
Trim your Kimberly Queen Fern every 3-4 months to encourage bushier growth. Focus on removing yellow or brown fronds first, then lightly shape the plant by cutting back leggy stems to just above a leaf node. Pro tip: Use clean, sharp scissors to avoid damaging the plant!
Can I propagate my Kimberly Queen Fern from cuttings?
Yes!
Snip healthy fronds just below a node, remove the lower leaves, and place the cutting in water or moist sphagnum moss. Keep it in bright, indirect light, and roots should appear in 4-6 weeks. Pro tip: Use a rooting hormone for faster success!
Why are my Kimberly Queen Fern’s fronds turning brown?
Brown fronds usually mean overwatering or low humidity. Let the top inch of soil dry out between waterings, and mist the fronds regularly. If the air is too dry (common indoors), place a pebble tray under the pot or group plants together to boost humidity.
Is direct sunlight bad for Kimberly Queen Ferns?
Yes!
Direct sunlight can scorch the delicate fronds. Keep your Kimberly Queen Fern in bright, indirect light, like near an east-facing window. If leaves look pale, it might need more light—but never harsh, direct rays.
What’s a good alternative if I can’t find a Kimberly Queen Fern?
Try these low-maintenance, lush alternatives:
- Boston Fern – Hardy and thrives in shade.
- Maidenhair Fern – Elegant and loves humidity.
- Staghorn Fern – Unique texture, great for mounting.
All three love similar care to the Kimberly Queen Fern!
Wrapping up and next steps
Growing a Kimberly Queen Fern indoors is a rewarding way to bring lush, tropical beauty into your home—with just a few simple trimming tips! 🌿 Remember, the key is consistent care: prune regularly to encourage new growth, keep humidity levels up, and avoid overwatering.
With patience and attention, your fern will thrive year-round, becoming a stunning centerpiece for any space.
Ready to level up your indoor garden? Start small:
- Pick one tip from this guide and try it this week.
- Snap a photo of your fern’s progress—you’ll love watching it flourish!