
Propagation
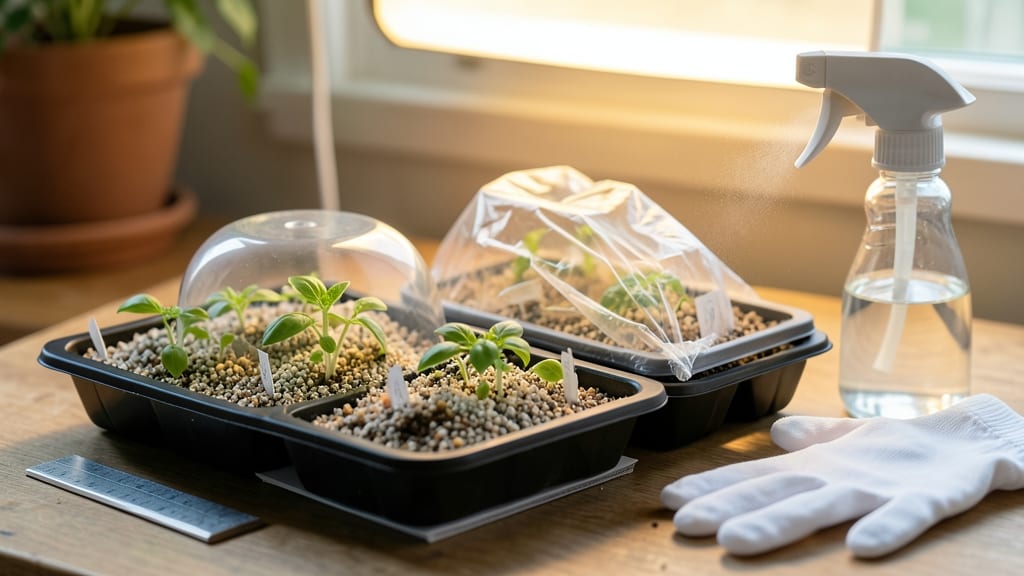
Germinating seeds quickly indoors isn't just about patience—it's about the right technique. ✨ The speed-soak method cuts weeks off your waiting time by breaking dormancy before planting, and I've used it to get seedlings popping in half the usual time.
What most guides skip is how to combine soaking with bottom heat for maximum speed, which is where the real magic happens.
You'll need just a few supplies: seed-starting mix, containers, a spray bottle, and a heat mat (or even a warm spot near your fridge). The trick lies in prepping seeds properly—whether through soaking, scarification, or both—before giving them the cozy, moist environment they crave.
Most seeds respond within 24-72 hours when done right, though some stubborn varieties may take a few extra days.
What you end up with are sturdy, uniform seedlings ready for transplanting weeks ahead of store-bought plants. The roots stay strong, the stems stay stocky, and you avoid the dreaded leggy seedlings that come from poor light conditions.
This method works for tomatoes, peppers, herbs—anything you're eager to get growing early.
Even experienced gardeners hit snags with mold or uneven sprouting, but the fixes are simple. A little ventilation goes a long way, and adjusting moisture levels prevents most issues.
Once you master this, you'll be starting seeds months before your last frost with confidence—and watching those first green shoots emerge feels like a small miracle every time.
📚 In This Guide
- What you need
- Instructions
- Tips and common mistakes
- Wrapping up and next steps
What you need
- ● Seeds: Choose fresh, high-quality seeds (check the packet for germination instructions). Quantity: Adjust based on your project—start with 5–10 seeds for testing!
- ● Germination container: Small glass jar (8–16 oz) with a lid (or a breathable cloth lid), or
- ● A seedling tray with a clear dome lid (for larger batches).
- ● Water: Room-temperature, chlorine-free water (use filtered or bottled if tap water is treated). Quantity: Enough to fully submerge seeds (e.g., 1 cup for a jar).
- ○ Paper towels or germination sheets: 2–3 sheets (unbleached, seed-safe). Optional: Use a seedling mat for humidity control.
- ● Plastic wrap or breathable lid: To retain moisture without drowning seeds.
- ● Spray bottle (small): For gentle misting (if using a tray instead of soaking).
- ● Permanent marker: To label containers (trust us, you’ll thank us later!).
- ● Seedling heat mat: Keeps seeds warm (70–85°F) for faster germination.
- ● Grow lights or sunny windowsill: Ensure 12+ hours of light post-germination.
- ● Humidity dome: For trays to lock in moisture.
- ● Fungicide (diluted): Prevents mold in high-humidity setups.
- ● Notebook: Track seed types, soak times, and sprouting dates for future reference!
Step-by-Step instructions for speed-soaking seeds indoors
Here's the method I rely on to cut germination time nearly in half—no special equipment needed.
🌱 Step 1: Prep Seeds with a Warm Water Soak
The speed-soak method starts with breaking the seed's natural dormancy barrier. Fill a shallow dish with lukewarm water (around 80°F) and add your seeds. Most gardeners overlook this step, but it softens the seed coat and speeds up water absorption by 24-48 hours. I use a non-metallic bowl to prevent any chemical reactions that could inhibit germination.
Let the seeds soak for 8-12 hours—no longer, or they risk rotting before sprouting. You'll see some seeds swell visibly, while others may float. That's normal—only the viable ones will sink and plump up. After soaking, drain the water completely through a fine mesh strainer, then gently blot seeds dry with a paper towel.
💧 Step 2: Set Up Your Germination Station
Line a seed tray with a damp paper towel instead of soil—this creates ideal moisture conditions while preventing damping-off. I fold the towel to create a snug fit, then mist it lightly until evenly damp but not dripping. Place the tray on a heat mat set to 75-80°F, which mimics spring soil temperatures and accelerates germination.
Arrange seeds in a single layer, spacing them ½ inch apart to prevent crowding. Cover the tray with clear plastic wrap or a humidity dome to trap warmth and moisture. Check daily for condensation—if you see droplets forming, remove the cover for 10-15 minutes to prevent fungal growth. This setup keeps humidity at 90%+ while allowing air circulation.
☀️ Step 3: Monitor for Sprouting and Transplant Prep
Germination typically occurs within 3-5 days (versus the usual 7-14 days). Watch for the radicle (first white root) to appear, followed by the shoot breaking through the seed coat. Once sprouts reach ¼ inch tall and show first true leaves, they're ready to transplant. I use a small spoon to carefully lift each seedling by its leaves, avoiding root damage.
Fill your seed-starting containers with the pre-moistened potting mix (from your materials list) and make small holes with a pencil. Gently press each seedling into the hole, ensuring the soil line matches what it had in the germination tray. Firm the soil lightly around the base—this prevents air pockets that could strangle young roots. Water gently from the bottom to encourage downward root growth.
⏰ Step 4: Provide Optimal Light and Care
Move seedlings to a bright location with 14-16 hours of light daily, using a grow light if natural light is insufficient. I position the light 2-3 inches above the seedlings and raise it as they grow. Without enough light, seedlings become leggy and weak—look for thick stems and dark green leaves as signs of healthy growth.
Water only when the top inch of soil feels dry, using a spray bottle to avoid disturbing the soil. Overwatering at this stage is the #1 killer of young seedlings. After 7-10 days of established growth, you can transition to bottom-watering by placing the tray in a shallow dish of water for 10 minutes. This encourages deeper root systems and prevents surface evaporation.
Tips & tricks for perfect speed-soak seed germination
These game-changing strategies will help you maximize your germination success and avoid common pitfalls that slow down results.
Water Temperature Precision: While 80°F is ideal for the warm water soak in Step 1, I've found that using a thermometer ensures consistency—especially if you're in a cooler climate. If your tap water runs cold, let it sit in the sun for 20 minutes before using. For hot climates, let it cool slightly after boiling to avoid shocking the seeds. The goal is to mimic spring soil temperatures that naturally trigger germination.
Seed Viability Test: Before investing time in Step 1, perform a quick viability test on a small sample: place 10 seeds between damp paper towels in a sealed bag for 24 hours. If fewer than 50% sprout, your seeds may need stratification (cold treatment) or may be too old. This simple check saves you from waiting weeks for seeds that might never sprout.
Humidity Management: The 90%+ humidity in Step 2 is critical, but too much condensation can lead to fungal issues. I've learned to check the plastic wrap daily—if you see water droplets forming, remove the cover for exactly 10-15 minutes to allow air circulation. This prevents damping-off while maintaining optimal moisture levels for root development.
Light Transition Strategy: When moving seedlings to 14-16 hours of light in Step 4, I recommend a gradual transition. Start with 12 hours on day 1, then increase by 1 hour daily. This prevents shock to young seedlings that haven't developed their protective pigments yet. Use a timer for your grow light to maintain consistency—seedlings grow best with predictable light cycles.
Pro Tips for Germinate Seeds Quickly Indoors
- These game-changing strategies will help you maximize your germination success and avoid common pitfalls that slow do...
- Water Temperature Precision: While 80°F is ideal for the warm water soak in Step 1, I've found that using a thermomet...
- Seed Viability Test: Before investing time in Step 1, perform a quick viability test on a small sample: place 10 seed...
Frequently asked questions
Got questions about speeding up seed germination indoors?
You’re not alone! Here are answers to the most common concerns—so you can get those sprouts growing fast.
How long does the speed-soak method actually speed up germination?
The speed-soak method can cut germination time by 30-50% compared to dry sowing. For example, beans that normally sprout in 7–10 days might appear in 3–5 days. Fast-germinating seeds (like radishes or lettuce) may even pop up in just 2–3 days!
Can I over-soak seeds and kill them?
Yes—over-soaking (beyond 8–12 hours) can cause seeds to rot or suffocate. Most seeds need just enough moisture to plump up (like a prune!). After soaking, rinse and plant them immediately to avoid mold. Pro tip: Use filtered or room-temp water—no chlorine or hot water!
What’s the best temperature for fast germination?
Most seeds thrive between 65–75°F (18–24°C), but heat-loving varieties (like peppers or tomatoes) may need 80–85°F (27–29°C). Use a seedling heat mat ($10–$20) or place trays on top of your fridge for consistent warmth. Avoid cold windowsills—chilly temps slow growth.
Do I need special lights for indoor germination?
Not yet! Seeds only need light after they’ve sprouted (when the seed leaves appear). For the first 5–7 days, keep them in a dark, warm spot (like a closet). Once sprouted, move them under grow lights or a sunny windowsill (6+ hours/day).
What if my seeds won’t germinate after soaking?
Try these fixes:
- Check viability: Float seeds in water—if most sink, they’re good; if they float, they’re likely dead.
- Scarify hard shells: Rub seeds gently with sandpaper (for tomatoes/peppers) or nick them with a knife.
- Adjust moisture: Use a spray bottle to keep soil damp (not soggy) and cover trays with plastic wrap to retain humidity.
Wrapping up and next steps
Germinating seeds indoors with the speed-soak method is your fast track to lush, thriving plants—no patience required! 🌱 By following these steps, you’ll bypass the wait and watch your seeds sprout in days instead of weeks.
Whether you’re a green thumb or a curious beginner, this technique makes growing your own plants effortlessly exciting.
Now that you’re armed with the know-how, grab those seeds and get started! Once your sprouts peek through, it’s time to transplant them into soil and keep nurturing their growth. Happy gardening—your future harvest is waiting! 🌿✨