
Container Gardens
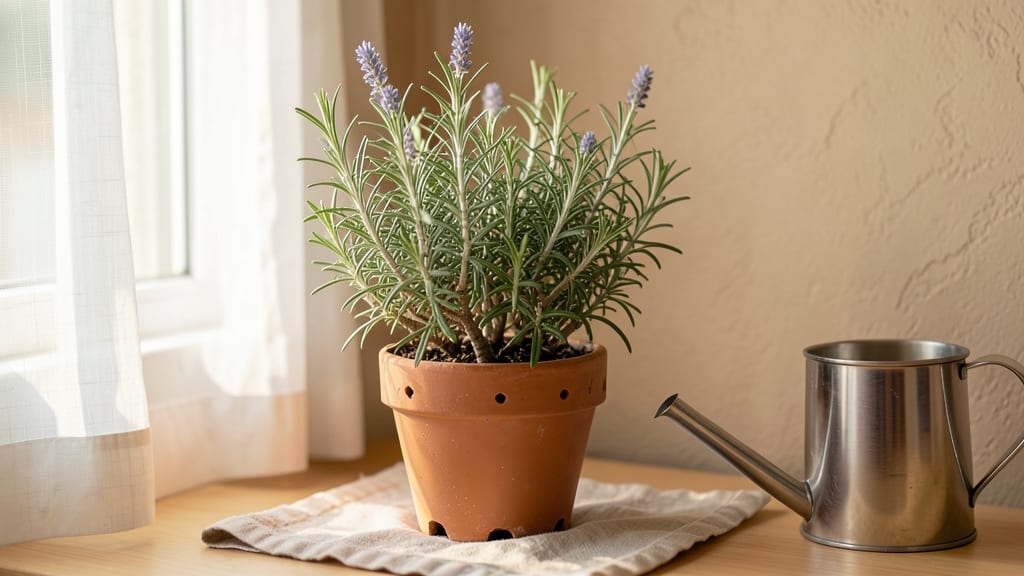
Bringing rosemary indoors for winter keeps its piney scent alive all year—my kitchen still smells like a Tuscan hillside in January. 🌿 The trick is mimicking its Mediterranean roots: bright light, dry soil, and cool air. Most people overwater, turning their fragrant shrubs into sad, leggy sticks.
You’ll need a sunny window (south-facing is best), a pot with drainage, and a spray bottle for occasional misting. Rosemary hates soggy roots, so let the top inch of soil dry out completely between waterings. A grow light works too if natural light is weak.
By spring, your plant will be bushier and more aromatic than ever. Prune lightly in early spring to encourage new growth, and you’ll have fresh sprigs for cooking or potpourri all season long. This method works for any rosemary variety—upright, prostrate, or even the variegated types.
Just avoid sudden temperature swings, and your plant will thrive indoors until you’re ready to bring it back outside.
📚 In This Guide
- What you need
- Instructions
- Tips and common mistakes
- Wrapping up and next steps
What you need
- ● Rosemary plant: A healthy, disease-free specimen (preferably in a 6–12-inch pot with drainage holes). Choose upright varieties like 'Tuscan Blue' or 'Arp' for better indoor adaptation.
- ● Well-draining potting mix: A cactus/succulent blend (e.g., 50% potting soil + 50% perlite/pumice) or a light, airy mix (avoid heavy garden soil!). Quantity: Enough to fill your pot (typically 2–4 quarts per 6–12" container).
- ● Pruning shears or sharp scissors: Sterilized (rubbing alcohol wipe) to prevent disease. Size: 3–6" blades for precision cuts.
- ● New container (if repotting): 1–2 inches larger than the current pot, with drainage holes. Material: Terracotta (breathable) or plastic (lightweight).
- ● Drainage tray or saucer: To catch excess water and protect surfaces.
- ● Spray bottle: For light misting (8–12 oz capacity).
- ○ Grow lights (optional but helpful): A full-spectrum LED bulb (6000–6500K) or a sunlight mimic like the GE LED Grow Light. Note: Place 6–12" above the plant for 12–14 hours/day.
- ● Humidity tray: A shallow tray with pebbles + water to boost moisture (especially for dry indoor air).
- ● Fertilizer: A balanced liquid fertilizer (e.g., 10-10-10) or fish emulsion (diluted to half-strength). Use: Every 4–6 weeks in winter.
- ● Thermometer/hygrometer: To monitor ideal temps (60–75°F) and humidity (40–60%).
- ● Decorative pot: A cachepot (outer pot without drainage) for aesthetics—just ensure the inner pot still drains!
- ● Pruning paste: To seal cuts and prevent infection (e.g., Dynamat Pruning Seal).
Step-by-Step instructions for bringing rosemary indoors for winter
Here's how I keep my rosemary thriving through cold months—no wilting, no bare branches.
🪴 Step 1: Select and Prepare the Healthiest Stems
Choose 4-6 healthy stems from your rosemary plant, each with 3-4 sets of leaves and no signs of disease. Cut just above a leaf node (the bump where leaves attach) using clean, sharp pruning shears—this ensures new growth will sprout from the cut. Avoid stems that are woody or leggy, as they won’t root as easily.
Strip the lower leaves from each stem, leaving only the top 2-3 sets. This reduces stress on the plant and encourages roots to form along the bare stem. Place the stems in a glass of room-temperature water right away—don’t wait. I like to use a clear glass so I can watch the roots develop over the next few weeks.
💧 Step 2: Encourage Root Growth in Water
Change the water every 3-4 days to prevent bacteria buildup, which can rot the stems. Keep the glass in a bright, indirect light spot—a kitchen windowsill works perfectly. You’ll see tiny white roots sprouting in 2-4 weeks, depending on your rosemary’s health and your home’s warmth.
If the water gets cloudy before roots appear, dump it and rinse the stems under fresh water. Avoid direct sunlight at this stage—it can overheat the water and stress the stems. Once roots reach 1-2 inches long, your rosemary is ready for soil. I know it’s ready when I can gently tug on a stem and feel resistance from the roots.
✂️ Step 3: Plant in Well-Draining Soil
Fill a 6-inch diameter pot with a mix of potting soil and perlite (half and half) for excellent drainage—rosemary hates soggy roots. Make a small hole in the center with your finger, then place the rooted stem in the hole so the bottom 2 inches of the stem are buried. Gently firm the soil around it to secure the plant.
Water lightly until moisture seeps out the drainage hole, then let the pot sit for 10 minutes to drain completely. Overwatering now will suffocate the roots. Place the pot in a spot with at least 6 hours of bright light daily—a south-facing window is ideal. If your home lacks natural light, supplement with a grow light kept 4-6 inches above the plant for 12-14 hours a day.
☀️ Step 4: Adjust Care for Indoor Conditions
Water only when the top inch of soil feels dry to the touch—rosemary in pots dries out faster indoors. I check by sticking my finger in the soil; if it’s dry past my first knuckle, it’s time to water. Use room-temperature water and avoid wetting the leaves to prevent fungal issues. A humidity tray (pebbles + water under the pot) helps mimic outdoor conditions without overwatering.
Fertilize lightly every 6-8 weeks with a balanced, water-soluble fertilizer (diluted to half strength). Too much fertilizer indoors causes weak growth and salt buildup. Prune lightly in spring to encourage bushiness—just snip the tips of new growth to maintain shape. With these adjustments, your rosemary will stay lush and fragrant all winter long.
⏰ Step 5: Transition Back Outdoors in Spring
Wait until after the last frost date and when nighttime temperatures stay above 50°F before moving your rosemary back outside. Place it in a shaded spot for the first 3-5 days to acclimate. Gradually increase sun exposure over 1-2 weeks to avoid leaf burn.
If you notice yellowing leaves, it’s usually a sign of overwatering or too much direct sun. Trim any damaged growth and adjust care based on your rosemary’s response. With proper indoor care, your plant will bounce back stronger than ever for the next growing season.
Tips & tricks for bringing rosemary indoors for winter
Here's what I learned after keeping rosemary alive through multiple winters—small details make all the difference.
Leaf Node Location: When cutting stems in Step 1, look for the tiny bump where leaves attach—the leaf node. This is where new roots will sprout. Cut just above it with clean shears to prevent disease. I've ruined stems by cutting too low or using dull scissors, so take your time here. The top 2-3 sets of leaves should remain—more leaves mean more stress for the plant during rooting.
Root Growth Timing: Those 2-4 weeks for roots to appear can feel like forever, but patience pays off. Place your glass near a warm spot (like above the fridge) to speed things up slightly, but avoid heat vents. I once rushed this stage and ended up with weak roots—don't let impatience ruin your progress. Once roots hit 1-2 inches, give them a gentle tug test before planting.
Soil Mix Matters: The half-and-half mix of potting soil and perlite in Step 3 is non-negotiable—rosemary roots need excellent drainage. I've seen people use regular garden soil and end up with sad, mushy stems. If you don't have perlite, coarse sand works in a pinch, but perlite prevents compaction better. After planting, let that 10-minute drainage time happen—this prevents root rot that kills indoor rosemary faster than anything else.
Light Source Strategy: For the 6 hours of bright light daily requirement, position your pot near the sunniest window you have. If you're using a grow light for 12-14 hours, keep it 4-6 inches away—closer than that can scorch leaves. I rotate my plant every few days so all sides get equal light, which prevents lopsided growth. South-facing windows are ideal, but west-facing works too if you have one.
Pro Tips for Bringing Rosemary Indoors For Winter
- Here's what I learned after keeping rosemary alive through multiple winters—small details make all the difference.
- Leaf Node Location: When cutting stems in Step 1, look for the tiny bump where leaves attach—the leaf node. This is w...
- Root Growth Timing: Those 2-4 weeks for roots to appear can feel like forever, but patience pays off. Place your glas...
Frequently asked questions
Got questions about keeping rosemary indoors during winter?
Here are answers to the most common concerns—from timing to troubleshooting—so you can enjoy your fragrant herb all year long.
When is the best time to bring rosemary indoors for winter?
Move rosemary indoors before the first frost (typically late fall, around October or November in most climates). If you wait until temperatures drop below 40°F (4°C), the plant may suffer cold damage. Look for signs like wilting or brown leaves—these are your cues to act fast!
How do I know if my rosemary is ready to come inside?
Your rosemary is ready when it’s fully hardened off (acclimated to cooler temps) and shows no stress. Check for sturdy stems and healthy green foliage—avoid bringing in plants with yellowing leaves or pests. A gentle shake should dislodge dust, not leaves!
Can I keep rosemary indoors in a small pot or does it need a large container?
Rosemary thrives in well-draining pots with at least 6–8 inches of depth and diameter. Smaller pots work for short-term indoor growing, but upgrade to a 10–12 inch container if you plan to keep it long-term. Use a mix of potting soil + perlite to prevent root rot.
Why is my indoor rosemary dropping leaves? How do I fix it?
Leaf drop usually signals overwatering, low light, or stress. Adjust by:
- Water only when the top inch of soil is dry (rosemary hates soggy roots!).
- Move to a sunny spot (south-facing window or grow lights, 6+ hours/day).
- Reduce humidity—mist lightly or use a fan to improve airflow.
What’s the easiest alternative if I can’t keep rosemary indoors?
Try these low-maintenance winter herbs for indoors:
- Thyme – Drought-tolerant and thrives in pots.
- Parsley – Prefers cooler temps and indirect light.
- Chives – Hardy and regrows easily from cuttings.
- Winter savory – Similar to rosemary but more cold-resistant.
Wrapping up and next steps
Bringing rosemary indoors for winter is a rewarding way to enjoy its fragrant beauty year-round—with just a little care and creativity!
By following gentle pruning techniques, proper lighting, and a cozy indoor setup, you’ll keep your rosemary thriving while adding a touch of Mediterranean charm to your space. Now’s the perfect time to act: grab your pruners, pick a sunny spot, and give your rosemary the winter love it deserves!
🌱 Next Steps:
- 📅 Monitor your rosemary’s health weekly—adjust light or humidity as needed.
- 🌿 Experiment with recipes or crafts using your indoor harvest!
- 💬 Share your progress—tag us @YourGreenSpace for tips and inspiration!