
Container Gardens
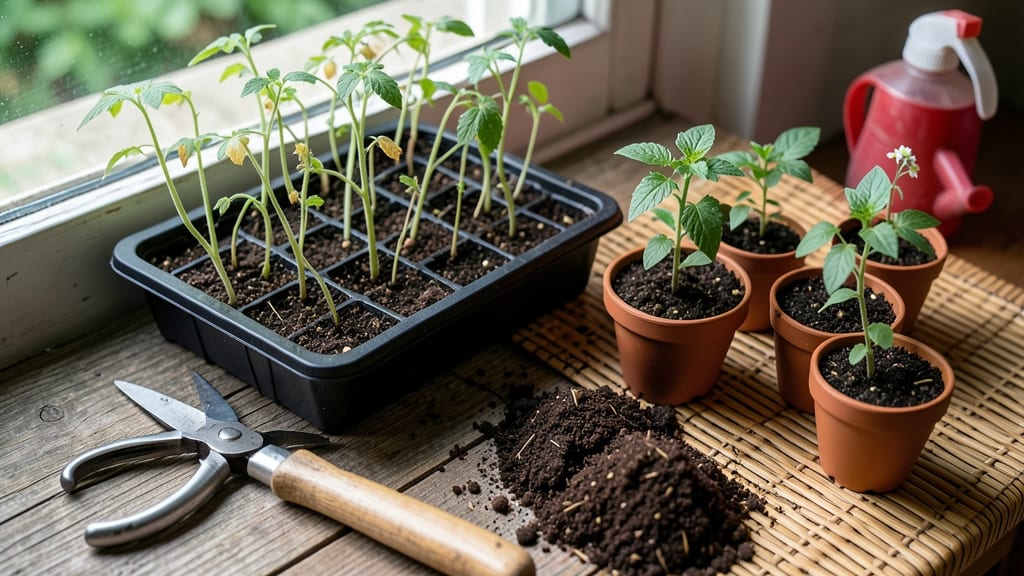
Thinning seedlings indoors at the right time—when they have 2-3 true leaves—is the secret to avoiding leggy, weak plants and setting your garden up for success.
Picture this: your seedlings are packed tightly in a tray, stretching toward the light like sun-starved kids at a window. If you wait too long to thin, you’ll end up with stunted growth and wasted resources. But thin too early, and you risk damaging delicate roots before they’re ready.
Getting the timing right means stronger stems, better airflow, and healthier plants that’ll transplant like pros. Below, I’ll walk you through the exact stages to watch for, the tools you’ll need, and how to handle those seedlings after thinning—no guesswork, just results.
Whether you’re growing veggies or flowers, these insights will save you from the heartbreak of leggy, struggling plants. Let’s make sure your seedlings get the head start they deserve.
The perfect timing for thinning seedlings indoors: key growth stages
Thinning seedlings indoors is one of the most critical steps in early plant development, yet many gardeners struggle with timing. The key is to act when seedlings have developed 2-3 sets of true leaves—not the initial seed leaves—and are tall enough to compete for resources.
Waiting too long leads to stunted growth, while thinning too early can weaken fragile plants.
Leafy greens like lettuce and spinach are more forgiving, while tomatoes, peppers, and herbs need precise timing to avoid shock. The exact moment depends on your seedling height and leaf count, which we’ll break down by plant type.
Understanding these stages ensures you maximize survival rates and plant vigor before transplanting.
Here’s the golden rule: Thin seedlings when they’re 2-3 inches tall and have 2-3 true leaves. This window balances root development with above-ground growth, giving you the best chance for healthy, resilient plants.
For leafy greens, you can thin slightly later, while transplants like tomatoes need earlier thinning to prevent overcrowding.
Overcrowded seedlings compete aggressively for light, water, and nutrients, leading to weak stems and yellowing leaves. The goal is to leave the strongest seedlings 2-3 inches apart in their containers. This spacing mimics outdoor conditions and prepares them for transplanting without transplant shock.
For leafy greens, timing is less critical since you’ll harvest the entire plant. However, thinning at 1-2 inches tall with 1-2 true leaves ensures even growth.
In contrast, transplants like peppers or herbs need thinning at 2-3 inches tall with 2-3 true leaves to develop strong root systems before moving outdoors.
Use this summary table as your guide to thinning seedlings indoors by plant type, height, and leaf count:
| Plant Type | Height Threshold | Leaf Count | Spacing After Thinning | Best Time to Thin |
|---|---|---|---|---|
| Leafy Greens (Lettuce, Spinach, Kale) | 1-2 inches | 1-2 true leaves | 1-2 inches apart | 3-4 weeks after sowing |
| Transplants (Tomatoes, Peppers, Herbs) | 2-3 inches | 2-3 true leaves | 2-3 inches apart | 4-6 weeks after sowing |
| Root Crops (Carrots, Beets, Radishes) | 1 inch | 1 set of true leaves | 1 inch apart | 2-3 weeks after sowing |
| Flowers (Marigolds, Petunias, Basil) | 1.5-2 inches | 2 true leaves | 2 inches apart | 3-5 weeks after sowing |
Leggy seedlings with long, thin stems are a red flag—they’ve stretched toward light but lack strength. These plants need immediate thinning to prevent further stress. Use clean scissors to snip at soil level, leaving the strongest seedlings to thrive.
Avoid pulling seedlings by hand, as this can damage roots and leave gaps for pests.
After thinning, reduce watering slightly for 2-3 days to help cuttings dry out and minimize fungal risks. Place remaining seedlings in a bright, indirect light spot and monitor for signs of stress, like wilting or yellowing.
If you notice overcrowding signs like slow growth or pale leaves, it’s time to thin again—even if seedlings seem small.
Timing thinning correctly also depends on your indoor growing conditions. Seedlings under grow lights may grow faster and need thinning slightly earlier than those near a south-facing window.
Always err on the side of thinning too early rather than too late—weak seedlings won’t recover, but strong ones will bounce back with proper care.
Once you’ve thinned your seedlings, focus on hardening off them 1-2 weeks before transplanting outdoors. This process acclimates plants to outdoor conditions, reducing shock. By mastering thinning timing, you’ll set your seedlings up for a lifelong garden success—from seed to harvest.
How to thin seedlings indoors without killing them: step-by-step methods
Thinning seedlings indoors might seem intimidating, but it’s one of the most important steps to ensure strong, healthy plants. When done correctly, it prevents competition for nutrients and light, giving your seedlings the best chance to thrive.
The key is to act at the right time and use the right techniques to minimize stress on your young plants.
Many gardeners make the mistake of waiting too long or using harsh methods like pulling seedlings by hand, which can damage roots and shock the remaining plants. Instead, focus on gentle removal and proper timing—typically when seedlings have 2-3 true leaves and are 2-3 inches tall.
This is when they’ve developed enough strength to survive the process.
Step-by-Step Guide to Thinning Seedlings Indoors
- Step 1: Wait for the Right Stage Thin when seedlings have 2-3 true leaves and are 2-3 inches tall. Avoid thinning too early, as seedlings need this growth to establish roots.
- Step 2: Water Before Thinning Water the seedlings 1-2 hours before thinning to make the soil easier to work with and reduce stress on the plants.
- Step 3: Use the Right Tools Use clean scissors or small pruning shears to cut seedlings at soil level. Avoid pulling to prevent disturbing roots of remaining plants.
- Step 4: Thin to the Strongest Seedlings Keep the healthiest, most vigorous seedlings spaced 2-3 inches apart. Remove weaker or leggy seedlings first.
- Step 5: Adjust Light After Thinning Move trays closer to a light source (natural or grow lights) to compensate for the reduced competition. Seedlings need 12-16 hours of light daily to prevent stretching.
- Step 6: Monitor Watering Post-Thinning Water lightly but frequently (every 1-2 days) to keep soil moist but not soggy. Avoid overwatering, which can lead to fungal issues.
- Step 7: Harden Off Before Transplanting After thinning, wait 1-2 weeks before transplanting outdoors. Gradually expose seedlings to outdoor conditions to prevent shock.
After thinning, your seedlings will need extra care to recover. Place them in a bright, indirect light area and avoid fertilizing for 1-2 weeks to prevent burning their delicate roots.
If you notice leggy growth post-thinning, it’s a sign they need more light—consider supplementing with a grow light if natural light is insufficient.
One common mistake is thinning too aggressively, which can shock the remaining plants. Always leave the strongest seedlings and avoid removing more than 30-50% of the seedlings at once.
This gradual approach helps them adjust without stress. With the right timing and care, your seedlings will grow into robust, healthy plants ready for transplanting.
Remember, thinning isn’t about waste—it’s about giving your plants the best start possible. By following these steps, you’ll ensure your seedlings have the space and resources they need to thrive indoors before heading outdoors. Happy gardening! 🌱