
Container Gardens
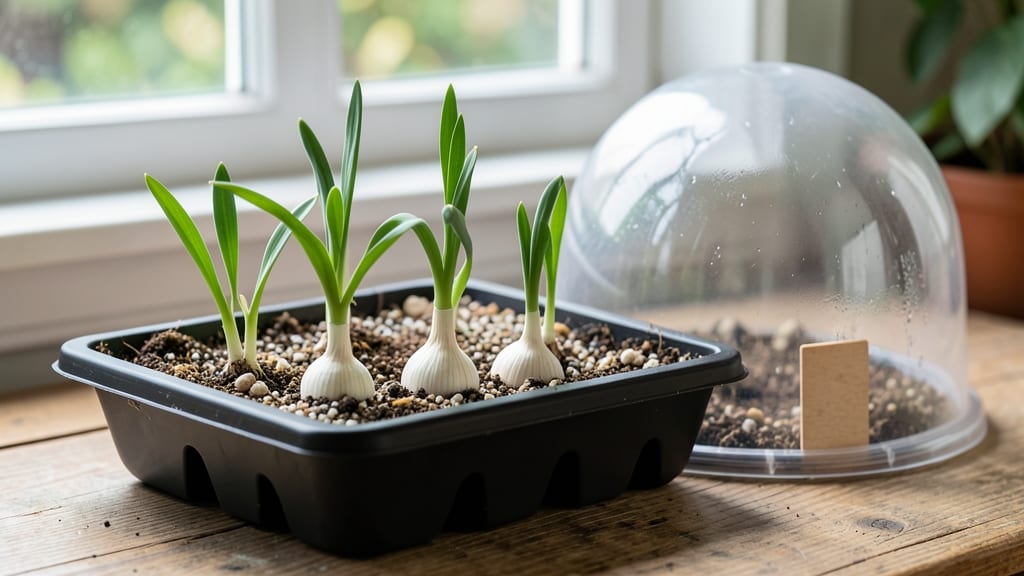
Starting garlic indoors lets you get a jump on next year’s harvest—60 days of green shoots before you even plant outside. 🌱 I’ve grown garlic this way for three seasons now, and the difference in size and bulb quality is night and day compared to store-bought sets.
The secret? Timing, light, and patience—no fancy equipment needed.
You’ll need just three things: softneck garlic bulbs (or hardneck if you prefer), a shallow container (like a seed tray or even a repurposed shoebox), and well-draining potting mix. Plant cloves pointy-end up, about 2 inches deep, in late winter—8-10 weeks before your last frost.
A sunny windowsill or grow light keeps them from stretching leggy.
By mid-spring, you’ll have 3-inch-tall green shoots ready for transplanting. The bulbs won’t be fully formed yet, but they’ll establish roots faster outside, giving you larger, more robust harvests than planting bare cloves in fall. No green tops? Check your light—garlic needs 12+ hours of daylight to thrive.
This method works for any garlic variety, even in small spaces. Whether you’re a city dweller or just want to beat the crowds at garden centers, indoor-starting garlic is the foolproof way to grow bigger bulbs. Ready to try it?
📚 In This Guide
- What you need
- Instructions
- Tips and common mistakes
- Wrapping up and next steps
What you need
- ● Garlic bulbs: Choose hardneck varieties (e.g., Rocambole, Purple Stripe) for best indoor results. Buy 1–2 bulbs (6–12 cloves total).
- ● Cloves: Separate bulbs into individual cloves, ensuring each has a small root attached (discard any sprouted or damaged cloves).
- ● Containers: Small pots (4–6 inches deep) for 1–2 cloves each, or
- ● A shallow tray (6+ inches deep) for bulk planting (1–2 inches apart).
- ● Potting mix: 1–2 gallons of well-draining, sterile mix (50% potting soil + 50% perlite/sand).
- ● Grow lights: Full-spectrum LED (12–16 hours/day) or a south-facing windowsill (if sunny).
- ● Spray bottle: For gentle watering (avoid over-saturation).
- ● Humidity dome: Keeps cloves moist during germination (place a clear lid or plastic wrap over pots).
- ● Thermometer: Ideal germination temp: 60–70°F (use a heat mat if needed).
- ● Fertilizer: Balanced liquid fertilizer (5-5-5) after sprouting (dilute to half-strength).
- ● Labels: Mark pots with dates/varieties to track growth.
Step-by-step guide to growing garlic indoors
Here’s how to transform store-bought cloves into bold, flavorful harvests in just two months.
🌱 Step 1: Select and Prepare Garlic Cloves
Choose hardneck garlic varieties—they’re the best for indoor growing. Break apart a head of garlic and separate the individual cloves, leaving the papery skin intact. Each clove should have a small root nub at the base; discard any cloves without roots or that look shriveled. I like to soak the selected cloves in lukewarm water for 12 hours to soften the skin slightly—this helps roots emerge faster once planted.
After soaking, lay the cloves on a paper towel to dry for 30 minutes. This prevents rot when you plant them. You’ll need 4-6 cloves for a small indoor harvest, spaced about 2 inches apart in your container. The goal is to mimic outdoor spacing so bulbs develop properly.
🪴 Step 2: Plant in Containers with Proper Drainage
Use a 6-inch deep container with drainage holes—garlic hates soggy roots. Fill it with well-draining potting mix (avoid garden soil; it compacts and suffocates roots). I like to mix in a handful of perlite or coarse sand to improve aeration. Moisten the soil until it’s damp but not dripping, then make small holes 1 inch deep—just enough to bury the clove with the root end down.
Place one clove in each hole, pointy end up, and cover lightly with soil. Press gently to ensure good contact with the soil. Don’t water immediately—wait 24 hours to let the cloves settle. This prevents the soil from shifting and exposing the cloves, which can cause rot.
☀️ Step 3: Provide Light and Temperature for Strong Growth
Garlic needs bright, indirect light for 12-14 hours daily. A south-facing window works, but if natural light is weak, supplement with a grow light placed 6 inches above the plants. You’ll see shoots emerge in 10-14 days—this is your cue that the cloves are rooting. Keep the soil evenly moist (not soggy) by watering when the top inch feels dry. Overwatering is the fastest way to kill indoor garlic.
Maintain temperatures between 60-70°F—garlic grows best in cool conditions. If your home runs warmer, place the container on a cool tile floor or near a shaded window. Avoid drafts or sudden temperature swings, which stress the plants. Within 3-4 weeks, you’ll notice long, slender leaves—this means the bulbs are forming underground.
⏰ Step 4: Monitor Growth and Prepare for Harvest
After 6 weeks, the bottom leaves will turn yellow and crispy while the top leaves stay green. This is your signal that the bulbs are nearly ready. Reduce watering slightly at this stage—too much moisture now can cause rot. Stop watering entirely 1-2 weeks before harvest to let the skins dry and toughen.
Harvest when about half the leaves have browned, usually around 8-10 weeks. Gently lift the bulbs from the soil, shake off excess dirt, and lay them in a dry, shaded spot for 2-3 weeks to cure. This drying process develops flavor and prevents spoilage. Once fully cured, store the bulbs in a cool, dark place for up to 6 months—your indoor-grown garlic will be far more potent than store-bought.
Tips & tricks for perfect indoor garlic harvests
Transforming store-bought cloves into bold indoor garlic takes patience—but these tricks will help you avoid common pitfalls and maximize your harvest.
Selection Matters: Not all garlic is created equal for indoor growing. While you can use store-bought hardneck varieties, opt for organic garlic when possible—the thicker skins and larger cloves yield better results. Look for plump cloves with firm, unbroken skins and visible root nubs. I've found that Silverskin garlic varieties often produce smaller bulbs indoors, so stick with Artichoke or Rocambole types for bigger harvests. The 12-hour soak in lukewarm water isn't just about softening skins—it also helps identify any cloves that might be compromised, as they'll float or show signs of mold after soaking.
Container Strategy: The 6-inch depth recommendation is non-negotiable for bulb development, but don't overlook container material. Terracotta pots wick moisture better than plastic, preventing root rot, while fabric grow bags allow excellent air circulation. If using plastic, drill extra drainage holes—garlic roots are sensitive to waterlogged conditions. Pro tip: Place a 1-inch layer of pebbles at the bottom before adding potting mix to create a natural drainage layer that prevents clogging. This simple adjustment can mean the difference between thriving plants and rot.
Lighting Hack: Those 12-14 hours of daily light are critical, but natural light alone often falls short. If you're using a grow light, position it on a timer to maintain consistency—garlic responds poorly to erratic light cycles. For maximum efficiency, use a full-spectrum LED grow light (around 6500K color temperature), which mimics sunlight better than standard bulbs. I've seen dramatic differences in leaf growth when using these compared to basic fluorescent lights. Remember, the goal is bright but indirect light—direct sunlight can scorch tender garlic leaves.
Harvesting Cues: The 6-week mark isn't just about time—watch for the bottom leaves turning yellow while tops stay green. This visual cue means the bulbs are nearly mature. Here's what I watch for: When you gently tug on a leaf and it comes away easily (like pulling a weed), that's your harvest signal. For indoor garlic, I often harvest 1-2 weeks earlier than outdoor varieties because space is limited. Just be prepared for slightly smaller bulbs if you harvest early—they'll still be flavorful but may not be as large as fully mature outdoor garlic.
Pro Tips for Starting Garlic Indoors
- Transforming store-bought cloves into bold indoor garlic takes patience—but these tricks will help you avoid common p...
- Selection Matters: Not all garlic is created equal for indoor growing. While you can use store-bought hardneck variet...
- Container Strategy: The 6-inch depth recommendation is non-negotiable for bulb development, but don't overlook contai...
Frequently asked questions
Got questions about growing garlic indoors? You’re not alone—this bold, flavor-packed method can feel tricky at first! Below, we’ve rounded up the most common queries (and their easy fixes) to help you grow confident, clove-ready garlic in just 60 days.
When is the best time to start garlic indoors?
For hardneck garlic (best for flavor), start indoors 8–10 weeks before your last frost date—typically late winter (February–March in most zones). Softneck varieties can wait until 4–6 weeks before frost (spring). Check your local frost dates for precision!
Can I grow garlic indoors year-round?
Yes, but with tweaks! Garlic needs cool temps (40–60°F) and 12+ hours of light daily. Use a grow light if natural light is weak, and keep humidity moderate (40–60%) to prevent mold. No dormancy period? It’ll still grow, but flavor may be milder.
What if my garlic sprouts turn yellow or wilt?
Yellowing leaves often mean overwatering, poor drainage, or too much light. Let soil dry slightly between waterings, and move plants to bright, indirect light if leaves scorch. Moldy cloves? Toss them—fungus spreads fast. Use sterile soil and space cloves 2" apart to improve airflow.
Do I need to use a greenhouse or can I just use pots?
Pots work great—just pick containers with drainage holes and at least 6" depth. Group 3–5 cloves per pot for efficiency. For extra warmth, place pots on a heat mat (70°F) until sprouts emerge, then reduce heat. No greenhouse? A sunny windowsill or under grow lights suffices!
Will indoor garlic taste the same as outdoor-grown?
Indoor garlic will be milder but still flavorful—especially if you mimic outdoor conditions (cool temps, dormancy-like rest in late summer). For boldest flavor, try hardneck varieties like ‘German White’ or ‘Music.’ Store-bought garlic? Skip it—use organic, disease-free bulbs from a nursery for best results.
Wrapping up and next steps
Starting garlic indoors is a rewarding journey that turns bold, flavorful cloves into thriving plants in just 60 days! With the right setup—pots, soil, and patience—you’ll harvest plump bulbs ready for cooking or planting.
Whether you’re a beginner or a seasoned gardener, this method makes growing garlic accessible and exciting.
Now that you’re armed with tips and tricks, take the next step: grab those cloves, prep your containers, and dive in! Soon, you’ll be savoring homegrown garlic in your favorite dishes—and maybe even sharing bulbs with friends. Happy planting! 🌱✨