
Planting
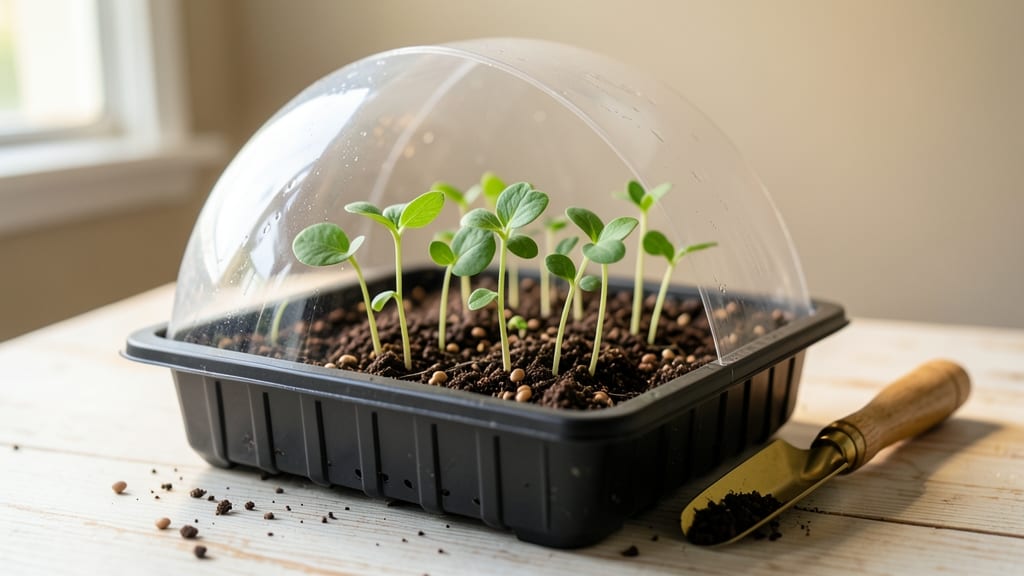
Sowing beans indoors gives you a head start on the season—plump, vigorous plants ready to outpace anything from the garden center. 🌱 I learned the hard way that skipping this step means waiting weeks for harvests, but with the right timing and setup, you can have tender snap peas and bushy pole beans by late spring.
The secret isn’t complicated: it’s about warmth, moisture, and patience in those first critical days.
You’ll need just four simple supplies: seed-starting mix (not regular potting soil), small pots or a seed tray, a heat mat (optional but game-changing), and a sunny windowsill or grow light. Beans germinate fast—often within 3-5 days—but they need consistent warmth (70-80°F) to avoid leggy seedlings.
Overwatering is the #1 killer, so keep the soil damp but never soggy, and avoid cold drafts that stall growth.
By the time you’re transplanting outdoors, your seedlings will be stocky and dark green, ready to hit the ground running. The payoff? Harvests that start 2-3 weeks earlier than neighbors who direct-sow, plus fewer losses to pests and weather.
Even my black thumb can’t mess this up—honestly, it’s one of the most forgiving indoor starts you’ll try.
Works for bush beans, pole beans, and snap peas alike, and the same method applies whether you’re in a small apartment or a greenhouse. Once you’ve mastered this, you’ll never wait another season for fresh-picked beans again. Let’s get those seeds going!
📚 In This Guide
- What you need
- Instructions
- Tips and common mistakes
- Wrapping up and next steps
What you need
- ● Seed trays or containers: 4–6" deep with drainage holes (e.g., plastic seed trays, biodegradable pots, or recycled containers). Pro tip: 💡 Use at least 2–3 containers per variety to avoid overcrowding.
- ● High-quality seed-starting mix: Lightweight, sterile, and well-draining (avoid garden soil). Quantity: Enough to fill your trays to ~1 inch below the rim.
- ● Bean seeds: Choose fast-maturing varieties like Bush Blue Lake or Scarlet Runner. Quantity: 2–3 seeds per cell/pot (thin to the strongest seedling later).
- ● Spray bottle with water: For gentle, even moisture without disturbing seeds.
- ○ Clear plastic dome or plastic wrap: To create a humid microclimate (optional but helpful for germination).
- ● Grow lights or sunny windowsill: Beans need 6–8 hours of light daily. A full-spectrum LED grow light (12–18 inches above seedlings) is ideal.
- ○ Heating mat (optional but recommended): Keeps soil at 70–80°F for faster germination (especially for cooler climates).
- ● Fertilizer: A balanced, water-soluble fertilizer (5-5-5 or 10-10-10) diluted to half-strength for first feeding.
- ● Humidity tray: A shallow tray with pebbles and water to boost moisture levels.
- ● Plant labels: To track varieties and planting dates.
- ● Tweezers or small spoon: For delicate seed placement.
- ● Thermometer: To monitor soil temperature if using a heating mat.
Step-by-step instructions for starting bean seeds indoors
Here’s how to get your beans sprouting quickly and growing strong for a head start on harvest.
🌱 Step 1: Prepare Containers and Seed Starting Mix
Use clean, shallow containers—4-6 inches deep—with drainage holes to prevent soggy roots. I like biodegradable pots because they eliminate transplant shock later. Fill them with a sterile seed-starting mix (never garden soil, which can harbor diseases). Moisten the mix until it’s damp but not dripping—you should be able to squeeze it gently without water leaking out.
Press the mix down lightly to remove air pockets, then smooth the surface with your fingers. This ensures even contact between seeds and soil, which speeds up germination. I like to label each pot with the variety and date—beans grow fast, and you’ll forget which is which in a week.
🌱 Step 2: Sow Seeds at the Right Depth and Spacing
Plant 2-3 seeds per container at a depth of 1 inch—about three times the diameter of a bean seed. Sowing too deep slows germination because the seedling must push through more soil. Cover lightly with additional mix, then mist the surface with water until evenly damp. Avoid soaking the seeds beforehand; beans germinate best when planted dry.
Space seeds 2 inches apart if using a larger tray. If you’re planting multiple varieties, group them by type to avoid cross-pollination later. Place the containers in a warm spot—70-80°F—to encourage quick sprouting. You’ll see tiny roots breaking through the soil in 5-7 days if conditions are right.
☀️ Step 3: Provide Warmth and Light for Germination
Beans need warmth to germinate, so place the containers on a seedling heat mat or in a sunny windowsill. Without extra heat, germination can take 10-14 days, but with warmth, you’ll see sprouts in 5-7 days. Once they emerge, move them to a bright, indirect light source—a south-facing window or grow light—for 12-14 hours daily. Leggy seedlings (stretched, pale stems) mean they’re reaching for light.
Rotate the containers quarter-turn daily so plants grow straight instead of leaning. Once the first true leaves appear—those are the second set after the initial seed leaves—you can reduce the heat mat and focus on consistent light. This is when they’ll start growing faster, so keep the soil evenly moist but not soggy.
💧 Step 4: Thin Seedlings and Encourage Strong Growth
When seedlings reach 2 inches tall, thin to the strongest one per container by snipping the others at the base with scissors. This prevents overcrowding, which leads to weak, spindly plants. After thinning, water gently at the base to avoid disturbing roots. You’ll notice the remaining seedling perks up within a day—it now has all the nutrients and space to thrive.
Fertilize lightly with a balanced, water-soluble fertilizer (half-strength) when the first true leaves appear. Beans fix nitrogen in their roots, but a little extra helps them bulk up faster. Keep the soil moist but not waterlogged—overwatering causes root rot, which kills seedlings overnight.
⏰ Step 5: Harden Off and Transplant Outdoors
Two weeks before your last frost date, start hardening off the seedlings by placing them outside in a sheltered spot for 1-2 hours the first day. Gradually increase their time outdoors by 1 hour daily until they can stay out all day. This toughens their stems and leaves for the garden. Watch for wilting—if it happens, they’re not ready yet.
Transplant outdoors after all danger of frost has passed and soil is at least 60°F. Plant seeds 1-2 inches deep and 4-6 inches apart in rows. Beans love warmth, so choose a sunny spot with well-draining soil. Water deeply after planting to settle the roots. You’ll see new leaves emerge within a week—that’s your signal everything is working.
Tips & tricks for perfect indoor bean sprouting
These simple strategies will help you avoid common pitfalls and get your bean seedlings off to the fastest, strongest start possible.
Container Selection: While biodegradable pots are ideal, you can also use plastic nursery pots or even recycled yogurt cups with drainage holes punched in the bottom. Just make sure they're at least 4-6 inches deep—shallower containers restrict root growth and lead to leggy seedlings. I've had great success with seed-starting trays that hold multiple cells, which makes thinning easier later on.
Germination Accelerator: The 5-7 day germination window assumes perfect conditions—warmth (70-80°F), consistent moisture, and darkness. To speed things up even more, place a damp paper towel over the planted seeds and containers, then loosely cover with plastic wrap to create a mini greenhouse effect. Check daily for condensation—this means your humidity levels are just right. Remove the cover once sprouts appear to prevent mold.
Lighting Strategy: After germination, those crucial 12-14 hours of daily light become non-negotiable. If your natural light isn't sufficient, invest in a basic LED grow light—even a simple 6-inch clip-on bulb works wonders. Position it just 2-3 inches above the seedlings and adjust as they grow. The key is preventing leggy growth (those stretched, pale stems), which happens when plants reach for light they can't access properly.
Transplanting Prep: When it's time to harden off your seedlings, don't rush the process. Start with just 1-2 hours on day one, even if your schedule allows more time. Gradual exposure prevents shock—seedlings that go from indoor comfort to full sun all at once often wilt dramatically. I've seen plants recover within hours, but the first 24 hours after transplanting are critical for establishing strong root systems in their new environment.
Pro Tips for Sowing Beans Indoors
- These simple strategies will help you avoid common pitfalls and get your bean seedlings off to the fastest, strongest start possible.
- Container Selection: While biodegradable pots are ideal, you can also use plastic nursery pots or even recycled yogurt cups with drainage holes punched in the bottom.
- Germination Accelerator: The 5-7 day germination window assumes perfect conditions—warmth (70-80°F), consistent moisture, and darkness.
Frequently asked questions
Got questions about sowing beans indoors? You’re not alone!
Here are answers to the most common concerns—from timing to troubleshooting—to help you grow a thriving indoor bean crop with confidence.
When is the best time to start sowing beans indoors?
For most bean varieties, start sowing indoors 6–8 weeks before the last frost in your area. If you’re growing heat-loving types like kidney or pinto beans, wait until soil temps reach 60°F+ (or use a heat mat). Cold-sensitive beans? Begin indoors in late winter for an early spring harvest.
How long does it take for beans to germinate indoors?
Beans typically sprout in 7–14 days indoors, depending on warmth and moisture. Keep soil consistently moist (not soggy) and maintain temps between 70–85°F. If germination stalls after 2 weeks, check for overwatering (root rot) or cold drafts. A clear plastic dome or heat mat can speed things up!
Can I use regular potting soil for sowing beans?
Yes, but amend it for better results! Mix potting soil with 20% perlite or vermiculite for drainage and add a slow-release fertilizer (like 5-10-5). Beans prefer well-draining, slightly acidic soil (pH 6.0–7.0). Avoid garden soil—it’s too dense and may harbor pests.
What should I do if my indoor bean seedlings look leggy or weak?
Leggy seedlings usually mean too little light. Move them within 2–3 inches of a grow light (12–16 hours/day) or a sunny south-facing window. If overcrowded, thin to 1–2 inches apart and fertilize lightly with diluted fish emulsion. Yellow leaves? Check for overwatering or nutrient deficiency.
Are there any bean varieties that grow better indoors than others?
Try these compact, fast-growing varieties for indoors:
- Bush beans (e.g., ‘Blue Lake’ or ‘Contender’)—dwarf varieties thrive in containers.
- Pole beans (e.g., ‘Kentucky Wonder’)—train vines on a trellis for vertical growth.
- Dwarf French beans (e.g., ‘Mascotte’)—ideal for small spaces and harvest in 50–60 days.
Wrapping up and next steps
Sowing beans indoors is a fantastic way to jumpstart your gardening season and enjoy a healthier, faster harvest—no matter your growing zone! With the right setup, patience, and care, you’ll be well on your way to thriving plants ready for transplanting.
Whether you’re a beginner or a seasoned gardener, this early start gives your beans a competitive edge.
Now that you’re armed with tips and tricks, it’s time to take action! Grab your supplies, set up your indoor station, and start sowing—your future harvest will thank you. Happy planting! 🌱