
Planting
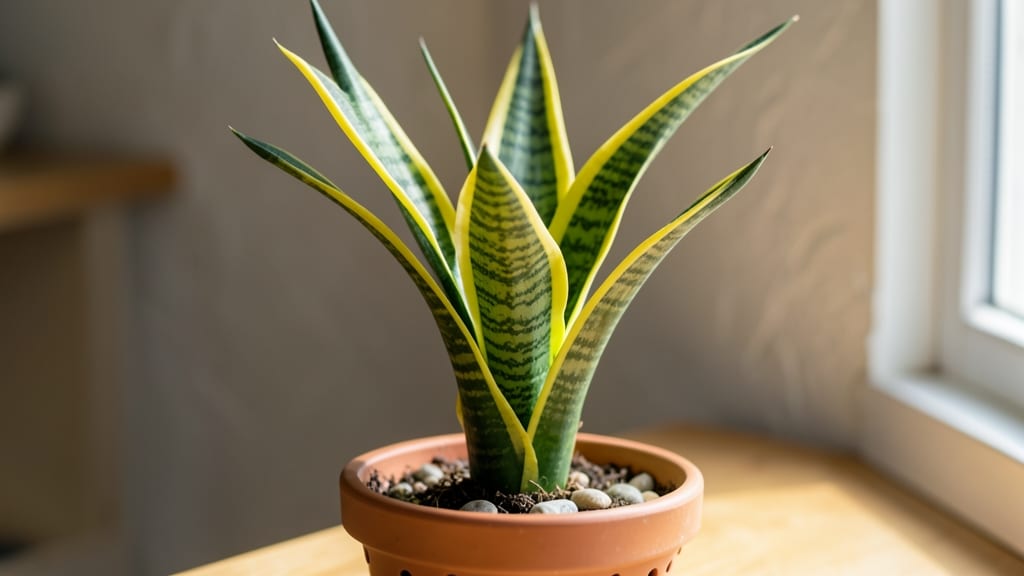
Sunlit vines climbing up your indoor window plant pots transform dull spaces into lush, green escapes. 🌿 I learned this the hard way—my first attempt with mismatched pots ended in a tangled mess of roots and broken vines.
The right setup makes all the difference, turning a simple windowsill into a vertical garden that catches every ray of light.
Terracotta breathes better than ceramic, but ceramic holds moisture longer—choose based on your plant's thirst. Size matters too: small pots for herbs, medium for trailing vines, and large for leafy greens.
My pothos thrives in a 6-inch pot, while my monstera needs 12 inches to stretch its roots properly. Drainage holes are non-negotiable, and a saucer underneath keeps your windowsill dry.
You'll love how these plants frame your window like living curtains, filtering light beautifully while adding texture. The key is grouping pots by sunlight needs—sun-lovers on the south side, shade-tolerant plants on the north. A little rotation keeps growth even, and occasional pruning prevents overcrowding.
This setup works for any window, from cozy apartments to spacious lofts. The best part? You can start small with just one pot and expand as your green thumb grows. Let's make that windowsill your new favorite spot!
📚 In This Guide
- What you need
- Instructions
- Tips and common mistakes
- Wrapping up and next steps
What you need
- ● Window plant pots: 3–5 medium-sized pots (6–8 inches in diameter) with drainage holes. Terracotta or ceramic works best for airflow.
- ● High-quality potting mix: 1 bag (1–2 cubic feet) of well-draining, organic soil (e.g., cactus/succulent mix or all-purpose potting soil with perlite).
- ● Drainage medium: Small pebbles or gravel (1–2 cups) for the pot’s base.
- ● Sun-loving plants: 3–5 vines or trailing plants (e.g., pothos, string of pearls, or ivy). Check their light needs!
- ● Watering can or spray bottle: With a gentle nozzle for even moisture.
- ○ Gloves (optional): To keep hands clean while handling soil.
- ● Trowel or small shovel: For easy planting and soil adjustments.
- ○ Misting spray (optional): For humidity-loving plants.
- ○ Decorative elements (optional): Mosaic tiles, paint, or saucers to match your decor.
- ○ Plant food (optional): Liquid fertilizer for a nutrient boost.
How to create a thriving indoor window plant display
Sunlit vines transform any windowsill into a lush, living gallery—here's how to make it happen.
🪴 Step 1: Select the Right Pots and Window
Choose pots with drainage holes—terracotta or ceramic work best for airflow. I like to mix sizes for visual interest, but keep them at least 6 inches wide for vines to grow comfortably. Place them on a saucer to catch excess water and prevent messy windowsills.
Position your display on a south- or west-facing window where vines get 4-6 hours of direct sunlight daily. East-facing works too, but growth will be slower. Test your window first: if a newspaper stays warm after 2 hours, it's a good spot. If it stays cold, supplement with a grow light.
🌱 Step 2: Choose and Plant Vine Varieties
For beginners, start with hardy vines like pothos, philodendron, or string of pearls. These tolerate lower light and occasional neglect. Fill each pot with well-draining potting mix—I add a handful of perlite to prevent soggy roots. Plant each vine 1 inch deeper than its root ball to stabilize it.
Water thoroughly after planting, then let the top inch of soil dry out before watering again. Overwatering is the #1 killer of indoor vines—you'll know it's time when leaves start yellowing. I like to use a spray bottle for delicate varieties like string of pearls to avoid disturbing the soil.
☀️ Step 3: Train Vines for Maximum Growth
Gently guide vines along a trellis, macramé hanger, or even a simple wire frame. I start training early—within a week of planting—to encourage upward growth. Use soft plant ties or twist ties to secure stems without crushing them. Rotate pots quarter-turn weekly so vines grow evenly toward the light.
Watch for leggy growth (long stems with sparse leaves)—this means your plant needs more light. Move it closer to the window or add a grow light 6-12 inches away for 12-14 hours daily. You'll see new leaves forming within 2-3 weeks of proper light exposure.
💧 Step 4: Maintain Light, Water, and Humidity
Water when the top 1-2 inches of soil feel dry—stick your finger in to check. Most vines prefer slightly dry soil over soggy conditions. Mist leaves weekly or place pots on a tray of pebbles with water to increase humidity, especially in dry climates. Wipe leaves with a damp cloth monthly to remove dust and help them absorb light.
Fertilize every 4-6 weeks during growing season (spring-fall) with a balanced liquid fertilizer. I cut back to half-strength to avoid burning roots. In winter, let vines rest—water less and skip fertilizer. You'll notice slower growth in winter, but consistent care keeps them healthy for spring blooms.
✂️ Step 5: Prune and Refresh Seasonally
Trim leggy stems in early spring to encourage bushier growth. Cut just above a leaf node (the bump where leaves grow) with clean scissors. Propagate cuttings in water to grow new plants—it's free and fun! Deadhead spent flowers on flowering vines like jasmine to redirect energy to new growth.
Replace old soil every 1-2 years to refresh nutrients. I do this in early spring by gently removing the plant, shaking off old soil, and repotting with fresh mix. This prevents nutrient depletion and keeps roots healthy. Rotate pots again after repotting to maintain even growth toward the light.
Tips & tricks for perfect indoor window plant pots
Here's what nobody tells you about keeping your sunlit vines thriving without the guesswork.
The Light Factor: That 4-6 hours of direct sunlight in Step 1 is non-negotiable for most vines. I've learned the hard way that even a few inches difference can mean the difference between lush growth and sad, leggy stems. If your window doesn't get enough light, invest in a quality grow light—your plants will thank you with vibrant foliage. For maximum benefit, position the grow light 6-12 inches away and run it for 12-14 hours daily, just like the instructions suggest.
Soil Secrets: When filling your 6-inch pots with well-draining potting mix in Step 2, don't skimp on the perlite. I add about 1 part perlite to 3 parts potting mix to prevent those dreaded soggy roots. This simple adjustment has saved me from losing multiple plants to overwatering. Also, that 1-inch deeper planting depth is crucial—it gives your vines stability while allowing roots to spread properly.
Training Timing: Starting vine training within a week of planting (as mentioned in Step 3) makes all the difference. I've seen vines grow twice as fast when properly trained early. Use soft plant ties rather than wire—they won't damage delicate stems. And remember that quarter-turn weekly rotation? It's not just about even growth—it's also about preventing your plants from leaning toward one light source and becoming lopsided.
Watering Wisdom: The finger test for checking soil moisture in Step 4 is your best friend. I've ruined more plants by overwatering than by underwatering, so always wait until that top 1-2 inches feel dry. For delicate varieties like string of pearls, that spray bottle method really works—it keeps the soil undisturbed while giving them the moisture they need. And don't forget to wipe those leaves monthly—they'll absorb more light when they're not covered in dust!
Pro Tips for Indoor Window Plant Pots
- Here's what nobody tells you about keeping your sunlit vines thriving without the guesswork.
- The Light Factor: That 4-6 hours of direct sunlight in Step 1 is non-negotiable for most vines.
- Soil Secrets: When filling your 6-inch pots with well-draining potting mix in Step 2, don't skimp on the perlite.
Frequently asked questions
Got questions about keeping your indoor window plant pots thriving? We’ve got answers! Here are some of the most common concerns—plus quick fixes to keep your green friends happy.
What’s the best way to water indoor window plant pots?
Water when the top inch of soil feels dry—usually every 5–7 days, but adjust based on light and humidity. Overwatering is the #1 killer, so always ensure pots have drainage holes. For thirsty plants like pothos or ivy, check soil moisture daily in bright windows.
How do I choose the right spot for my window plants?
Match plants to light levels: low light (e.g., snake plants) thrives near north-facing windows; medium light (e.g., pothos) works for east/west; bright light (e.g., monstera) needs south-facing or a few feet from a sunny window. Rotate pots weekly for even growth!
When should I repot my indoor window plants?
Repot every 1–2 years or when roots crowd the pot (check by gently tugging the plant—if it resists, it’s time!). Spring is ideal, but do it anytime if roots are circling. Choose a pot just 1–2 inches wider than the current one for stability.
What are good alternatives to traditional soil for window plants?
Try lightweight mixes like coco coir (great for drainage), orchid bark (for air plants), or perlite/vermiculite blends to prevent root rot. For succulents, a cactus mix with extra grit works wonders. Just ensure the mix mimics the plant’s natural habitat!
Why are my window plant leaves turning yellow or crispy?
Yellow leaves often mean overwatering (let soil dry out more), while crispy edges signal low humidity or underwatering. Move plants away from drafts, mist leaves, or place pots on a tray with pebbles and water. Dusty leaves? Wipe them gently with a damp cloth!
Wrapping up and next steps
Transforming your space with indoor window plant pots is simpler—and more rewarding—than you think! 🌿 Whether you’re drawn to trailing vines, leafy greens, or fragrant blooms, the right plants and care will turn your windowsill into a thriving oasis.
Start small, experiment with styles, and watch as your green companions bring fresh energy to your home.
Ready to take the next step? Pick one plant from this guide, gather your supplies, and let your creativity grow! Your future self—and your space—will thank you. 🌱