
Light Requirements
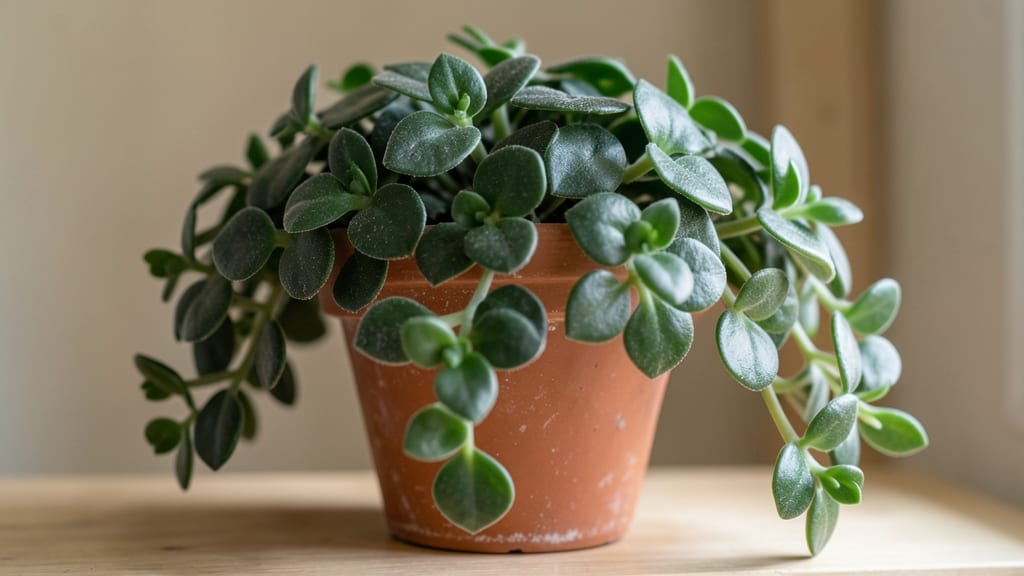
Growing Swedish ivy indoors transforms dull corners into lush, green waterfalls. 🌿 This hardy vine thrives in low-light spaces where most plants struggle, making it perfect for offices, bathrooms, or north-facing rooms. I've kept mine alive for years with minimal effort—just a few simple rules about light, water, and pruning.
The secret lies in its adaptability: Swedish ivy tolerates low to bright indirect light, though it grows fastest near a window. Water when the top inch of soil feels dry, and use well-draining soil to prevent soggy roots.
A 6-inch pot works for starters, but it’ll trail beautifully in hanging baskets or shelves. You’ll love how it fills empty spaces with vibrant green tendrils, purifying the air while requiring almost no attention. Prune leggy stems to encourage bushier growth, and watch it bounce back in weeks.
Even my black thumb can’t kill this plant. For propagation, simply snip a healthy stem and place it in water—roots appear in about 2 weeks. Perfect for beginners who want a foolproof, trailing beauty that thrives where others fail.
📚 In This Guide
- What you need
- Instructions
- Tips and common mistakes
- Wrapping up and next steps
What you need
- ● Swedish Ivy Plant: 1 healthy starter plant (check for vibrant green leaves and no yellowing).
- ● Pot: 1 container with drainage holes (4–6 inches in diameter for a small plant; 8+ inches for mature growth). Pro tip: Terracotta or ceramic pots help regulate moisture! 🌡️
- ● Well-draining soil: 1 bag of light, airy potting mix (e.g., cactus/succulent mix or a blend with perlite/peat moss). Avoid heavy garden soil!
- ○ Drainage medium: Optional but helpful—1–2 inches of gravel or perlite at the pot’s bottom to prevent root rot.
- ● Watering can: 1 with a narrow spout for precise watering.
- ● Spray bottle: 1 for misting leaves (especially in dry climates).
- ● Pruning shears: 1 pair (sterilized with rubbing alcohol) for trimming leggy vines.
- ○ Fertilizer (optional): 1 bottle of balanced liquid fertilizer (e.g., 10-10-10) or slow-release granules for occasional feeding.
- ○ Humidity tray or pebbles: Optional for low-humidity areas—place pot on a tray with water and pebbles to boost moisture. ✨
- ● A bright, indirect light spot (e.g., near a north or east-facing window). Avoid harsh direct sun!
- ● Consistent room temperature (60–75°F / 15–24°C). Swedish Ivy hates drafts or cold windows. 🌡️
- ● Patience! This trailing beauty grows 6–12 inches per year—let it stretch and fill its space.
Step-by-Step instructions for growing Swedish ivy indoors
Here’s how to coax lush, trailing Swedish ivy vines—even in dim corners where other plants struggle.
🪴 Step 1: Choose the Right Container and Soil
Swedish ivy thrives in well-draining soil that mimics its natural rocky habitat. Use a 6-inch pot (or larger for multiple plants) with drainage holes—terracotta works best because it breathes and prevents root rot. Fill it with a mix of 50% potting soil and 50% perlite or coarse sand to ensure excess water drains freely.
Press the soil lightly but don’t compact it—Swedish ivy roots need air. Tap the pot gently on the table to settle the mix, then water until moisture reaches the bottom. The soil should feel damp but not soggy when you squeeze it; if water pools on top, your mix is too dense.
🌱 Step 2: Plant and Position for Low-Light Success
Place your Swedish ivy 2-3 inches deep in the soil, ensuring the roots spread naturally without bending. Gently firm the soil around the base to anchor the plant, but avoid pressing too hard—this can suffocate roots. If you’re propagating from cuttings, dip the stem in rooting hormone first for faster establishment.
Position the pot where it receives bright, indirect light—think east-facing windows or a few feet from a south-facing one. Direct sun can scorch the leaves, while too little light causes leggy growth. You’ll know it’s happy when new leaves emerge bright green and glossy within 4-6 weeks. Rotate the pot occasionally so growth stays even.
💧 Step 3: Water with Precision to Prevent Root Rot
Swedish ivy is drought-tolerant but hates soggy roots. Water once a week (or when the top inch of soil feels dry), using room-temperature water to avoid shocking the plant. Pour slowly until water drains through the bottom—discard any excess in the saucer to prevent root suffocation.
Mist the leaves lightly 2-3 times a week to replicate humidity, especially in dry climates. You’ll notice the vines grow more vigorously when the air feels slightly damp, and the leaves stay plump rather than curling at the edges. Overwatering is the #1 killer—if the soil stays wet for more than 2 days, cut back immediately.
✂️ Step 4: Prune and Encourage Bushier Growth
Pinch back the tips of new growth every 6-8 weeks to encourage branching. Use clean, sharp scissors to trim just above a leaf node—this redirects energy into thicker foliage. If the vines get too long, cut them back by one-third to maintain shape and prevent legginess.
Fertilize lightly once a month in spring and summer with a balanced liquid fertilizer (10-10-10). Dilute it to half-strength to avoid burning roots. You’ll see new leaves emerge darker and more vibrant after feeding, signaling the plant is thriving. Skip fertilizer in fall and winter—Swedish ivy grows slower then and doesn’t need extra nutrients.
☀️ Step 5: Troubleshoot Common Issues
Yellowing leaves? Overwatering or poor drainage is usually the culprit. Let the soil dry out more between waterings, and check that your pot has drainage. Brown tips? Low humidity—group the plant with others or use a pebble tray with water underneath to boost moisture.
If the vines stop growing, it’s likely not enough light. Move it closer to a window (but avoid direct sun) or supplement with a grow light for 12-14 hours daily. Leggy, sparse growth means it’s stretching for light—rotate the pot weekly to keep it balanced. With the right care, your Swedish ivy will cascade beautifully for years.
Tips & tricks for perfect indoor Swedish ivy growth
Here's what nobody tells you about keeping Swedish ivy thriving in those tricky low-light spots.
Soil Mix Matters: That 50/50 potting soil to perlite ratio in Step 1 is non-negotiable. I've seen Swedish ivy roots rot twice when people skipped the perlite, thinking any old potting mix would work. The perlite creates those tiny air pockets roots need to breathe—especially important in small pots where drainage can be tricky.
Light Positioning Secret: In Step 2, when positioning your plant, don't just eyeball it. Test your spot with a simple experiment: Place a white piece of paper where your ivy will sit. If you can't read the paper clearly after 24 hours, that's too dark. Swedish ivy needs that indirect light to photosynthesize properly—it's why you see those gorgeous glossy leaves within 4-6 weeks.
Watering Technique: The "top inch dry" rule in Step 3 is your best friend, but here's the pro move: Use a moisture meter or stick your finger in the soil. If it's damp just below the surface, wait another day. I learned this the hard way after losing two plants to overwatering—Swedish ivy's roots can't handle soggy conditions for more than 48 hours.
Pruning Strategy: When you're pinching back growth every 6-8 weeks in Step 4, aim for the top two sets of leaves. This creates a bushier plant and encourages more vibrant new growth. I've found that cutting back by one-third actually stimulates more vigorous regrowth than you'd expect—it's like giving your plant a little haircut to show off its best features.
Pro Tips for Indoor Swedish Ivy
- Here's what nobody tells you about keeping Swedish ivy thriving in those tricky low-light spots.
- Soil Mix Matters: That 50/50 potting soil to perlite ratio in Step 1 is non-negotiable. I've seen Swedish ivy roots r...
- Light Positioning Secret: In Step 2, when positioning your plant, don't just eyeball it. Test your spot with a simple...
Frequently asked questions
Got questions about keeping your indoor Swedish ivy (Plectranthus verticillatus) thriving? Here are some common ones—and their answers!
How much light does Swedish ivy really need?
Swedish ivy thrives in bright, indirect light but tolerates low-light conditions better than most vines. Place it near a north- or east-facing window, or under grow lights if natural light is scarce. Avoid harsh direct sun, which can scorch its delicate leaves. Pro tip: If leaves turn pale, it’s getting too much light; if they darken, it needs more brightness!
Why are my Swedish ivy leaves turning yellow?
Yellowing leaves usually signal overwatering or poor drainage. Let the top inch of soil dry out between waterings, and ensure the pot has drainage holes. Brown edges? That’s often low humidity—mist the leaves or place a tray of water nearby. Check: Feel the soil moisture with your finger before watering again!
Can I grow Swedish ivy in water instead of soil?
Yes! Swedish ivy adapts well to water propagation. Simply place a healthy stem in a jar of room-temperature water, changing it weekly. Once roots grow (usually in 2–4 weeks), transfer it to soil. Bonus: This method is great for quick propagation or reviving leggy plants!
Is Swedish ivy pet-safe?
Unfortunately, no. Swedish ivy is toxic to cats and dogs if ingested, causing drooling, vomiting, or lethargy. Keep it out of reach of pets or opt for pet-friendly alternatives like parlor palm or Boston fern. Safety first: If your pet nibbles, contact your vet immediately.
How fast does Swedish ivy grow?
Swedish ivy grows moderately fast—expect 4–6 inches of new growth per month with proper care. Prune regularly to encourage bushiness and prevent legginess. Growth hack: Pinch back the tips to promote fuller foliage and slower, stockier vines!
Wrapping up and next steps
Indoor Swedish ivy is your perfect low-light green buddy—easy to care for, forgiving, and stunning in any corner of your home! 🌿 With just a few simple steps—like choosing the right pot, mastering light and watering, and keeping pests at bay—you’ll have lush, trailing vines in no time.
The key? Observe, adjust, and enjoy the process!
Ready to transform your space? Start by snagging your Swedish ivy plant (or a cutting!) and follow the tips above. Before you know it, you’ll be the proud owner of a thriving, low-maintenance green masterpiece. Happy growing! 🌱