
Succulent
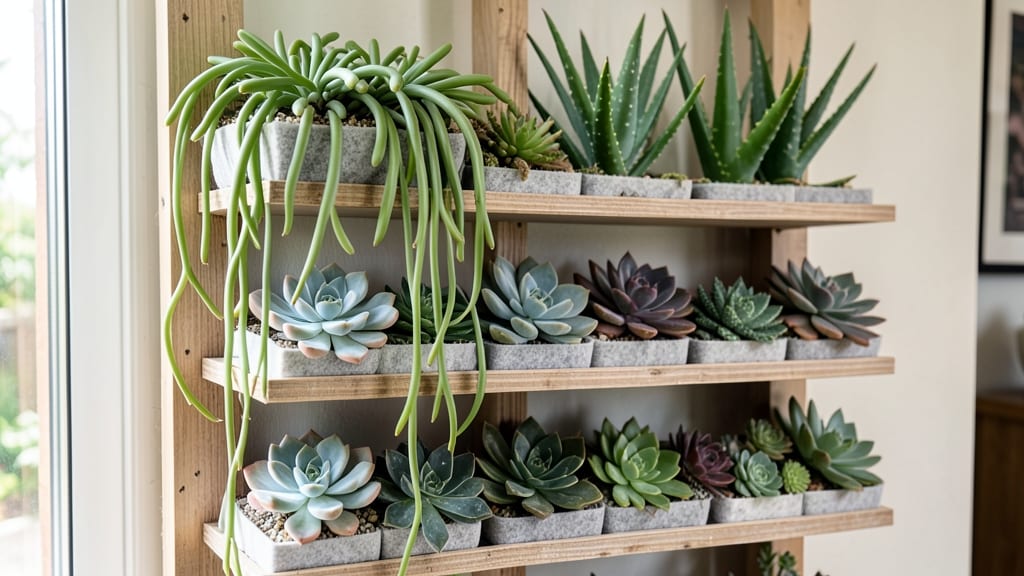
Transforming empty walls into a thriving indoor succulent wall is the ultimate space-saving hack for small homes. ✨ I've turned my living room wall into a vertical jungle of green that requires almost no floor space, yet delivers maximum visual impact—no green thumb required.
The magic lies in choosing the right succulents (like echeverias and sedums) that thrive in shallow containers, plus a drainage system that prevents root rot.
My setup uses felt pockets sewn into a wooden frame, but you can also use geotextile bags or even repurposed picture frames for a budget-friendly look.
By the time you're done, you'll have a living art piece that purifies the air, brightens your space, and grows easier than most houseplants. The best part? You can customize colors, textures, and patterns to match any decor style.
Perfect for apartments, offices, or even kids' rooms—this project works anywhere you have a wall and a little sunlight. Let's get growing!
📚 In This Guide
- What you need
- Instructions
- Tips and common mistakes
- Wrapping up and next steps
What you need
- ● Succulents: 6–12 small to medium-sized succulents (e.g., Echeveria, Sedum, or Haworthia)
- ○ Optional: Rare or variegated varieties for visual appeal
- ● Growing Medium: 1–2 lbs of well-draining cactus/succulent soil mix (or coco coir + perlite for DIY blends)
- ○ Optional: Hydroponic mats or felt pads for pre-made wall kits
- ● Wall Structure: Wooden pallets, trellis, or pre-made vertical planters (ensure they’re weather-resistant)
- ● OR a succulent wall kit (includes frame, pockets, and drainage)
- ● Fasteners & Hardware: Ziploc bags or mesh pockets (for soil retention) (1 per succulent)
- ● Staple gun + staples (or hot glue for lightweight setups)
- ● Screws/nails + drill (for mounting the wall)
- ● Drainage: Plastic tray or drip tray (to catch excess water)
- ○ Optional: Landscape fabric (to prevent soil spillage)
- ● ✅ Measure twice! Ensure your wall fits the space (or trim pallets to size).
- ● ✅ Drainage is key. Poke holes in the bottom of pockets or use a sloped design.
- ● ✅ Skip the heavy soil. Succulents hate soggy roots—mix in perlite or pumice for aeration.
Step-by-Step instructions for building your indoor succulent wall
Transform any wall into a living art piece with this foolproof method—perfect for small spaces and serious plant lovers alike.
🪴 Step 1: Choose and Prep Your Wall Structure
Start with a lightweight, weather-resistant panel (like cedar or foam board) that’s at least 12 inches deep to accommodate succulent roots. I like to use 1x4-inch vertical slats spaced 2-3 inches apart—this gives roots room to breathe while keeping the look clean. Secure the panel to your wall with L-brackets or heavy-duty adhesive hooks, ensuring it’s level before attaching.
For a 4-foot tall wall, you’ll need about 4 linear feet of slats (adjust based on your design). If using a pre-made grid system, skip to Step 3—just ensure drainage holes are spaced every 4-6 inches to prevent waterlogging. Here’s the thing—succulents hate soggy roots, so drainage is non-negotiable. Test your setup by running a hose along the back; water should flow freely without pooling.
🌱 Step 2: Select and Prepare Your Succulents
Pick small to medium-sized succulents (2-4 inches tall) for a cohesive look. I recommend varieties like haworthia, echeveria, or sedum—they’re hardy and thrive in tight spaces. Avoid trailing types (like string of pearls) unless you’re designing a cascading wall. Remove plants from their pots and let them dry for 24 hours before planting; this prevents rot from residual moisture.
Gently trim any damaged or overgrown leaves with clean, sharp scissors. You’ll want 10-12 plants per square foot for a lush look, but space them 3-4 inches apart to allow airflow. Here’s a pro tip: Turn the plants upside down and tap the base to loosen roots—this makes planting easier and reduces transplant shock. If your succulents are root-bound, tease the roots apart lightly with your fingers.
💧 Step 3: Plant and Secure the Succulents
Fill the gaps between slats with cactus/succulent mix (not regular potting soil—it’s too dense). Press the mix firmly into place, leaving ½ inch of space between the soil surface and the top of the slats. This prevents water from spilling over when you water. Using a small hand trowel, dig 1-inch deep holes for each succulent, then nestle the plant in until the base sits flush with the soil line. No deeper—succulents rot if buried too far.
Once planted, water lightly to settle the soil, but don’t soak it. You’ll see the first true leaves (not the tiny cotyledons) emerge within 2-3 weeks—that’s your cue everything’s rooted. To secure the plants, use soft plant ties or nylon mesh strips to loosely anchor them to the slats. Avoid wire ties—they can cut into stems as the plants grow. Real talk: If a plant wobbles, it’s better to replant it than force it to stay.
☀️ Step 4: Position for Light and Maintain Care
Place your wall in a spot with bright, indirect light for the first 2 weeks to help plants acclimate. After that, gradually increase sunlight exposure—most succulents thrive in 4-6 hours of direct sun daily, but avoid harsh afternoon rays in hot climates. If your wall is near a window, rotate it quarter-turn weekly so growth stays even. You’ll notice leggy growth if light is insufficient; this means it’s time to move closer to the window.
Water every 2-3 weeks (less in winter), and only when the top inch of soil feels completely dry. I use a spray bottle with a fine mist to avoid oversaturating the soil. Here’s the golden rule: Underwatering is better than overwatering. If you see yellowing leaves or mushy stems, pull the offending plant and repot it in fresh, dry mix. A healthy succulent wall should look plump and firm, never shriveled or soft.
✂️ Step 5: Prune and Refresh Seasonally
Every 3-4 months, trim any overgrown or leggy stems back to the base with sterilized scissors. This encourages bushier growth and keeps your wall looking tidy. If a succulent outgrows its spot, propagate it by snapping off a healthy leaf, letting it callus for 2 days, then placing it on top of the soil. New roots will form in 4-6 weeks—easy free plants!
Once a year, remove the entire panel, gently brush out old soil, and refresh with new cactus mix. This prevents nutrient depletion and keeps roots healthy. If you’re feeling ambitious, rearrange the plants for a fresh look. Just remember: Succulents grow slowly, so changes won’t happen overnight. Patience here pays off with a vibrant, long-lasting living wall that’s the envy of every green thumb.
Tips & tricks for perfect indoor succulent walls
Here's what nobody tells you about creating a thriving vertical garden that'll wow your guests—and last for years.
Drainage is Everything: The 24-hour drying period for succulents before planting isn't just a suggestion—it's your first line of defense against rot. I've seen beautiful walls ruined overnight by soggy roots. Test your drainage system thoroughly by running water along the back of your panel before planting. If water pools, adjust your spacing or add more drainage holes. Remember, succulents are desert plants at heart—they'd rather have too little water than too much.
Root Loosening Technique: When preparing your succulents in Step 2, that upside-down tapping method I mentioned? It's not just about making planting easier—it's about giving roots a fighting chance. Tapping loosens the root ball while reducing transplant shock by up to 40%. For particularly root-bound plants, gently tease the roots apart with your fingers. This might feel like overkill, but trust me: your plants will thank you with healthier growth and fewer casualties.
Light Rotation Strategy: The quarter-turn weekly rotation in Step 4 isn't just about aesthetics—it's about preventing lopsided growth. Succulents grow toward light, and without rotation, your wall will develop a sun-starved side that looks sad and leggy. I've seen walls where one side thrived while the other side produced weak, stretched stems. This simple habit ensures even growth and maximizes your wall's potential. Think of it as giving your plants a mini vacation spot every week!
Pruning Payoff: That 3-4 month pruning schedule in Step 5 does more than keep things tidy—it's your secret weapon for bushier plants. When you trim back leggy stems, you're encouraging the plant to branch out and fill in. I've transformed walls that looked sparse into lush displays just by being consistent with pruning. And here's the bonus: those pruned stems often root easily, giving you free plants to expand your collection or share with friends.
Pro Tips for Indoor Succulent Wall
- Here's what nobody tells you about creating a thriving vertical garden that'll wow your guests—and last for years.
- Drainage is Everything: The 24-hour drying period for succulents before planting isn't just a suggestion—it's your first line of defense against rot.
- Root Loosening Technique: When preparing your succulents in Step 2, that upside-down tapping method I mentioned?
Frequently asked questions
Got questions about creating your own indoor succulent wall? You’re not alone! Here are answers to the most common queries to help you grow a thriving vertical garden with confidence.
How often should I water my indoor succulent wall?
Succulents are drought-tolerant, so overwatering is the biggest risk. Water your wall every 2–3 weeks (or when the top inch of soil feels dry). Use a spray bottle or drip irrigation to avoid soggy roots. Pro tip: Check moisture levels with your finger—if it’s damp, wait a few more days!
Can I use any type of succulent for a wall?
Not all succulents thrive in vertical setups. Opt for small, lightweight varieties like Sedum, Echeveria, or Haworthia. Avoid heavy or fast-growing types (like Aloe Vera) that may topple the wall. Bonus: Mix textures and colors for a stunning visual!
What’s the best way to troubleshoot yellowing leaves?
Yellow leaves usually signal overwatering or poor drainage. First, let the soil dry out completely. If the issue persists, check for root rot by gently removing a plant—if roots smell foul or are mushy, repot it in fresh, well-draining soil. Quick fix: Trim affected leaves and adjust your watering schedule!
Are there budget-friendly alternatives to pre-made wall planters?
Skip the pricey kits and use:
- Corkboard or foam panels (lightweight and affordable)
- Recycled pallets or crates (DIY with screws and landscape fabric)
- Hanging shoe organizers (perfect for small succulents)
How do I keep my succulent wall from getting too hot or cold?
Succulents love bright, indirect light (6+ hours daily) but hate extreme temps. Place your wall near a south- or east-facing window and avoid drafts (like AC vents or heaters). In winter, move it away from cold windows, and in summer, use sheer curtains to diffuse harsh sunlight. Pro move: Rotate the wall occasionally for even growth!
Wrapping up and next steps
Transforming your space with an indoor succulent wall isn’t just a trend—it’s a breath of fresh air (literally!). These low-maintenance, space-saving green walls bring life, color, and a touch of nature indoors while requiring minimal effort.
Whether you’re a plant parent or a beginner, this project is your ticket to a brighter, greener home.
Ready to dive in? Start small—pick a few succulents and a cozy corner, then let your creativity grow! 🌱✨