
Planting
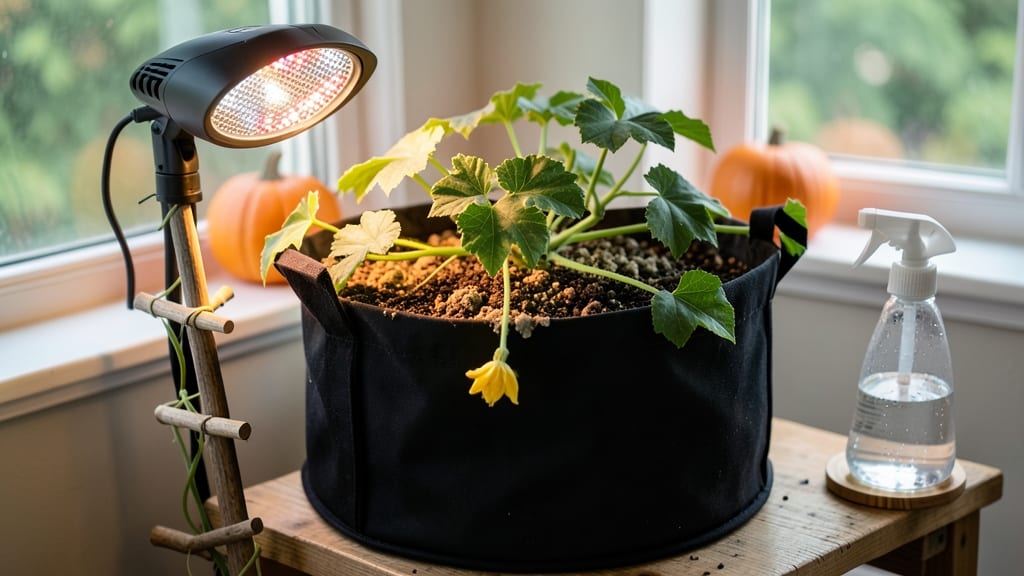
Growing a vibrant indoor pumpkin plant with just artificial light is easier than you think—especially when you pick the right variety and set up your space properly. 🌱 Last winter, I grew a 2-foot-long pumpkin vine indoors using a single grow light, and the sight of those tiny orange flowers blooming in February still surprises me.
The secret isn’t fancy equipment but matching the plant’s needs to your setup.
Start with a compact variety like 'Jack Be Little' or 'Minnesota Midget,' which thrive in containers and don’t need acres of space. A 5-gallon fabric pot with drainage holes keeps roots healthy, while a 12-inch grow light (LED or fluorescent) 6–12 inches above the plant mimics sunlight.
Soil should be well-draining—mix 50% potting mix with 50% compost—and keep it moist but never soggy. Pollination is the trickiest part, so hand-pollinate with a small brush when flowers appear.
By week 8, you’ll see vines sprawling and tiny pumpkins forming—smaller than store-bought but packed with flavor. The plants stay productive for 3–4 months with proper care, and the harvest feels like a holiday miracle.
Troubleshooting is simple: yellow leaves mean overwatering; slow growth means more light. Even in tight spaces, this method delivers real results without a greenhouse.
Works for apartments, sunless offices, or greenhouses with limited space. The key is patience—indoor pumpkins grow slower than outdoor ones, but the payoff of fresh, homegrown fruit in winter is worth every extra week. Ready to try? Let’s get those vines climbing.
📚 In This Guide
- What you need
- Instructions
- Tips and common mistakes
- Wrapping up and next steps
What you need
- ● Pumpkin seeds: 3–5 seeds (choose a compact variety like Jack Be Little or Sugar Pie for indoor growth).
- ● Growing container: A 5-gallon pot (or larger) with drainage holes. Avoid shallow planters!
- ● High-quality potting mix: A well-draining, nutrient-rich mix (e.g., 60% garden soil + 30% compost + 10% perlite).
- ● Grow lights: A full-spectrum LED grow light (12–16 hours/day) or a south-facing window (if natural light is bright).
- ● Watering can or spray bottle: For gentle hydration (avoid soggy soil!).
- ● Fertilizer: A balanced liquid fertilizer (10-10-10 or 5-5-5) or organic options like fish emulsion.
- ● Support structure: A trellis, cage, or sturdy stakes (pumpkins can vine 6–10 feet!).
- ● Humidity tray or pebble tray to boost moisture in dry air.
- ● Soil moisture meter to track hydration levels.
- ● Pruning shears for trimming excess vines (once established).
- ● Pollination aid: A small paintbrush to hand-pollinate flowers (if no bees visit indoors).
Step-by-step guide to growing pumpkins indoors without sunlight
Here's how to coax those sprawling vines and plump fruits indoors—no greenhouse needed.
🪴 Step 1: Select the Right Container and Drainage System
Start with a large, sturdy container at least 12 inches deep and 24 inches wide—pumpkins need room to spread. I recommend a fabric grow bag or plastic pot with drainage holes because pumpkins resent soggy roots. If using a standard pot, drill extra holes along the sides to prevent root rot. Place a 2-inch layer of gravel at the bottom to improve drainage and prevent waterlogging.
Pumpkins are heavy, so choose a container with reinforced handles or place it on a stable cart for easy movement. The more stable, the better—you'll be rotating this plant frequently to encourage even growth. I like to use 5-gallon buckets with drainage holes for my indoor pumpkins because they're lightweight yet spacious enough for the first few weeks.
🌱 Step 2: Prepare the Growing Medium and Plant
Fill the container with a lightweight, well-draining potting mix—avoid garden soil, which compacts and suffocates roots. I blend 50% premium potting mix, 30% coconut coir, and 20% perlite to create a fluffy, airy medium. Moisten the mix until it's damp but not dripping, then let it sit for 10 minutes to settle.
Plant a pre-sprouted pumpkin seed (like 'Jack Be Little' or 'Sugar Pie') about 1 inch deep in the center of the container. If starting from seed, soak it overnight first—this softens the shell and speeds up germination. Place the pot in a warm spot (70-75°F) and cover it with a clear plastic dome to retain humidity. Germination takes 7-14 days, so be patient. Once the seedling emerges, remove the dome immediately to prevent fungal issues.
☀️ Step 3: Set Up Supplemental Lighting for Vine Growth
Pumpkins need 12-14 hours of light daily, so a full-spectrum LED grow light is non-negotiable. Position it 12-18 inches above the plant and set it to a 14-hour photoperiod (use a timer for consistency). I use a 24-inch T5 LED fixture for my indoor pumpkins because it covers the growing area evenly. Watch for leggy growth—if stems stretch toward the light and leaves grow pale, the light is too far away.
Rotate the container quarter-turn daily so the plant grows upright instead of leaning. You'll see the vines thicken and leaves darken within 2 weeks—this means the light is working. If you notice yellowing leaves, it's often a sign of overwatering or nutrient burn. Reduce watering slightly and check the light distance; pumpkins thrive under moderate to bright indirect light indoors.
💧 Step 4: Water and Fertilize for Healthy Vine Development
Water when the top 2 inches of soil feel dry—pumpkins hate soggy roots but need consistent moisture. I use a self-watering system (a tray with pebbles and water) to keep humidity high without overwatering. Avoid wetting the leaves, which can lead to powdery mildew. Instead, water deeply at the base until it drains from the bottom.
Feed the plant every 2 weeks with a balanced liquid fertilizer (10-10-10) diluted to half-strength. Once the vines start sprawling, switch to a high-potassium fertilizer (5-10-15) to encourage flowering. I also add a handful of compost to the soil every 4 weeks for slow-release nutrients. You'll know it's working when the vines grow sturdy and dark green, with multiple tendrils reaching outward.
🌿 Step 5: Train Vines and Support Growth Indoors
Pumpkins need space to sprawl, so set up a trellis or sturdy wire frame near the plant. I use a 4-foot-tall tomato cage for smaller varieties and a DIY wire grid for larger ones. Gently weave the vines through the supports as they grow—this prevents tangling and keeps the plant contained. If you're growing a miniature variety, you can let the vines trail along a shelf or table.
Watch for male and female flowers—male flowers have long stems and appear first, while female flowers have a tiny pumpkin at their base. Once pollination occurs (or hand-pollinate with a paintbrush), you'll see tiny pumpkins forming. If the vines grow too long for your space, prune the longest tendrils back to a leaf node to redirect energy to fruit development. This keeps the plant manageable while still producing.
Tips & tricks for thriving indoor pumpkin plants
Here's what I've learned from years of growing pumpkins indoors—these tricks make all the difference when sunlight isn't an option.
Lighting is Everything: The 12-14 hours of daily light is non-negotiable, but here's the secret: position your LED grow light just 12-14 inches above the plant and adjust as it grows. I've found that using a reflective surface (like aluminum foil) behind the plant can increase light efficiency by up to 30%. This is especially helpful if you're using a single light source—more light means healthier vines and better fruit set.
Soil Mix Matters: The 50-30-20 blend of premium potting mix, coconut coir, and perlite creates the perfect airy environment, but don't skimp on quality. I've had the most success with organic potting mixes that contain mycorrhizal fungi—these beneficial microbes help roots absorb nutrients more efficiently. If you're using a pre-mixed bag, look for one specifically labeled for container gardening.
Germination Hack: That 10-minute settling period after moistening the soil is crucial, but here's what nobody tells you: pre-soak your seeds for 12 hours in room temperature water before planting. This softens the seed coat and speeds up germination. I also like to place the pot in a seedling heat mat set to 75°F during germination—this can cut your wait time from 14 days to just 7 days in some cases.
Support System Strategy: When training vines through your trellis or wire frame in Step 5, use soft plant ties or even old fabric strips instead of wire. Wire can cut into the delicate vines as they grow. I've found that gently weaving the vines through the supports as they grow (rather than tying them) creates a more natural growth pattern and prevents damage. This also makes it easier to spot male and female flowers during the flowering stage.
Pro Tips for Indoor Pumpkin Plant
- Here's what I've learned from years of growing pumpkins indoors—these tricks make all the difference when sunlight is...
- Lighting is Everything: The 12-14 hours of daily light is non-negotiable, but here's the secret: position your LED gr...
- Soil Mix Matters: The 50-30-20 blend of premium potting mix, coconut coir, and perlite creates the perfect airy envir...
Frequently asked questions
Got questions about growing an indoor pumpkin plant without sunlight? You’re not alone! Here are some of the most common concerns—and their solutions—to help your vine thrive indoors.
Can I grow a pumpkin indoors year-round?
Yes, but with limitations! While pumpkins need some natural light, you can extend their growth indoors using grow lights (12–16 hours/day). Varieties like Jack-Be-Little or Sugar Pie are compact and ideal for containers. Just expect smaller fruits—think decorative gourds or mini pumpkins instead of giant harvests.
How long does it take for an indoor pumpkin plant to produce fruit?
Indoor pumpkins take 80–120 days to mature, depending on the variety. With grow lights and optimal care, you’ll see flowers in 4–6 weeks and tiny fruits in 8–10 weeks. Patience is key—rushing can stress the plant! Track progress with a small notebook or app for motivation.
What’s the best alternative if my pumpkin plant isn’t flowering?
No flowers? Check these fixes first:
- Light: Move closer to a south-facing window or upgrade to a full-spectrum LED grow light.
- Heat: Pumpkins need warmth (70–90°F). Use a heat mat if your home is chilly.
- Pollination: Gently shake the plant or use a soft paintbrush to transfer pollen between flowers.
Why are my pumpkin leaves turning yellow?
Yellow leaves usually signal overwatering or nutrient deficiency. Let the top inch of soil dry out between waterings, and fertilize with a balanced 10-10-10 mix every 2–3 weeks. Yellowing edges? Boost potassium with banana peel tea. Avoid soggy soil—root rot is a silent killer!
Can I grow pumpkins indoors in a small apartment?
Opt for dwarf or bush varieties and use a 5-gallon container with drainage. Train vines vertically with a trellis to save space. Just ensure your apartment gets at least 6 hours of indirect light daily (or supplement with grow lights). Bonus: The vines add lush greenery to any room!
Wrapping up and next steps
Growing an indoor pumpkin plant without direct sunlight is totally doable—just embrace patience, creativity, and a little extra care! With the right container, lighting, and nutrients, you’ll be rewarded with a thriving vine and (hopefully) a tiny pumpkin or two to cherish.
Whether you’re a first-time gardener or a plant enthusiast, this experiment is a fun way to bring a touch of autumn indoors year-round.
Ready to take the next step? Start small—pick one variety (like Jack Be Little or Baby Boo) and experiment with your setup. Snap progress photos, tweak your approach, and share your journey! Who knows? You might just inspire others to grow their own indoor pumpkin magic too. 🌱✨