
Container Gardens
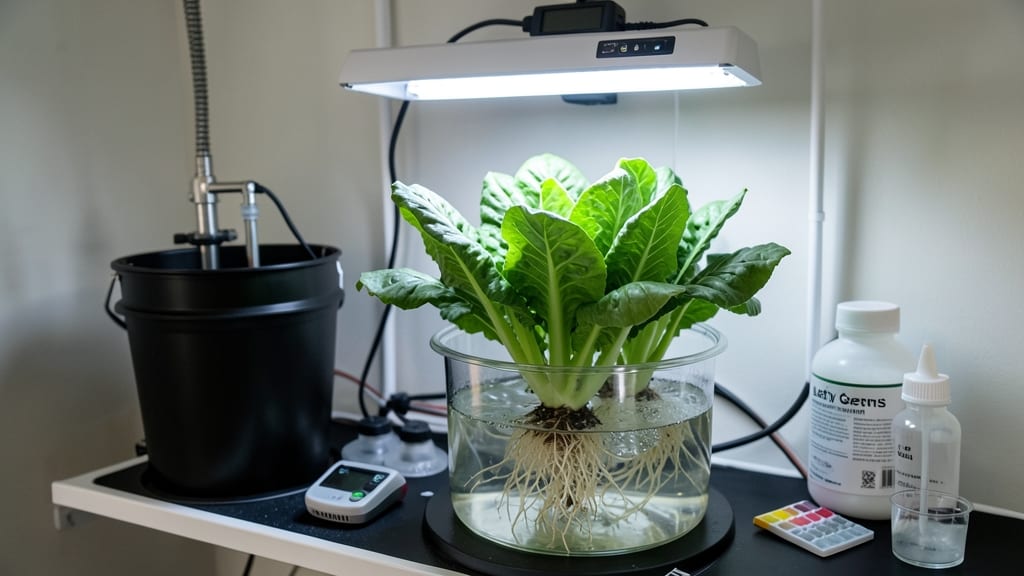
Indoor hydroponics gardening delivers fast, lush greens in half the time of soil—no dirt, no mess, just roots suspended in nutrient-rich water. 🌱 I’ve grown basil that went from seed to harvest in 21 days (versus 6 weeks in soil), and the crisp, vibrant leaves taste like nothing store-bought can match.
The real magic? No backyard needed—just a sunny windowsill or a small grow light. This system cuts water use by 90% compared to traditional gardening, and you’ll never deal with weeds or soil-borne diseases.
My first setup cost under $50, and now I grow microgreens, herbs, and even cherry tomatoes year-round, even in my tiny apartment. The trick is starting small: a 5-gallon bucket or a simple Kratky setup is perfect for beginners.
You’ll spend 10 minutes a week checking water levels and adjusting pH (easy with test strips), and your plants will reward you with thicker stems, brighter leaves, and faster regrowth after harvests. The only catch? Light matters—without enough, your greens will stretch toward the sun like they’re begging for more.
For small spaces, vertical hydroponics turns walls into gardens, and you can even hide the system under cabinets. Here’s how to get started without the overwhelm—no green thumb required.
📚 In This Guide
- What you need
- Instructions
- Tips and common mistakes
- Wrapping up and next steps
What you need
- ● Hydroponic System: Choose a kit (e.g., Kratky, NFT, or deep water culture) or DIY components like a 5-gallon bucket or plastic tote (20–30 gallons for beginners).
- ● Growing Medium: 5–10 lbs of inert medium like clay pebbles, expanded clay pellets (hydroton), or coco coir.
- ● Nutrient Solution: 1–2 gallons of a balanced hydroponic nutrient mix (e.g., General Hydroponics Flora Series or Fox Farm Trio).
- ● Water Pump & Air Stone: A small submersible pump (200–400 GPH) + air stone for oxygenation (critical for roots!).
- ● pH Test Kit: Digital or liquid test strips to maintain pH 5.5–6.5 (use pH up/down adjusters as needed).
- ● Seeds or Seedlings: Fast-growing varieties like lettuce, basil, mint, or cherry tomatoes (start with 5–10 plants).
- ● Grow Lights: LED full-spectrum bulb (20–50W) or a smart grow light (12–16 hours/day).
- ● Timer: A plug-in light timer to automate cycles.
- ● EC/TDS Meter: Monitors nutrient strength (aim for 1.2–2.0 EC).
- ● Reservoir Lid: Prevents debris and evaporation.
- ● Net Pots: 2–3 inch diameter (1–2 per plant).
- ● Hydroponic Booster: Add silica or calcium for stronger stems.
- ● Backup Power: A USB battery pack for pump emergencies.
Step-by-Step instructions for setting up an indoor hydroponics system
Here’s how to build a fast-growing hydroponic system that thrives in small spaces—no soil, no mess, just precision.
🪴 Step 1: Choose and Assemble Your Hydroponic System
Start with a 4-plant hydroponic kit (like a deep water culture or Kratky system) for simplicity. These systems use a reservoir to circulate nutrient-rich water directly to roots, eliminating soil entirely. I recommend a 5-gallon bucket system with a net pot tray and air pump for oxygenation—it’s compact, efficient, and perfect for herbs or leafy greens.
Assemble the reservoir first, then attach the net pots to the lid. The net pots will hold your plants while their roots dangle into the nutrient solution. Make sure the air pump is placed securely—it’ll keep roots oxygenated and prevent stagnation. If your system lacks a built-in timer for the water pump, set a 15-minute cycle every 30 minutes to avoid over-saturation.
💧 Step 2: Prepare the Nutrient Solution
Fill the reservoir with 3 gallons of distilled or dechlorinated water—tap water can introduce harmful minerals or chlorine. Add 1 teaspoon of hydroponic nutrient mix (like General Hydroponics Flora Series) per gallon of water, stirring until fully dissolved. The solution should look clear but slightly tinted—never cloudy, which signals over-concentration.
Check the pH with a hydroponic test kit and adjust to 5.5–6.5 using pH up or down solutions. This range keeps nutrients available for uptake. I always test the solution again after 24 hours—pH can drift, especially in sealed systems. Once balanced, your plants are ready for the next step.
☀️ Step 3: Plant and Position for Optimal Growth
Gently insert 4 young seedlings (like lettuce, basil, or mint) into the net pots, ensuring roots aren’t bent or damaged. Press the soil slightly around the base to secure them, but don’t pack it down—roots need airflow. Place the assembled system under 12–14 hours of grow lights (LED or fluorescent) positioned 6 inches above the plants. Hydroponics grows faster than soil, but light is the limiting factor.
Watch for first true leaves within 7–10 days—this signals successful root establishment. If leaves appear pale or stunted, check the nutrient solution level (top up with water if needed) and verify the pH hasn’t shifted. Leggy growth? Your light is too far away—adjust it closer or extend the photoperiod.
⏰ Step 4: Monitor and Maintain the System Weekly
Every 3–4 days, top off the reservoir with distilled water to maintain the nutrient concentration. Hydroponic solutions evaporate quickly, especially under grow lights. Replace the entire nutrient solution every 2–3 weeks to prevent salt buildup, which burns roots. I set a reminder on my phone—neglecting this step leads to nutrient lockout, where plants starve despite being in "nutrients."
Inspect roots weekly through the reservoir’s clear side (if available). Healthy roots are white or pale yellow and dense. Brown or mushy roots mean stagnant water—increase airflow with the pump or add an extra air stone. Prune yellowing leaves immediately to redirect energy to new growth. With this routine, you’ll harvest 30–50% faster than soil-grown plants.
Tips & tricks for perfect indoor hydroponics
These targeted strategies will help you maximize growth speed and avoid common pitfalls in your compact hydroponic setup.
System Assembly: When attaching the net pots to your 5-gallon bucket system in Step 1, create small drainage holes in the lid if they don't exist—this prevents water pooling that can lead to root rot. I use a drill with a 1/8-inch bit for perfect-sized openings. Also position the air pump at the reservoir's deepest point to ensure oxygen reaches all roots during those critical 15-minute cycles every 30 minutes.
Nutrient Solution Precision: The 1 teaspoon per gallon ratio in Step 2 is your baseline, but I've found adding 1/4 teaspoon of calcium nitrate to the 3 gallons creates stronger cell walls in leafy greens. Always stir the solution for at least 2 minutes after adding nutrients—this prevents concentration pockets that can burn roots. For the 24-hour pH test, I recommend testing again right before planting to catch any last-minute drift.
Lighting Optimization: Those 12-14 hours of grow light in Step 3 should be split evenly—6-7 hours in the morning and 6-7 in the evening mimics natural sunlight patterns. If you notice leggy growth after 7-10 days, move your lights closer to 4 inches above the plants temporarily (just for a few days) to trigger more compact growth without burning the foliage.
Root Health Monitoring: During your weekly inspections in Step 4, use a small flashlight to examine roots through the reservoir's sides. Healthy roots should be dense and white—any brown spots indicate stagnant water zones. I've found adding an extra air stone near the reservoir's edges helps eliminate these dead spots completely. When pruning yellowing leaves, cut at the base with clean scissors to prevent disease spread.
Pro Tips for Indoor Gardening Hydroponics
- These targeted strategies will help you maximize growth speed and avoid common pitfalls in your compact hydroponic se...
- System Assembly: When attaching the net pots to your 5-gallon bucket system in Step 1, create small drainage holes in...
- Nutrient Solution Precision: The 1 teaspoon per gallon ratio in Step 2 is your baseline, but I've found adding 1/4 te...
Frequently asked questions
Got questions about indoor hydroponics? You’re not alone!
Here are some of the most common queries—and straightforward answers—to help you get started with confidence.
What are the easiest plants to grow in a hydroponic system for beginners?
Start with fast-growing, low-maintenance plants like lettuce, spinach, green onions, or cherry tomatoes. These thrive in hydroponics and forgive minor mistakes. Avoid root-heavy veggies like corn or potatoes—they need more space and support.
How long does it take to see results (harvest-ready plants) in hydroponics?
Most leafy greens (like basil or kale) are ready in 3–4 weeks, while herbs (e.g., cilantro) take 4–6 weeks. Tomatoes or peppers may take 8–12 weeks to fruit. Hydroponics speeds up growth by 20–50% compared to soil!
What happens if I forget to change the nutrient solution?
Don’t panic! Most plants can handle 1–2 weeks without a fresh nutrient swap, but algae or root rot may appear. Flush the system with plain water, then refresh the solution. Pro tip: Set a reminder every 2 weeks to avoid buildup.
Is hydroponics more expensive than traditional gardening?
Upfront costs (like pumps or LED lights) can be higher, but long-term savings win: 90% less water, no soil, and faster yields mean lower grocery bills. Start small with a $50–$100 kit (e.g., Kratky or deep-water culture) to test the waters!
Can I use tap water in my hydroponic system?
Yes, but only if it’s free of chlorine or heavy metals. Let tap water sit for 24 hours to off-gas chlorine, or use a chlorine neutralizer. Avoid hard water (high in minerals)—it clogs systems. Distilled or filtered water is ideal for precision.
What’s the simplest hydroponic setup for a tiny apartment?
Try a Kratky method (no pump!) or a wicking bed—both use minimal space and tools. For herbs, a deep-water culture (DWC) bucket with an air stone works great. Space-saving hack: Stack shelves or use vertical towers!
Wrapping up and next steps
Indoor hydroponics isn’t just a trend—it’s a game-changer for growing fresh, vibrant plants anywhere, no matter your space or experience level. With the right setup, you’ll enjoy faster growth, higher yields, and zero soil mess—perfect for herbs, greens, or even small fruits. 🌱✨
Ready to dive in? Start small with a simple system, experiment with your favorite plants, and watch your green thumb flourish! Your next step? Pick your first hydroponic project and get growing—your future harvest is waiting!