
Tools
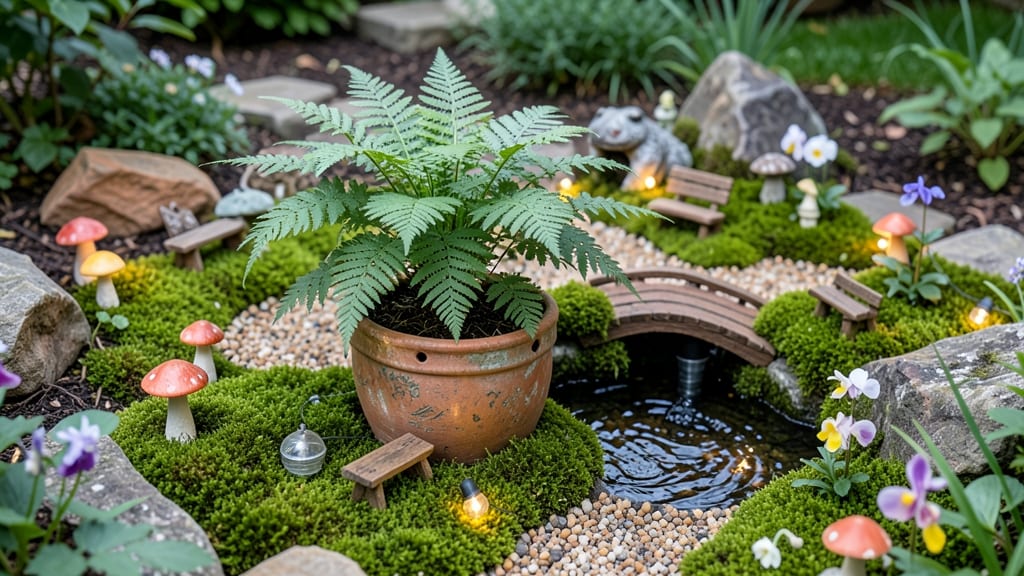
Creating an indoor fairy garden in glass containers transforms empty spaces into magical miniatures. 🌿 The key is blending tiny plants with delicate decor—think moss, succulents, and whimsical furniture—to craft a self-contained world that thrives even in low light.
My first attempt used a repurposed fishbowl with air plants and a pebble "path," and it became the centerpiece of my apartment shelf.
Start with a glass container (wide bowls or terrariums work best) and layer drainage first—small pebbles or activated charcoal prevent rot. Choose low-light plants like fittonia, miniature ferns, or moss to keep maintenance simple.
Add fairy-tale elements: tiny mushrooms, a miniature bridge, or even LED tea lights for a glow. The secret is scale—everything should feel like it belongs in a storybook.
This project delivers instant charm with minimal upkeep. In just a few hours, you'll have a living diorama that purifies air, adds color, and sparks joy daily. The glass creates a self-contained ecosystem where humidity stays balanced, and the magic grows over time.
Perfect for small apartments or offices, it’s a garden that doubles as decor.
Adapt the theme to your space: a woodland fairy glade, a cottage garden, or even a desert oasis. Use what you have—acorns as mushrooms, twigs as fences—and let your creativity guide the design. The beauty is in the details, not the budget. Ready to bring fairy-tale magic indoors?
📚 In This Guide
- What you need
- Instructions
- Tips and common mistakes
- Wrapping up and next steps
What you need
- ● Glass container (12"–18" tall, wide-mouthed for easy access): Options: Apothecary jars, terrariums, or repurposed glass bowls
- ● Pro tip: 💡 Choose containers with a wide opening (3"–4" diameter) for easier planting and decorating!
- ● Pebbles or small rocks (1–2 cups): Size: ¼"–½" (for drainage and aesthetics)
- ● Color options: Neutral (beige, gray) or playful (pastel pink, blue)
- ● Soil mix (1–2 cups): Cactus/succulent soil (well-draining) or potting soil + perlite (50/50 mix)
- ● Pro tip: 🌡️ Sterilize soil by baking it at 200°F for 30 minutes to prevent mold!
- ● Miniature plants (2–5, depending on container size): Ideal picks: Fittonia, moss, air plants (tillandsia), or tiny succulents
- ● Size: 1"–3" tall (available at nurseries or online)
- ● Fairy garden decor (pick 5–10 items): Examples: Miniature mushrooms, tiny furniture, pebbles, shells, or fairy lights
- ● Pro tip: ✨ Thrift stores or Etsy are goldmines for affordable, whimsical finds!
- ● Small hand trowel or spoon (for planting)
- ● Spray bottle (to mist plants gently)
- ● Tweezers (for placing tiny decor)
- ○ Optional: LED tea lights (battery-operated, for a magical glow)
- ● Miniature figurines (fairies, gnomes, or animals)
- ● Twine or moss (to create paths or textures)
Step-by-Step instructions for creating your indoor fairy garden
Building a miniature fairy world is simpler than it looks—just follow these steps for a magical, self-contained ecosystem.
🪴 Step 1: Select and Prepare Your Glass Container
Choose a glass container with a wide base and tall sides—think fishbowls, apothecary jars, or vintage glass terrariums. The 4-inch diameter minimum gives fairies room to move, while deeper containers allow for layered landscapes. Clean the glass thoroughly with warm, soapy water to remove any residue that could harm plants or deter tiny creatures.
For drainage, add a ½-inch layer of small pebbles or activated charcoal at the bottom. This prevents root rot and keeps moisture balanced. I like to use aquarium gravel because it’s sterile and stays in place better than loose sand. Press it down lightly to create a solid base before adding soil.
🌿 Step 2: Build the Soil and Plant Layers
Add a 1-inch layer of coarse sand or potting mix over the pebbles. This mimics natural soil layers and helps with drainage. For a whimsical touch, mix in a handful of crushed eggshells or tiny moss pieces—they add texture and look like fairy gravel. Press the soil down gently but don’t compact it too tightly.
Plant miniature succulents, mosses, or tiny ferns in clusters to create a lush fairy forest. I recommend using slow-growing plants like hen-and-chicks or miniature sedums—they stay small and thrive in confined spaces. Space them 1-2 inches apart to allow for growth without overcrowding. Water lightly after planting to settle the soil around the roots.
☀️ Step 3: Add Fairy Garden Elements
Now comes the fun part—decorating! Use tiny pebbles, twigs, and miniature furniture to create pathways and cozy nooks. I like to bend thin wire into tiny bridges or fences and position them over the soil. For extra magic, add a few drops of food coloring to water in a tiny vial or paint tiny mushrooms with acrylic paint (use non-toxic colors).
Place your fairy garden in bright, indirect light—near a window but not in direct sunlight, which can overheat the glass. A south-facing window works well, but rotate the container occasionally so the plants grow evenly. Watch for condensation on the glass: if it’s heavy, your garden needs better airflow by leaving the lid slightly ajar.
💧 Step 4: Maintain Your Fairy World
Water your fairy garden lightly every 7-10 days, using a spray bottle to mist the soil rather than pouring water directly. Overwatering is the biggest mistake—it causes mold and root rot. You’ll know it’s time to water when the top layer of soil feels dry to the touch. For extra humidity, place the container on a tray of pebbles with water (but never let the base sit in water).
Every few months, check for overgrowth and trim any plants that outgrow their space. Remove fallen leaves or debris to keep the scene looking fresh. If you notice tiny insects, don’t panic—many are harmless and add to the fairy-tale vibe. Just avoid using pesticides, as they can harm the plants and the magic.
⏰ Step 5: Refresh and Expand Over Time
Fairy gardens evolve, just like real gardens! After a few months, you might notice some plants dying or the scene looking tired. This is the perfect time to refresh. Remove any dead plants, add new moss or tiny flowers, and rearrange elements for a fresh look. I like to introduce seasonal changes—tiny pumpkins in autumn or a miniature snow scene in winter (use fake snow or cotton batting).
The key to a lasting fairy garden is balance. Keep the soil healthy, the plants happy, and the decorations whimsical. With a little care, your indoor fairy world will stay enchanting for years. Watch as it becomes a tiny escape where fairies, gnomes, and other magical creatures could call home!
Tips & tricks for perfect indoor fairy gardens
Here's what nobody tells you about creating a thriving miniature world that stays enchanting for years.
Container Selection: The glass container's size and shape directly impact your fairy garden's ecosystem. For best airflow and light distribution, choose containers with a diameter-to-height ratio of at least 1:1.5. I've found vintage apothecary jars with wider mouths work beautifully—they allow easy access for maintenance while preventing excessive moisture loss. Avoid containers with sharp edges that could damage delicate plants or decorations.
Plant Placement Strategy: When arranging your miniature plants in Step 2, follow the "forest layering" principle: place taller plants toward the back (against the glass) and shorter ones toward the front. This creates depth perception that makes your fairy world feel more expansive. I like to use tiny ferns as "trees" and moss as ground cover—they naturally create that lush, magical forest floor fairies would love.
Lighting Solutions: While bright indirect light is ideal, many homes don't have perfect south-facing windows. For alternative lighting, place your fairy garden under a grow light for 6-8 hours daily if natural light is insufficient. LED grow lights are energy-efficient and won't overheat your delicate ecosystem. Position the light about 6-12 inches above the container for optimal growth without scorching the glass.
Seasonal Refresh Hack: Instead of completely rebuilding your fairy garden each season, create a "seasonal swap kit" with interchangeable elements. Keep tiny pumpkins, acorns, and autumn leaves in one container and miniature snowflakes, cotton batting, and winter-themed decorations in another. This lets you transform your garden with minimal effort while maintaining the existing plant structure. I rotate mine every 2-3 months for variety.
Pro Tips for Indoor Fairy Garden
- Here's what nobody tells you about creating a thriving miniature world that stays enchanting for years.
- Container Selection: The glass container's size and shape directly impact your fairy garden's ecosystem.
- Plant Placement Strategy: When arranging your miniature plants in Step 2, follow the "forest layering" principle: place taller plants toward the back (against the glass) and shorter ones toward the front.
Frequently asked questions
Got questions about creating your own indoor fairy garden? Here are some of the most common ones—and their answers—to help you get started with confidence!
What’s the best container for an indoor fairy garden?
Glass containers like terrariums, mason jars, or even repurposed fishbowls work beautifully! They allow light to pass through while keeping humidity in. For a whimsical touch, try vintage teacups, hollowed-out logs, or even a mini greenhouse. Just ensure it has drainage holes if planting real soil.
How long does it take to set up an indoor fairy garden?
Most indoor fairy gardens can be assembled in 30 minutes to 2 hours, depending on complexity. If you’re using live plants, allow an extra 1–2 weeks for them to settle in and adjust to their new environment. The fun part? You can always add or tweak details later!
Do indoor fairy gardens need sunlight?
Yes, but not direct sunlight! Place your garden near a bright, indirect light source (like a north-facing window) to prevent overheating. If natural light is limited, a small LED grow light (4–6 hours daily) works wonders. Avoid harsh sunlight, which can dry out plants or fade decorations.
Can I use fake plants instead of real ones?
Fake plants are a great low-maintenance option, especially for beginners or those with limited space. Choose realistic, lightweight foliage (like silk plants) to avoid weighing down your container. They’re also perfect if you want to experiment with bold colors or themed designs without worrying about upkeep.
What do I do if my indoor fairy garden gets moldy?
Mold is common in humid environments, but don’t worry—it’s fixable! First, remove any visibly moldy plants or debris. Then, improve airflow by opening the container slightly (if possible) or adding a small fan nearby. Reduce moisture by watering less frequently and ensuring proper drainage. A sprinkle of cinnamon or activated charcoal can also help inhibit mold growth.
How can I make my fairy garden look magical at night?
Add a touch of enchantment with fairy lights, LED tea lights, or glow-in-the-dark paint on pebbles or mini furniture. Battery-operated candles or fiber-optic lights create a cozy glow. For extra whimsy, place reflective elements (like tiny mirrors or glass beads) to bounce light around. Just keep bulbs low-wattage to avoid overheating!
Wrapping up and next steps
Creating your own indoor fairy garden is a magical way to bring nature’s charm into your home—no green thumb required!
Whether you’re crafting a tiny terrarium, a mossy wonderland, or a cozy miniature world, the key is to play, experiment, and enjoy the process. 🌿✨ Your fairy garden will thrive with a little creativity, patience, and love.
Ready to dive in? Start small—pick a container, gather your supplies, and let your imagination lead the way! Once your fairy garden is complete, watch it grow and share the joy with friends or family. Happy gardening!