
Planting
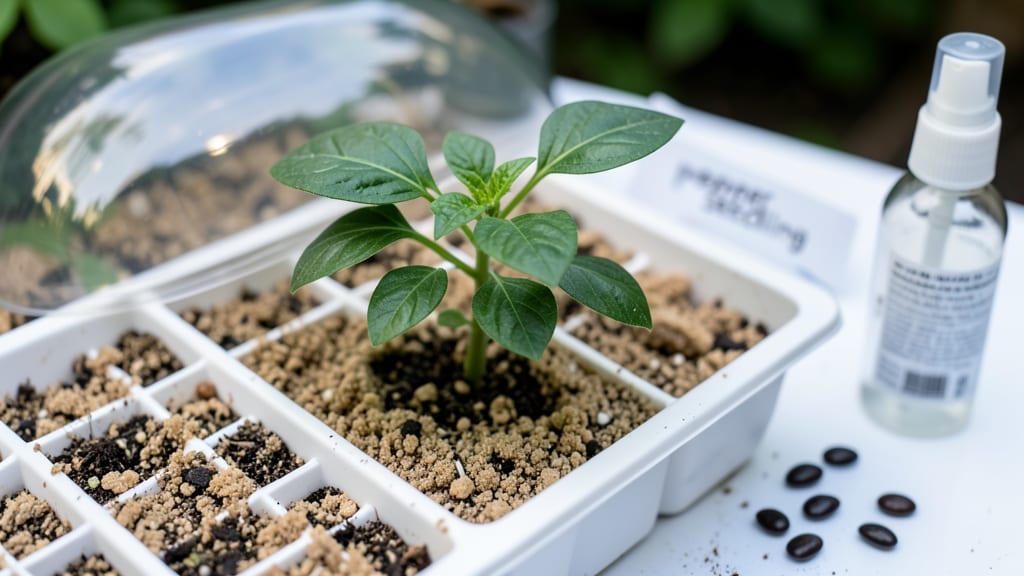
Planting pepper seeds indoors gives you a 3-4 week head start on the season—my jalapeños now produce twice as much as store-bought plants. The secret isn't fancy equipment; it's matching warmth, moisture, and light to what pepper seeds need to break dormancy and sprout strong.
Start with seed-starting mix (not garden soil) in small pots or trays, planting seeds ¼ inch deep and spacing them ½ inch apart. Keep the soil 75-85°F—a heating mat helps if your home runs cooler.
Once sprouted, move to bright light (grow lights work best) and maintain 70-80% humidity with a plastic dome or spray bottle.
You'll see tiny leaves in 7-14 days, but don't rush transplanting. Harden off seedlings over 1-2 weeks before moving them outside, and watch them outpace nursery plants all season. The payoff? Heavier yields, disease resistance, and varieties you'll never find at garden centers.
Works for any pepper type—jalapeños, bell peppers, or ghost peppers—just adjust spacing and heat preferences. Here's how to do it right the first time.
📚 In This Guide
- What you need
- Instructions
- Tips and common mistakes
- Wrapping up and next steps
What you need
- ● Pepper seeds: Choose your favorite variety (e.g., jalapeño, bell, habanero). Aim for 3–5 seeds per pot for better germination rates.
- ● Seed-starting trays or small pots: 2–4" deep, with drainage holes. 1–2 seeds per cell or pot is ideal.
- ● High-quality seed-starting mix: Lightweight, sterile, and well-draining (avoid garden soil—it’s too dense!). 1–2 cups per pot should suffice.
- ● Grow lights or a sunny windowsill: Peppers need 12–16 hours of light daily. A full-spectrum LED grow light (12–16 inches above seedlings) works best.
- ● Spray bottle with water: For gentle, even moisture without over-saturating the soil.
- ● Plastic wrap or humidity dome: Keeps moisture locked in until seeds sprout (usually 7–14 days).
- ○ Heat mat (optional but helpful): Maintains soil temps at 75–85°F for faster germination.
- ● Fertilizer: A balanced, water-soluble fertilizer (5-5-5 or 10-10-10) to use after the first true leaves appear.
- ● pH test kit: Peppers thrive in 6.0–6.8 pH soil. Adjust with lime or sulfur if needed.
- ● Fungicide (like neem oil or hydrogen peroxide): Prevents damping-off disease in damp conditions.
- ● Plant labels & marker: Track varieties and planting dates—especially useful if growing multiple types!
Step-by-Step instructions for planting pepper seeds indoors
Here’s the method I’ve used for years to grow healthy, vigorous pepper transplants from seed.
Prepare Your Containers and Seed Starting Mix
Use small, clean containers—2-3 inches deep—with drainage holes to prevent waterlogging, which peppers hate. I recommend biodegradable pots so you can transplant directly without disturbing roots. Fill each with a sterile seed-starting mix, not garden soil, because it’s too dense and may harbor diseases that kill seedlings.
Moisten the mix until it’s damp but not soggy—squeeze a handful to test. It should hold together lightly without dripping water. Tap the container gently to settle the soil, then smooth the surface with your fingers. This ensures even moisture and prevents seeds from floating too deep when you water.
Plant the Seeds at the Correct Depth
Peppers are finicky about depth—plant them ¼ inch deep, about the diameter of the seed itself. Sowing too deep slows germination because the seedling must push through more soil, exhausting its energy reserves. Place 1-2 seeds per cell (you’ll thin later), spacing them ½ inch apart if using a larger tray.
Cover lightly with a thin layer of the same mix—just enough to obscure the seeds. Mist the surface with a spray bottle until evenly damp. Avoid heavy watering, which can wash seeds deeper or create uneven moisture. Label each container with the pepper variety and date to avoid confusion later.
Provide Warmth and Humidity for Germination
Peppers germinate best at 75-85°F, so place the containers on a seedling heat mat or in a warm spot like on top of the fridge. Cover the tray with a clear plastic dome or plastic wrap to retain moisture and warmth. Check daily but resist the urge to water—condensation inside the dome keeps humidity high.
Germination takes 10-20 days, depending on the variety. Once 50% of seeds have sprouted, remove the dome immediately to prevent damping-off, a fungal disease that collapses seedlings overnight. Keep the soil consistently moist but never waterlogged—peppers are sensitive to root rot from overwatering.
Move to Bright Light and Encourage Strong Growth
The moment seedlings emerge, they need 14-16 hours of light daily. A south-facing window rarely provides enough intensity, so I use a full-spectrum LED grow light positioned 2-4 inches above the plants. Raise it as they grow to maintain that distance. Without sufficient light, seedlings stretch leggily toward the source, weakening their stems.
Watch for first true leaves (the second set after the initial cotyledons) as your signal to thin seedlings. Snip the weaker one at soil level with scissors, leaving the stronger plant. Fertilize lightly with a diluted balanced liquid fertilizer (5-5-5) when the first true leaves appear, but don’t overdo it—young seedlings are sensitive to salt buildup.
Harden Off Before Transplanting Outdoors
Two weeks before your last frost date, begin hardening off seedlings by placing them outside in a sheltered, shaded spot for 1-2 hours the first day. Gradually increase exposure by 1 hour daily over 10-14 days, introducing more sun and wind each time. This prepares them for outdoor conditions and reduces transplant shock.
By the time you’re ready to transplant, seedlings should be 4-6 inches tall with 6-8 true leaves. Choose an overcast day to move them to the garden, and water deeply at the base afterward. Peppers dislike root disturbance, so handle them gently and transplant on a cloudy afternoon to minimize stress.
Tips & tricks for planting pepper seeds indoors
Took me years of trial and error to perfect these tricks—here's how to avoid the common pitfalls that kill seedlings before they even get started.
Container Selection: While biodegradable pots are ideal, any clean container with drainage will work—just avoid plastic cups without holes, which trap moisture and invite root rot. I've successfully used recycled yogurt cups with drainage holes punched in the bottom. The key is keeping roots aerated and preventing soggy soil, which peppers absolutely hate. In Step 1, if you're using a tray without individual cells, space containers at least 2 inches apart to prevent cross-contamination between plants.
Germination Temperature: The 75-85°F range is critical because pepper seeds need consistent warmth to germinate. I learned this the hard way after placing my trays on a cold windowsill—nothing sprouted! If you don't have a heat mat, try placing containers on top of your refrigerator (where it's naturally warm) or nestle them against your water heater. Just monitor closely to ensure they don't dry out from the heat source. In Step 3, when you cover with plastic, the trapped heat will amplify the effect, so check daily for condensation buildup.
Lighting Strategy: That 14-16 hours of light requirement isn't just about duration—it's about intensity too. I've seen seedlings stretch like overgrown weeds when they're just getting weak morning sunlight. If using a grow light, position it just 2-3 inches above the tallest seedlings and raise it as they grow. For budget options, I've had success with simple LED shop lights (around $20) that provide full-spectrum coverage. In Step 4, rotate your containers daily so all sides get even light exposure—this prevents lopsided growth that makes seedlings more vulnerable to breakage.
Harden Off Gradually: The 1-2 hour to 14 days progression in Step 5 might seem slow, but it's the only way to prevent transplant shock. I once rushed this process and lost half my seedlings to sunburn within hours. Start by placing them in the shade where they'll get indirect light and breeze. After 5-7 days, you can gradually introduce them to more direct sunlight. Watch for wilting—this is your signal to slow down the process. If possible, harden off in the same location where you'll eventually plant them, so they recognize the environment.
Pro Tips for Plant Pepper Seeds Indoors
- Took me years of trial and error to perfect these tricks—here's how to avoid the common pitfalls that kill seedlings before they even get started.
- Container Selection: While biodegradable pots are ideal, any clean container with drainage will work—just avoid plastic cups without holes, which trap moisture and invite root rot.
- Germination Temperature: The 75-85°F range is critical because pepper seeds need consistent warmth to germinate.
Frequently asked questions
Got questions about growing peppers from seed indoors?
You’re not alone! Here are answers to the most common concerns to help you start strong—no guesswork required.
When is the best time to start pepper seeds indoors?
Plant seeds 8–12 weeks before your last frost date (usually March–April in most climates). Peppers need warmth to germinate—wait until soil temps hit 70°F+ (use a heat mat if needed). Starting too early risks leggy seedlings; too late may delay harvests.
Do pepper seeds need light to germinate?
Nope! Seeds sprout in darkness—focus on keeping them warm (75–85°F) and moist. Once sprouts emerge (7–14 days), move them to a sunny window or grow light (12–16 hours/day) to prevent weak, stretched seedlings.
Why aren’t my pepper seeds sprouting? Troubleshooting tips.
Check these fixes if seeds stay dormant:
Too cold? Use a heat mat or warm spot (like on top of the fridge).
Too wet/dry? Keep soil consistently moist (not soggy). Mist lightly if dry.
Old seeds? Viability drops after 1–2 years—test a few in warm water.
Low oxygen? Press seeds lightly into soil (¼ inch deep) for better airflow.
How warm does it need to be for pepper seedlings?
Peppers are heat-loving! Ideal temps:
- Germination: 75–85°F (use a heat mat if below 70°F).
- Seedlings: 65–75°F during the day, no lower than 55°F at night.
- Transplanting outdoors: Wait until soil is 60°F+ and nights stay above 50°F.
Can I use regular potting soil for pepper seeds?
Yes, but amend it for better results:
- Mix in perlite or vermiculite (20%) for drainage.
- Add a slow-release fertilizer (like 5-10-5) or compost.
- Avoid garden soil—it’s too dense and may harbor pests.
Wrapping up and next steps
Growing peppers indoors from seeds is a rewarding journey that starts with patience and a little know-how!
By following these steps—from selecting the right seeds to providing optimal light and care—you’ll be well on your way to a thriving indoor garden. Don’t forget: consistency is key, whether it’s monitoring moisture, ensuring proper airflow, or adjusting light as your seedlings grow.
Now that you’re equipped with the basics, take the next step! Start your seeds today, and in just a few weeks, you’ll have vibrant seedlings ready to transplant or enjoy as microgreens. Happy planting—your future harvest is waiting! 🌱✨