
Orchid Care
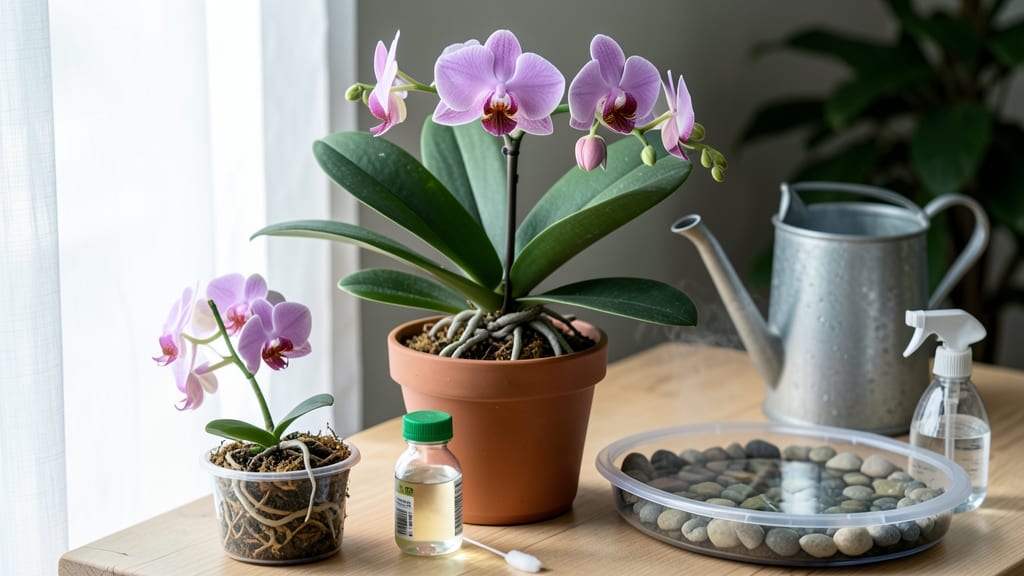
How to look after an indoor orchid feels like nurturing a delicate guest—one wrong move and it wilts, but get it right and you'll enjoy blooms for months. 🌸 The key is mimicking its tropical home with just enough light, water, and humidity, without drowning it in love (or chlorine). My first orchid lasted exactly three weeks before I drowned it, but now I’ve perfected the routine that keeps mine blooming year after year.
Orchids need bright, indirect light—think east-facing windows or a few feet from a south window. Water only when the top inch of mix feels dry, using room-temperature water (never tap water with chlorine).
A clear glass vase with pebbles and water nearby boosts humidity without soggy roots. Most people overwater, but orchids are tougher than they look—just don’t let them sit in standing water.
With the right balance, you’ll see new growth within 4-6 weeks, and blooms lasting 6-8 weeks (or longer if you prune spent stems). The leaves stay glossy and upright, and roots grow thick and silvery-green.
The secret? Consistency—orchids hate sudden changes in light, temperature, or watering. Even a drafty window can stress them out.
Troubleshooting is simple: yellow leaves mean overwatering, while wrinkled ones signal underwatering. Brown tips? Too much fluoride in your water. Swap to distilled or rainwater, and your orchid will bounce back faster than you think. Once you master the basics, you’ll be the one everyone asks for cuttings!
📚 In This Guide
- What you need
- Instructions
- Tips and common mistakes
- Wrapping up and next steps
What you need
- ● Orchid Pot: A well-draining pot with holes (4–6 inches in diameter, depending on orchid size). Pro tip: 💡 Use a pot with a built-in saucer or a cache pot to prevent root rot.
- ● Orchid Mix: A chunky, airy blend (50% bark, 30% sphagnum moss, 20% perlite or charcoal). Skip regular potting soil—it’s too dense!
- ● Watering Can or Spray Bottle: A can with a narrow spout (for deep watering) or a spray bottle (for misting). Pro tip: 🌡️ Use room-temperature water to avoid shocking the roots.
- ● Humidity Tray or Peat Moss: To maintain 40–70% humidity, especially in dry climates.
- ○ Fertilizer: A balanced, water-soluble orchid fertilizer (20-20-20 or 10-10-10, diluted to half-strength). Optional: Slow-release granules for convenience.
- ● Pruning Shears or Sharp Scissors: Sterilized and sharp for trimming dead blooms or roots.
- ● Support Stakes or Twist Ties: If your orchid has long stems (e.g., Phalaenopsis), these help keep blooms upright.
- ● Grow Lights: LED or fluorescent lights (12–14 hours/day) if natural light is insufficient.
- ● Thermometer/Hygrometer: To monitor temperature (60–80°F) and humidity levels precisely.
- ● Rooting Hormone: For propagating orchid babies or repotting.
- ● Decorative Stones or Moss: For a cute, naturalistic pot display (ensure they don’t block drainage!).
Step-by-Step instructions for caring for your indoor orchid
Here’s the simple routine I’ve used to keep my orchids blooming for months—no fancy tools, just consistent care.
💧 Step 1: Water with Precision and Patience
Orchids hate soggy roots, so I water only when the top inch of soil feels dry to the touch. Stick your finger in the pot—if it’s damp, wait. When it’s dry, give it a thorough soak until water runs freely from the drainage holes. Let it drain completely for 10-15 minutes before returning it to its saucer.
I use room-temperature water (never cold) and avoid getting the leaves wet—water only the roots. Overwatering is the #1 killer, so if you’re unsure, wait another day. Yellow leaves? That’s often a sign of too much water. Brown, mushy roots? Time to adjust.
☀️ Step 2: Place in Bright, Indirect Light
Orchids need bright, indirect light—think east-facing window or a few feet from a south window. Direct sun burns leaves, while dim light causes weak stems. If your orchid’s leaves turn dark green, it’s not getting enough light. If they yellow or get sunspots, move it back.
I rotate my orchid a quarter turn weekly so all sides get even light. A grow light works too if natural light is lacking, but keep it 6-12 inches away for 12-14 hours daily. Watch for new growth—strong, upright stems mean you’ve got the light right.
🌱 Step 3: Feed Monthly During Active Growth
Use a balanced, water-soluble orchid fertilizer (like 20-20-20) diluted to half-strength. Feed only during active growth—when you see new shoots or buds forming. I fertilize every 4-6 weeks in spring and summer, then stop in fall and winter when the plant rests.
Never fertilize a stressed orchid (like one with yellow leaves or no blooms). If you’re unsure, skip it. Flush the roots with plain water after fertilizing to prevent salt buildup. You’ll know it’s working when your orchid produces stronger stems and more blooms over time.
✂️ Step 4: Prune Dead Blooms and Yellow Leaves
Once a bloom stem fades, cut it back just above the second node (the bump where leaves or buds grow). This encourages new blooms. Use clean, sharp scissors to avoid crushing stems. If a leaf turns yellow, it’s dying—snip it off at the base with the same clean cut.
Deadheading isn’t just for looks—it redirects the plant’s energy to new growth. I prune mine every 2-3 weeks during bloom season. Never cut healthy green stems, even if they look tired. Orchids are tougher than they appear!
🪴 Step 5: Repot Every 1-2 Years for Fresh Growth
Orchids need repotting when their roots outgrow their pot or the potting mix breaks down (usually every 1-2 years). Choose a pot 1 inch larger in diameter with fresh orchid bark mix. Gently remove the plant, loosen old roots, and trim any that are black, mushy, or hollow—these are rotten.
I repot in late winter or early spring before new growth starts. After repotting, water lightly and place the orchid in bright, indirect light for a week to recover. You’ll see new roots forming within 4-6 weeks—that’s your sign it’s thriving again.
Tips & tricks for perfect indoor orchid care
Here's what nobody tells you about keeping your orchid happy—these are the little details that make all the difference between a struggling plant and one that blooms for months.
Watering Wisdom: The 10-15 minute drainage time after watering is non-negotiable. I've seen people skip this and end up with root rot within weeks. Place your orchid in its saucer over a tray of water for those 10-15 minutes—this ensures complete drainage without you having to time it perfectly. Pro tip: Use a spray bottle to mist the roots during this time if your orchid prefers humidity.
Lighting Insight: That quarter turn weekly rotation in Step 2 isn't just about even light—it's about preventing your orchid from leaning toward the light source. I notice my orchids develop a slight lean after just a few weeks without rotation. If you don't have a window that gets consistent indirect light, a simple LED grow light on a timer (12-14 hours daily) works wonders. Just don't let it touch the leaves—keep it that 6-12 inches away.
Fertilizing Finesse: The half-strength fertilizer dilution is crucial, but timing matters just as much. I've learned to fertilize right after watering—this prevents salt buildup from the fertilizer. And here's a trick I picked up: After fertilizing, give your orchid a good rinse with plain water after 24 hours. This flushes out any excess salts that can accumulate in the bark mix over time.
Pruning Precision: When you're cutting back those faded blooms just above the second node in Step 4, look closely at the nodes below. Sometimes you'll find dormant buds waiting to be awakened. I've had orchids produce second blooms from these hidden buds when given the right conditions. Just make sure your scissors are clean—dirty blades can introduce bacteria that causes infections.
Pro Tips for Look After An Indoor Orchid
- Here's what nobody tells you about keeping your orchid happy—these are the little details that make all the difference between a struggling plant and one that blooms for months.
- Watering Wisdom: The 10-15 minute drainage time after watering is non-negotiable.
- Lighting Insight: That quarter turn weekly rotation in Step 2 isn't just about even light—it's about preventing your orchid from leaning toward the light source.
Frequently asked questions
Got questions about keeping your indoor orchid happy and blooming? You’re not alone! Here are some of the most common concerns—plus straightforward answers to help you troubleshoot like a pro.
How often should I water my indoor orchid?
Orchids thrive on a soak-and-dry routine. Water your plant when the top inch of the potting mix feels dry—usually every 7–10 days. Overwatering is the #1 killer, so always empty the saucer after 10 minutes to prevent root rot. Pro tip: Use room-temperature water to avoid shocking the roots!
Why are my orchid leaves turning yellow?
Yellow leaves often signal overwatering or poor drainage. Check the roots—if they’re mushy or black, trim the damaged ones and repot in fresh bark mix. If the leaves are just soft, reduce watering and ensure the pot has drainage holes. Fun fact: Older leaves may yellow naturally as they age, but new growth should stay vibrant.
How do I encourage my orchid to rebloom?
Reblooming takes patience! After flowers fade, wait until 1–2 new leaves grow before fertilizing lightly (every 2–4 weeks with a balanced orchid fertilizer). Provide 12–14 hours of bright, indirect light daily and a slight temperature drop at night (5–10°F cooler). Patience pays off—healthy plants often rebloom in 6–12 months!
Can I use tap water for my orchid?
Ideally, use rainwater, distilled, or filtered water to avoid fluoride/chlorine buildup in tap water, which can damage roots. If you must use tap water, let it sit out for 24 hours to evaporate chemicals. Bonus tip: Orchids love humidity—mist leaves occasionally or place the pot on a tray of pebbles with water.
What should I do if I see bugs on my orchid?
Common pests like scale, mealybugs, or spider mites can hitch a ride on new plants. Isolate the orchid and wipe leaves with a soapy water solution (1 tsp mild soap per quart of water). For stubborn infestations, use neem oil (follow label instructions). Quarantine new plants for 2 weeks to prevent spreading.
How do I repot an orchid without killing it?
Repot every 1–2 years or when the potting mix breaks down. Gently remove the plant, trim dead roots with sterilized scissors, and place it in a slightly larger pot with fresh bark mix. Avoid fertilizing for 4–6 weeks post-repotting to let roots recover. Pro move: Use a pot with airflow holes—orchids hate soggy feet!
Wrapping up and next steps
Caring for an indoor orchid is all about patience, observation, and love—just like nurturing any cherished plant! With the right balance of light, water, and a little TLC, your orchid can reward you with stunning, long-lasting blooms year after year. 🌸
Ready to take the next step? Start by monitoring your orchid’s progress—adjust care routines as you learn what works best. And if you’re feeling inspired, why not expand your collection with a new variety? Every bloom is a little victory worth celebrating!