
Flowers
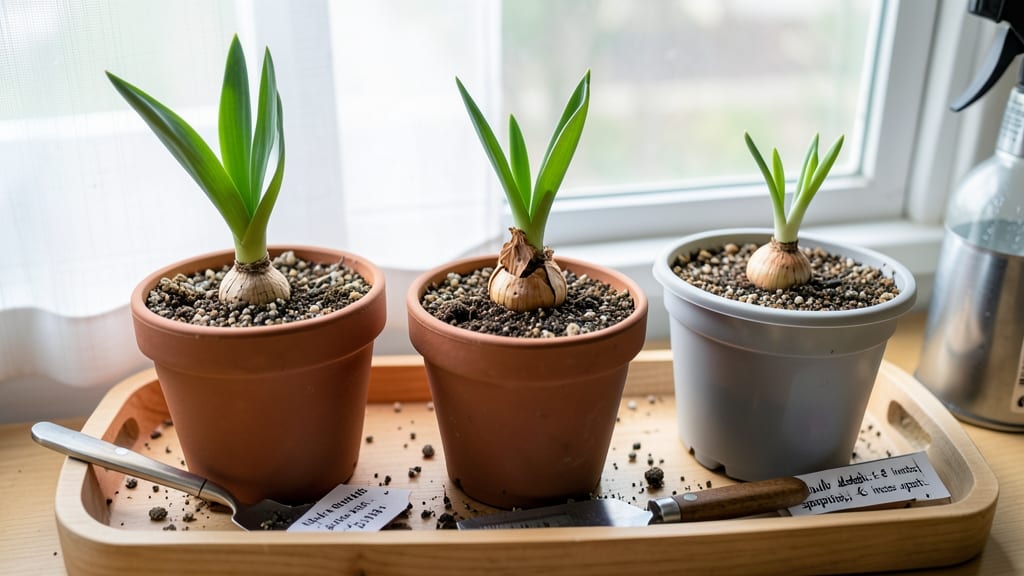
Growing tulips indoors means winter blooms that steal the show—no garden required. 🌱 I’ve forced tulips in my kitchen for years, and the secret isn’t complicated: it’s about light, timing, and the right bulb.
The first year, I nearly gave up when my bulbs sprouted but refused to bloom. Turns out, I skipped the critical cold period they need to trigger flowers.
You’ll need just three things: tulip bulbs (preferably species types like Tulipa greigii), a container with drainage, and a bright spot near a window—or a grow light if natural light is weak.
The bulbs need 6-8 weeks of cold (like a fridge) before forcing, then 12 hours of light daily once they sprout. Too much heat, and they’ll bolt without blooms. Too little light, and they’ll stretch awkwardly toward the window.
By Valentine’s Day, you’ll have cups of vibrant blooms that last a week or more in water. The scent alone makes it worth the wait—nothing beats tulips in a vase when winter’s grip finally loosens.
Plus, the bulbs can be replanted outdoors later, giving you free garden tulips for next year.
Works for apartments, sunrooms, or even a basement with grow lights. The key is patience—these aren’t instant gratification flowers. But once you see that first bud pop, you’ll be hooked on indoor forcing forever.
📚 In This Guide
- What you need
- Instructions
- Tips and common mistakes
- Wrapping up and next steps
What you need
- ● Tulip bulbs: Choose hardy indoor varieties like Parrot, Darwin Hybrid, or Fringed (3-5 bulbs per pot for best results). Look for firm, plump bulbs with no soft spots.
- ● Container: A pot with drainage holes (6-8" diameter for 3-5 bulbs; deeper for larger bulbs). Terracotta or ceramic works great!
- ● Potting mix: Use a well-draining, bulb-specific mix or blend 50% potting soil + 50% perlite/pumice to prevent rot.
- ● Grow lights: A full-spectrum LED bulb (10W-20W) or a smart grow light (12-16 hours/day during growth phase). No sun? No problem!
- ● Watering can: A spray nozzle or drip function to avoid overwatering (bulbs hate soggy roots!).
- ● Fertilizer: A balanced, water-soluble fertilizer (10-10-10 or 20-20-20) diluted to half-strength (use sparingly!).
- ● Chilling tray: A cool, dark fridge or basement space (35-45°F) for 12-16 weeks to mimic winter dormancy (or a bulb chiller if you’re fancy!).
- ● Thermometer/hygrometer: To monitor temperature (60-70°F during growth) and humidity (40-60%).
- ● Peat moss or coconut coir: For extra moisture retention around bulbs (mix into potting soil).
- ● Decorative stones: Moss or pebbles to pretty up your pot while keeping soil moist.
- ● Plant labels: To track varieties, planting dates, and care notes (trust us, it helps!).
Step-by-step instructions for growing tulips indoors
Here's how I force tulip bulbs to bloom indoors—no greenhouse needed, just smart timing and light control.
🌱 Step 1: Select and Prep the Right Bulbs
Pick fresh, firm tulip bulbs labeled "forcing" or "indoor blooming." Avoid bulbs that feel soft or shriveled—they won’t perform. I like Darwin Hybrid or Parrot tulips for their bold colors and strong stems. Soak the bulbs in lukewarm water for 12 hours before planting to hydrate them fully.
This step is critical: bulbs need to drink up water before planting so they don’t waste energy later. Place them in a bowl of water and leave them overnight. You’ll see them plump up slightly—that’s your signal they’re ready. If you skip this, blooms will be smaller or never appear.
🪴 Step 2: Plant in Containers With Proper Drainage
Fill a 6-inch deep container with well-draining potting mix—never garden soil. Tulips rot easily if their roots sit in soggy conditions. I use a mix of 50% potting soil and 50% perlite for airflow. Plant bulbs 6 inches deep, pointed end up, with 1-2 inches between each bulb.
Gently press the soil around the bulbs to secure them without compacting it too tightly. The key here is balance: firm enough to stay in place, but loose enough for roots to spread. Water lightly after planting—just enough to moisten the soil, not drench it. Overwatering now will cause bulbs to rot before they even sprout.
☀️ Step 3: Chill the Bulbs for 10-12 Weeks
Place the container in a cool, dark spot (35-45°F) for 10-12 weeks. A garage, unheated basement, or even a refrigerator works—just avoid temperature swings. This mimics winter conditions and triggers blooming. I wrap the pot in a dark plastic bag to block all light and check weekly to ensure no moisture has evaporated.
After 6-8 weeks, you’ll see the first signs of growth: a tiny green shoot pushing through the soil. This is your cue that the bulbs are waking up. Don’t move them yet—wait until the shoot reaches 2-3 inches tall before exposing them to light. Rushing this step often leads to weak, leggy stems that flop over later.
💧 Step 4: Move to Light and Water Gently
Once shoots hit 2-3 inches, transfer the pot to a bright, indirect light spot (60-65°F). A north-facing window or under a grow light 6-12 inches away works best. Tulips need 12-14 hours of light daily now to develop strong stems. I rotate the pot weekly so all sides get even exposure—this prevents stems from leaning toward the light.
Water sparingly: keep the soil moist but not soggy. Stick your finger 1 inch into the soil—if it feels dry, water lightly. Overwatering now causes bulbs to split or rot. You’ll see buds form in 3-4 weeks after moving to light. If buds stay closed or stems bend, your light isn’t strong enough—move the pot closer to the window or light source.
⏰ Step 5: Enjoy Blooms and Prep for Next Year
Once tulips bloom, enjoy them for 5-7 days before the flowers fade. Cut stems at a 45-degree angle just above a leaf node to prolong vase life. After blooming, let the foliage die back naturally—don’t cut it. The leaves feed the bulb for next year’s growth. Place the pot in a shady spot outdoors (if possible) or a cool, dry indoor area until the leaves turn yellow and crisp.
Discard the bulbs after they’ve fully dried out—they won’t rebloom indoors. To repeat this process, start fresh with new bulbs next fall. I’ve forced tulips this way for years, and with this method, you’ll get bold, vibrant blooms indoors every winter. The secret? Patience during the chilling phase and consistent light after sprouting.
Tips & tricks for perfect indoor tulip blooms
Forcing tulips indoors is all about patience and precision—here's how to avoid the common mistakes that keep blooms from happening.
Bulb Selection Matters: Look for bulbs labeled specifically for "forcing" or "indoor blooming" at garden centers. These varieties are bred to handle the stress of indoor growing, unlike regular garden tulips. Darwin Hybrid and Parrot tulips are my top picks—they produce the largest, most vibrant blooms. Confession: I skipped this step for years and wondered why my tulips never opened fully. The difference is night and day!
The Chilling Phase is Non-Negotiable: That 10-12 week chilling period at 35-45°F is absolutely critical. I've tried shortcuts, but nothing replaces this winter simulation. Use a refrigerator if needed, but avoid temperature swings—even a 5°F fluctuation can disrupt the process. Place a small dish of water near the container to maintain humidity, especially if using a refrigerator. This prevents the soil from drying out completely during the dark phase.
Light Transition is Key: When you move the 2-3 inch shoots to light, do it gradually. Start with just 2-3 hours of indirect light the first day, then increase by 2 hours daily until reaching 12-14 hours. This mimics spring's gradual lengthening days and prevents shock that causes stems to bend or buds to close. I use a timer for my grow light to ensure consistent 12 hours of light—no guessing involved!
Watering Wisdom: The 1-inch soil moisture check is your best friend. Tulips hate soggy conditions but also need consistent moisture. I've found that watering in the morning gives roots time to absorb moisture before the chilling phase begins. During the light phase, let the top inch dry slightly between waterings—this prevents the classic tulip bulb rot that kills so many indoor attempts.
Pro Tips for Grow Tulips Indoors
- Forcing tulips indoors is all about patience and precision—here's how to avoid the common mistakes that keep blooms from happening.
- Bulb Selection Matters: Look for bulbs labeled specifically for "forcing" or "indoor blooming" at garden centers.
- The Chilling Phase is Non-Negotiable: That 10-12 week chilling period at 35-45°F is absolutely critical.
Frequently asked questions
Got questions about growing tulips indoors? You’re not alone! Here are some of the most common queries—and their easy solutions—to help you bloom like a pro.
Can I grow tulips indoors from store-bought bulbs?
Yes, but with a twist! Store-bought tulips are often treated to prevent sprouting. For best results, choose untreated bulbs from garden centers or online retailers. Soak them in water for 24 hours to kickstart growth, then plant in well-draining soil. Patience is key—it may take 6–8 weeks for blooms!
How long does it take for indoor tulips to flower?
Indoor tulips typically take 6–12 weeks to bloom, depending on the variety and growing conditions. Smaller bulbs (like Tulipa greigii) may flower faster (6–8 weeks), while larger varieties could take up to 3 months. Keep them in a cool (50–60°F), bright spot to speed things up!
What’s the best light setup for indoor tulips?
Tulips need 12–14 hours of light daily for strong growth. Use a grow light (LED or fluorescent) 6–8 inches above the bulbs if natural light is limited. Rotate the pot occasionally for even exposure. Avoid direct sunlight, which can scorch leaves—bright, indirect light is ideal!
Why aren’t my indoor tulips blooming?
No blooms? Check these fixes:
- Light issues: Tulips need light before planting (simulate winter with 10–12 hours of darkness for 6–8 weeks).
- Temperature shock: Keep them cool (50–65°F) during growth. Warmth speeds up foliage but delays flowers.
- Overwatering: Bulbs rot in soggy soil. Water only when the top inch is dry.
- Small bulbs: Miniature tulips (like Tulipa clusiana) may not bloom as dramatically as larger varieties.
Can I reuse indoor tulip bulbs for next year?
Reusing bulbs is possible but tricky! After blooming, let the foliage fully yellow and die back (6–8 weeks) to recharge the bulb. Store it in a cool, dry place (40–50°F) until fall, then replant. Success isn’t guaranteed—many gardeners treat indoor tulips as one-and-done beauties and opt for fresh bulbs yearly.
Wrapping up and next steps
Growing tulips indoors is a rewarding way to enjoy vibrant blooms year-round—with just the right balance of light, patience, and care. Whether you’re a beginner or a seasoned plant parent, these smart lighting tricks and simple steps make it easier than ever.
Now that you’re armed with the know-how, why not take the next step? Try experimenting with different lighting setups or even propagate your tulips to share the joy with friends! 🌱✨
Pro tip: Document your progress—you’ll love watching those first green shoots emerge! Happy growing!