
Size
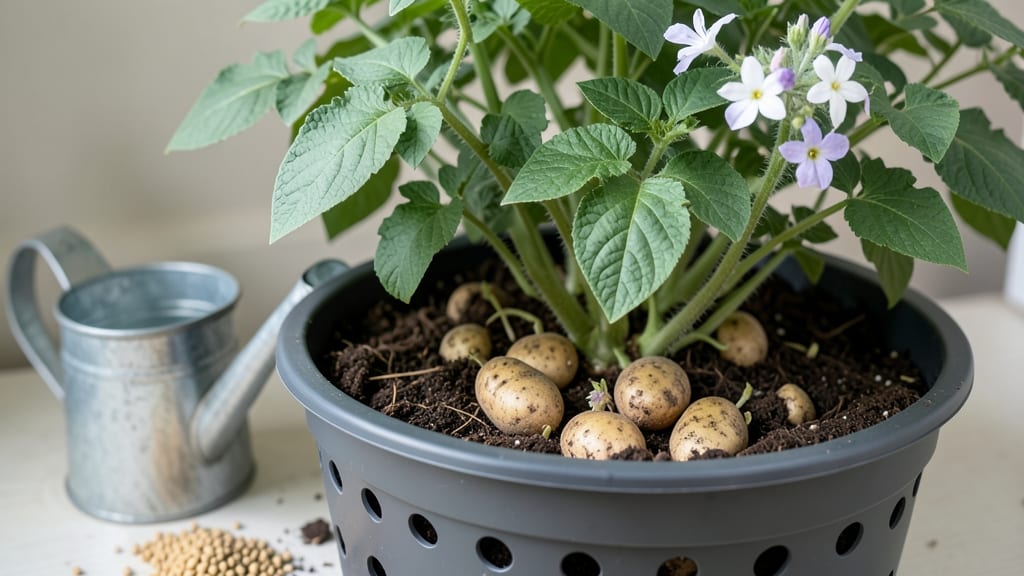
Growing potatoes in a bucket indoors lets you harvest crisp, homegrown spuds even in a studio apartment. 🌱 I started this method after my balcony garden failed—now I get 10-15 pounds from a single 5-gallon bucket, no yard required.
The secret is choosing certified seed potatoes (not grocery store tubers) and a deep container with drainage. You’ll layer soil and potatoes every 2 weeks, mimicking how they grow in the ground but vertically. No digging, no bending—just stackable harvests.
By harvest time, you’ll pull out golden, earthy potatoes straight from your windowsill. The first few are small, but they keep growing until the bucket is full. Perfect for small spaces, urban dwellers, or anyone who wants fresh potatoes without a garden.
This method works year-round with grow lights or a sunny windowsill. Here’s exactly how to set it up—no green thumb required!
📚 In This Guide
- What you need
- Instructions
- Tips and common mistakes
- Wrapping up and next steps
What you need
- ● 5-gallon bucket (or larger, with drainage holes—at least 12–18 inches deep and 18+ inches in diameter for optimal growth). Plastic buckets with lids work best!
- ● Potato seeds—choose certified seed potatoes (not grocery-store spuds!) like Yukon Gold, Red Pontiac, or Fingerlings (3–4 medium-sized potatoes per bucket).
- ● Potting soil—lightweight, well-draining mix (avoid garden soil; opt for a 50/50 blend of peat moss and perlite or coco coir). About 3–4 bags (4–5 cubic feet total) per bucket setup.
- ● Drainage material—small rocks, pebbles, or broken pottery pieces (1–2 inches thick) for the bucket’s bottom.
- ● Drill or screwdriver—to create 4–6 drainage holes in the bucket’s bottom (if not pre-drilled).
- ● Watering can or spray bottle—for gentle, even moisture (avoid over-saturating!).
- ○ Grow lights or sunny windowsill—potatoes need 12–16 hours of light daily. A full-spectrum LED grow light (optional but ideal for indoor setups).
- ○ Fertilizer (optional but helpful)—balanced, low-nitrogen fertilizer (like 5-5-5 or compost tea) to boost growth.
- ● Bucket lid or cover—to create a dark, humid environment for sprouting (remove once shoots appear!).
- ● Stackable bucket system—if you’re growing vertically, use multiple buckets with holes drilled in the bottom to layer them.
- ● Thermometer/hygrometer—to monitor soil temp (ideal: 60–70°F) and humidity.
- ● Twine or twine ties—to secure plants to a trellis if growing chitted potatoes (pre-sprouted).
- ● Epsom salt—a tablespoon mixed into soil can prevent blossom end rot.
Step-by-Step instructions for growing potatoes in a bucket indoors
Here’s the space-saving method I’ve used to grow 4 bucketfuls of potatoes in a closet or under-garage—no yard needed.
🪴 Step 1: Prepare the Bucket and Seed Potatoes
Choose a 5-gallon bucket with drainage holes drilled in the bottom (or use a pre-drilled grow bag). Fill the bottom 6 inches deep with a mix of 50% potting soil and 50% compost—this gives roots room to spread while keeping moisture balanced. I always add a handful of worm castings at this stage for extra nutrients.
Cut 4 seed potatoes (organic, certified disease-free) into chunks with at least 2-3 eyes each. Let them cure in a dark place for 24 hours so the cut surfaces callus over—this prevents rot once planted. Arrange them eyes-up in the bucket, spaced evenly around the edges. Cover with 2 inches of soil mix, leaving the tops exposed to light.
💧 Step 2: Water and Maintain Moisture Without Overdoing It
Water the bucket thoroughly until water drains from the bottom holes—this ensures the soil is evenly moist but not soggy. Place the bucket in a spot with indirect light (a sunny window or under grow lights 12+ hours/day). You’ll see sprouts in 2-3 weeks, but here’s the trick: never let the soil dry out completely—potatoes need consistent moisture, but soggy soil invites rot.
Check moisture by sticking your finger 1 inch deep—if it feels dry, water again. I use a spray bottle for top-ups between deep waterings to avoid disturbing the soil. Once the sprouts reach 4-6 inches tall, it’s time to add the first layer of soil.
🌱 Step 3: Layer Soil as Stems Grow (The Stacking Secret)
When the topmost leaves reach 6 inches, add 4-6 inches of fresh soil mix, burying the stems up to the leaves. This encourages more tuber formation below ground. Repeat every 2-3 weeks until the bucket is full—this is how you get stacked harvests in one container. I mark the soil level with a pencil so I don’t bury the leaves too deep.
Stop adding soil when the bucket is 2 inches from the rim—you want room for watering. The final layer should be loose and fluffy so new tubers can form without resistance. Avoid compacting the soil; gently pat it down instead.
☀️ Step 4: Adjust Light and Watch for Harvest Cues
Potatoes need bright, indirect light—if stems grow leggy and pale, move them closer to a south-facing window or under grow lights. Leggy growth means they’re stretching for light, which weakens the plant and reduces yield. You’ll know they’re ready to harvest when the flowers appear (if your variety blooms) or when the top leaves yellow and die back—this usually happens 8-12 weeks after planting.
Before harvesting, stop watering for 3-5 days to let the soil dry slightly. This prevents tubers from splitting when you dig. Gently tip the bucket onto a tarp and sift through the soil to collect potatoes. Some will be small; others will be golf-ball to softball-sized—save the smaller ones for next year’s seed potatoes.
✂️ Step 5: Cure and Store Your Harvest
Let the potatoes cure in a dark, dry place (like a closet) for 1-2 weeks at room temperature. This thickens their skins and improves storage life. Avoid refrigerating them—cold turns starches to sugar, making them taste sweet and mealy. Store in a paper bag or mesh sack in a cool, dark spot (ideally 40-50°F) for up to 6 months. Check occasionally for soft spots or sprouts—discard any that go bad.
Here’s the thing—if you saved the smaller potatoes as seed pieces, you’ve just created a self-sustaining system. Next year, you’ll need zero new seed potatoes from the store. Real talk: I’ve done this in a laundry closet, under a desk, and even on a balcony—as long as you follow the light and moisture rules, it works.
Tips & tricks for growing potatoes in a bucket indoors
Here's what I learned after growing four bucketfuls in tight spaces—these tricks save time, space, and headaches.
Soil Mix Matters: The 50% potting soil and 50% compost blend is non-negotiable for bucket growing. I've tried heavier mixes that compact too much, and they restrict root growth. For even better results, add a handful of perlite to the mix—it improves drainage and prevents waterlogging, especially in the bottom 6 inches where roots first establish. The worm castings in Step 1 aren't optional either; they provide the microbial boost that makes all the difference in tuber formation.
The 24-Hour Cure: Never skip letting those seed potato chunks cure in darkness for the full 24 hours. I learned this the hard way when a chunk rotted after planting—those cut surfaces need time to form a protective layer. Pro tip: Place them on a paper towel in a cardboard box to catch any excess moisture during curing. This prevents mold from forming while they're still vulnerable.
Light Management: When your stems reach 6 inches in Step 3, it's time for the first soil layer—but watch for light deprivation. The top leaves need access to light to continue growing while the buried stems form tubers. I use a small wooden stake to mark soil levels and ensure I don't bury the leaves too deep. If your growing space is dim, consider adding a clip-on LED grow light (12+ hours/day) to supplement natural light during the 8-12 week growing cycle.
Harvest Timing: The 3-5 day watering pause before harvest is crucial for preventing split potatoes. I've found that in humid environments, you might need up to 7 days of reduced watering. Test soil moisture by squeezing a handful—if it holds together but crumbles when you poke it, you're good to harvest. The smaller potatoes you save for next year's planting should have at least 2-3 eyes, just like your original seed pieces.
Pro Tips for Grow Potatoes In A Bucket Indoors
- Here's what I learned after growing four bucketfuls in tight spaces—these tricks save time, space, and headaches.
- Soil Mix Matters: The 50% potting soil and 50% compost blend is non-negotiable for bucket growing.
- The 24-Hour Cure: Never skip letting those seed potato chunks cure in darkness for the full 24 hours.
Frequently asked questions
Got questions about growing potatoes in a bucket? You’re not alone—let’s tackle the most common ones so you can confidently start your indoor harvest!
Can I grow potatoes indoors year-round?
Yes! Since you’re using buckets indoors, you control the environment. Just ensure your space gets 6–8 hours of sunlight daily (or use a grow light) and keep temps between 50–70°F. Avoid drafts or extreme heat, which can stunt growth or cause rot.
What’s the fastest potato variety for a bucket?
Opt for early-maturing varieties like ‘Yukon Gold’ (90 days) or ‘Red Pontiac’ (70 days). These thrive in containers and deliver harvests faster than russets. Avoid slow growers like ‘Idaho Russet’—they need more space and time!
How do I know when potatoes are ready to harvest?
Check for flowers (a sign of maturity) and gently brush soil away from the bucket’s sides. If you see small potatoes, wait 2–3 weeks. For a full harvest, stop watering and let the foliage die back—then dig carefully to avoid bruising.
What if my potatoes turn green or sprouts grow too fast?
Green potatoes mean too much light—move your bucket to a shadier spot or add a light-blocking cover. For rapid sprouting, reduce water slightly and ensure temps stay cool (60°F ideal). Trim excessive sprouts to redirect energy to tubers.
Can I reuse the same bucket for multiple harvests?
After harvesting, sterilize the bucket with a 10% bleach solution (rinse well) and refresh the soil. Add compost or organic matter to replenish nutrients. Just avoid reusing soil with signs of disease (mold, pests).
Do I need special soil for bucket potatoes?
Nope! Use a well-draining potting mix (avoid garden soil—it compacts). Mix in perlite or vermiculite for aeration. A 50/50 blend of potting soil and compost works great. Drainage holes in the bucket are a must to prevent rot!
Wrapping up and next steps
Growing potatoes in a bucket indoors is a rewarding way to enjoy fresh, homegrown produce—no matter how small your space! 🌱 With just a few supplies, a little patience, and the right care, you’ll soon be harvesting crisp, flavorful potatoes.
Start small, experiment with varieties, and soon you might even stack buckets for a bigger yield.
Ready to take the next step? Try your hand at growing another bucket-friendly crop like lettuce or herbs—your tiny garden adventure is just beginning! 🚀