
Size
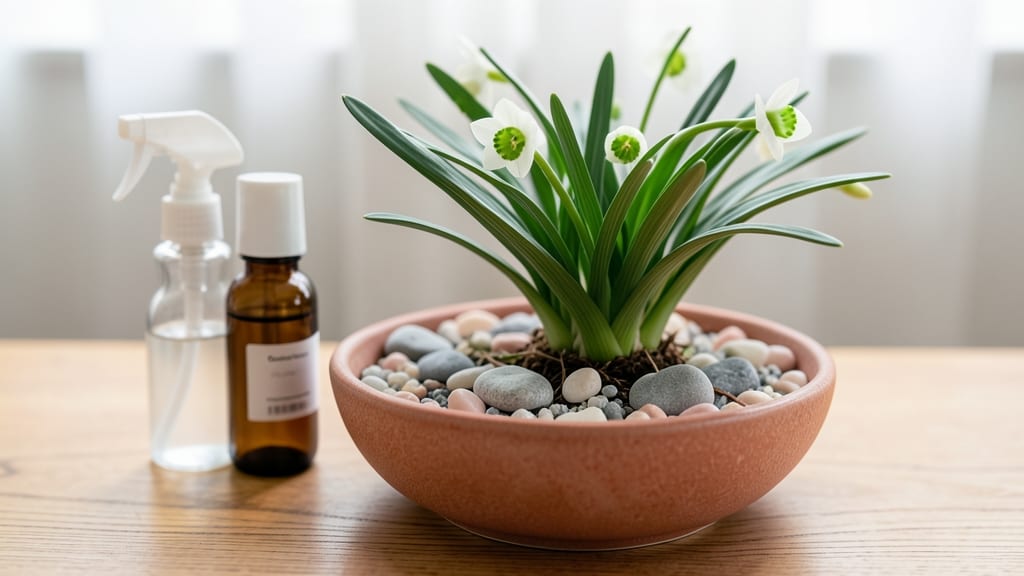
Growing paperwhite narcissus indoors transforms your home into a fragrant winter wonderland with just a few simple steps. 🌱 These cheerful blooms burst into life without needing sunlight, soil, or even a yard—just a sunny windowsill and a shallow container.
I've forced paperwhites every holiday season since my first attempt, and they never fail to deliver that signature sweet scent and cheerful blooms.
The secret lies in their bulb-forcing nature—no digging, no planting, just placing bulbs in a container with water and watching them sprout. You'll need a shallow dish, pebbles for drainage, and a sunny spot (even an artificial grow light works).
Within 2-3 weeks, you'll see green shoots pushing through the paper-thin skins, followed by clusters of fragrant white flowers in just 6-8 weeks.
What makes these bulbs magical is their resilience—they thrive in indoor conditions most plants can't handle. The fragrance alone makes them worth growing, but the cheerful blooms add instant holiday cheer.
Plus, each bulb produces 3-5 stems, so one package gives you a full display. No green thumb required; even my black thumb can't kill these.
Here's the best part: after blooming, you can replant the bulbs outdoors in spring for next year's flowers. Whether you're a first-time grower or a seasoned plant enthusiast, paperwhites are the easiest way to bring spring indoors during the coldest months. Let's get those bulbs growing!
📚 In This Guide
- What you need
- Instructions
- Tips and common mistakes
- Wrapping up and next steps
What you need
- ● Paperwhite Narcissus bulbs: 3–5 bulbs (look for firm, plump bulbs with no soft spots or mold).
- ● Shallow container: A wide, shallow dish (6–8 inches in diameter) with drainage holes. Options include: A ceramic or glass bowl with pebbles
- ● A bulb-forcing kit (pre-drilled with pebbles)
- ● A repurposed cake pan or pie dish (with holes drilled)
- ● Pebbles or gravel: 1–2 inches of smooth, rounded pebbles (like marble or quartz) for drainage and bulb support.
- ● Water: Room-temperature tap water (avoid distilled or softened water—it lacks minerals).
- ● Bright, indirect light: A sunny windowsill (east or south-facing) or a grow light (12–14 hours/day).
- ○ Optional but helpful: Chalk or charcoal (1–2 pieces) to keep water fresh and prevent bacterial growth.
- ● Floral foam (if using a vase-style setup).
- ● Decorative elements (like moss or pebbles) for a polished look.
Step-by-step instructions for growing paperwhite narcissus indoors
Here's how to coax those sweetly scented blooms indoors—no greenhouse needed.
🌱 Step 1: Choose and Prepare Your Bulbs
Select firm, plump paperwhite narcissus bulbs (about 2-3 inches in diameter) from a reputable supplier. Avoid any with soft spots or mold—these won't thrive. I like to soak the bulbs in lukewarm water for 12 hours before planting. This hydrates them and kickstarts root growth, which means faster blooms.
Here's the thing—don't skip the soaking. Bulbs store energy in their scales, and a good soak ensures they have enough reserves to push through the soil and bloom. After soaking, let them dry briefly so they won't rot when planted. You'll see tiny white roots forming within 24 hours—that's your first sign everything's working.
🪴 Step 2: Select Containers and Plant the Bulbs
Use shallow containers with drainage holes—6-8 inches deep works perfectly for 4 bulbs. I prefer glass bowls or ceramic pots because they let you admire the roots as they grow. Fill the container halfway with well-draining cactus/succulent mix (never regular potting soil—it stays too wet).
Place the bulbs neck-up, with about half their height exposed above the soil. This mimics their natural growing conditions in rocky Mediterranean soils. Space them evenly around the container so they have room to lean slightly as they grow. Press the soil gently around the base—just enough to hold them steady, not packed tightly.
💧 Step 3: Water and Provide Cool Conditions
Water the planted bulbs sparingly—just enough to moisten the soil, but not soaking. Paperwhites hate soggy roots, so I use a spray bottle to mist the soil until it feels damp ½ inch deep. Place the container in a cool, dark spot (like a closet or under a cabinet) where temperatures stay between 55-65°F.
This cool, dark phase lasts 2-3 weeks—the time it takes for roots to establish and shoots to reach 2-3 inches tall. You'll notice the green tips poking through the soil first, followed by the classic strap-like leaves. Don't water again until you see those leaves—overwatering now will rot the bulbs before they even sprout.
☀️ Step 4: Move to Light and Encourage Blooming
Once the shoots reach 2-3 inches, move the container to a bright, indirect light spot (a south-facing window works best). You'll see the leaves turn a deeper green and grow taller. This is when the magic happens—the bulbs shift from root growth to flower production. Water lightly every 5-7 days, keeping the soil just moist—not soggy.
After 4-6 weeks total, you'll spot tiny flower buds forming at the top of the stems. This is the moment that matters: increase light to 6+ hours of bright, indirect sunlight daily. Too little light = weak stems and sparse blooms. If your space lacks natural light, supplement with a grow light kept 6 inches above the plants for 12 hours daily. Watch for the buds to open in 7-10 days—that sweet fragrance is worth the wait!
⏰ Step 5: Maintain and Enjoy the Display
Once the flowers open, keep the soil moist but not waterlogged. The blooms last 1-2 weeks, and the scent intensifies in the evenings. I like to place the container in a high-traffic area—like a dining table or entryway—so the fragrance fills the room. After the flowers fade, the leaves will turn yellow. Let them die back naturally, but don't cut them until they're completely brown.
Here's the bonus: you can force multiple cycles from the same bulbs! After the leaves turn yellow, remove the container from light, let the soil dry out, and store the bulbs in a cool, dark place for 8-10 weeks. Then repeat the process—you'll get another round of blooms in 3-4 months. Real talk: this is the easiest way to enjoy spring's scent anytime of year.
Tips & tricks for growing paperwhite narcissus indoors
Real talk: these little tricks will help you avoid the most common pitfalls and get those fragrant blooms every time.
Soaking Strategy: The 12-hour soak in lukewarm water isn't just about hydration—it's about waking up the bulb's metabolic processes. I use a glass of water with just enough to cover the bottom (about ½ inch) and let them soak in a dark cupboard. After 12 hours, you'll notice the water looks cloudy—that's the bulbs releasing sugars and starting their growth cycle. Don't skip this step, even if your bulbs look perfect. I've tried planting without soaking, and the results are noticeably weaker blooms with longer wait times.
Container Selection: While glass bowls look stunning, they can make it harder to monitor soil moisture. If using glass, place a small pebble or decorative stone at the bottom to elevate the bulbs slightly—this prevents them from sitting in water if you overwater. For ceramic pots, make sure the drainage holes are large enough (at least ¼ inch diameter) to prevent root rot. I've seen beautiful displays ruined by soggy roots in containers with tiny holes.
Light Transition: The move from cool, dark conditions to bright light at the 2-3 inch shoot stage is critical. I like to gradually introduce light over 2-3 days by placing the container near a north-facing window first, then moving it to brighter locations. Sudden exposure can shock the plants and cause them to lean excessively toward the light. Watch for the leaves to turn a vibrant green—this is your sign they're adapting well to the new conditions.
Root Display: If you're using a clear container, you'll get a fascinating view of the roots developing. The roots should be white and firm, not brown or mushy. If you notice any brown spots during the initial 2-3 week dark phase, it's a sign of overwatering. At this stage, the roots need just enough moisture to establish—think of them like tiny sponges that will expand dramatically once in light. This is why the spray bottle method works best for initial watering.
Pro Tips for Grow Paperwhite Narcissus Indoors
- Real talk: these little tricks will help you avoid the most common pitfalls and get those fragrant blooms every time.
- Soaking Strategy: The 12-hour soak in lukewarm water isn't just about hydration—it's about waking up the bulb's metab...
- Container Selection: While glass bowls look stunning, they can make it harder to monitor soil moisture. If using glas...
Frequently asked questions
Got questions about growing Paperwhite Narcissus indoors? You’re not alone! Here are some of the most common concerns—plus quick, practical answers to keep your blooms thriving.
How long does it take for Paperwhite Narcissus to bloom indoors?
With the right conditions, you’ll see buds form in 4–6 weeks. The bulbs are pre-programmed to flower quickly, so patience is key! Keep them in a cool, dark spot for the first 2–3 weeks, then move to bright, indirect light to speed up blooming. Pro tip: A sunny windowsill or grow light works wonders!
What if my bulbs rot or smell bad?
Rot or a foul odor usually means overwatering or poor drainage. Let the top inch of soil dry out between waterings, and ensure your pot has drainage holes. If rot sets in, trim the affected bulb (with sterile scissors) and replant the healthy part in fresh, dry potting mix. Prevent it: Use well-draining soil and avoid soggy conditions!
Can I reuse Paperwhite Narcissus bulbs after they bloom?
Yes! After blooming, let the foliage yellow and die back naturally (about 6–8 weeks). Then, store the bulbs in a cool, dry place (like a paper bag with airflow) until next season. They’ll often rebloom, but their second year may be less vigorous. Bonus: Save seeds from the dried seed pods for future plants!
Do Paperwhite Narcissus need fertilizer?
A light dose of balanced fertilizer (like 10-10-10) can boost blooms, but it’s not required. Mix a tiny amount into the soil at planting, or use a diluted liquid fertilizer every 4–6 weeks. Warning: Over-fertilizing can burn roots—go easy!
What’s the best indoor location for Paperwhite Narcissus?
Place them in bright, indirect light (east or west-facing windows are ideal). Avoid direct sun, which can scorch leaves, and keep them away from drafts or heating vents. A kitchen counter or bathroom shelf often works perfectly! Troubleshoot: Yellow leaves? They need more light.
Wrapping up and next steps
Growing paperwhite narcissus indoors is a rewarding way to enjoy their sweet fragrance year-round—no green thumb required! With just a few bulbs, a cozy spot, and a little patience, you’ll be greeted by delicate blooms that brighten any space. 🌱✨
Now that you’re armed with tips, don’t wait—grab those bulbs and start your indoor garden adventure today! Try experimenting with different containers or even gifting a pot to a friend. Happy growing!