
Orchid Care
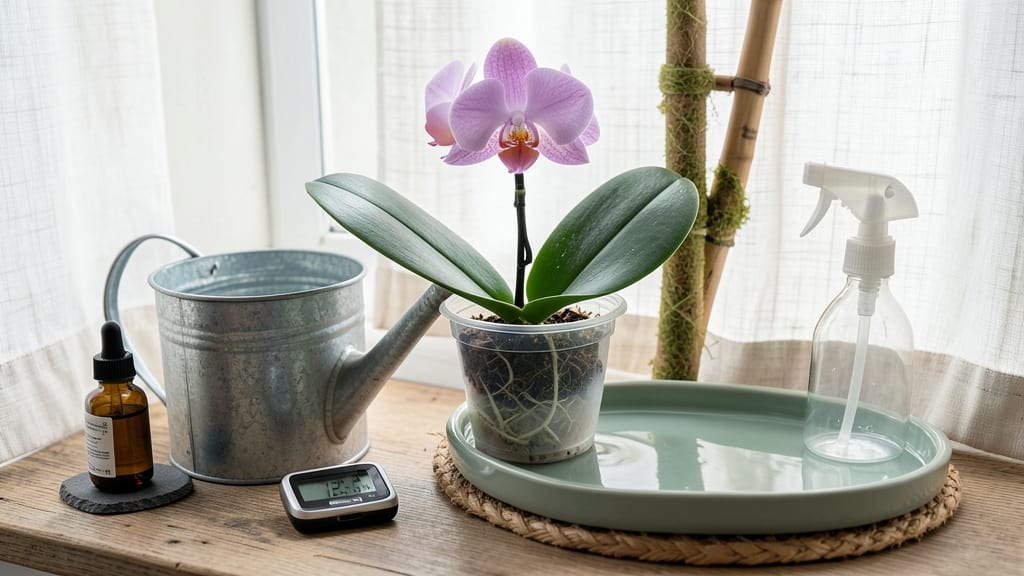
How to care for indoor orchids is all about mimicking their jungle roots—light, humidity, and watering are the secrets to keeping them lush and blooming. 🌿 I’ve nursed more orchids back from the brink than I’d like to admit, and the key is understanding their natural habitat. These plants aren’t fussy, but they do need consistency—bright, indirect light, a humid environment, and a watering routine that avoids soggy roots.
The biggest mistake? Treating orchids like other houseplants. They hate soggy soil but also dry-out stress—water only when the roots turn silvery-gray, and always use a pot with drainage. A simple pebble tray under the pot adds humidity without fuss, and a weekly misting keeps those delicate leaves happy.
Most people overwater, so check the roots before reaching for the watering can.
With the right care, you’ll see vibrant blooms lasting weeks instead of days, and the plants will reward you with new growth year after year. The first time I got an orchid to rebloom, I felt like I’d cracked a secret code.
It’s that satisfying—once you get the balance right, they’re nearly impossible to kill.
Whether you’re dealing with yellow leaves or stubborn buds that won’t open, the fixes are simple once you know what to look for. Let’s troubleshoot the common issues and keep your orchids thriving indoors—no greenhouse required.
📚 In This Guide
- What you need
- Instructions
- Tips and common mistakes
- Wrapping up and next steps
What you need
- ● Orchid Pot: 1-2 pots with drainage holes (3–6 inches in diameter, depending on orchid size). Pro tip: Use slotted or mesh pots for better airflow!
- ● Potting Mix: 1 bag of orchid-specific mix (bark, sphagnum moss, charcoal, or coconut husk blends). Avoid regular soil!
- ● Watering Can or Spray Bottle: 1 with a fine rose attachment for gentle watering.
- ● Humidity Tray or Peat Moss: 1 tray or a handful of moss to boost humidity near your orchid.
- ● Fertilizer: 1 bottle of balanced orchid fertilizer (20-20-20 or 10-10-10, diluted to half-strength).
- ● Scissors or Pruners: 1 pair for trimming dead roots or spent blooms.
- ○ Grow Lights (Optional but Helpful): 1-2 LED grow bulbs (5000K–6500K color temperature) for low-light areas.
- ● Hygrometer: To monitor humidity levels (ideal: 40–70%).
- ● Orchid Stakes or Spikes: For supporting tall blooms.
- ● Misting Bottle: For quick humidity boosts.
- ● Antibacterial Spray: To clean pots and tools before use.
Step-by-step instructions for caring for indoor orchids
Here's the simple routine I follow to keep my orchids thriving indoors for years.
☀️ Step 1: Position for the Right Light Balance
Orchids need bright, indirect light—think of it like morning sun through a sheer curtain. A north- or east-facing window works best, but if that's not an option, place your orchid 3-6 feet from a south- or west-facing window. You'll know the light is perfect when the leaves stay bright green and the flowers bloom regularly.
Watch for signs of too much light: yellow or brown patches on leaves mean it's getting too intense. If the leaves look dark green or purple, it needs more light. Rotate the pot a quarter turn weekly so all sides get even exposure. Artificial grow lights work too—just keep them 6-12 inches away and on for 12-14 hours daily.
💧 Step 2: Water with Precision (Not Guesswork)
Orchids hate soggy roots, so water only when the top inch of the potting mix feels dry to touch. Stick your finger in the mix—if it's damp, wait another day. When you water, soak the entire pot until water runs freely from the drainage holes below. Let it drain completely for 10-15 minutes, then empty any excess from the saucer.
I use room-temperature water (never cold) to avoid shocking the roots. In winter, when the air is dry, water every 7-10 days. In summer, when humidity rises, stretch it to every 10-14 days. The key is consistency—orchids prefer slight drought over soggy soil. Yellow leaves often mean overwatering, while wrinkled leaves signal underwatering.
🌿 Step 3: Maintain Ideal Humidity and Airflow
Orchids love 50-70% humidity, which is tricky indoors. Place the pot on a pebble tray filled with water and pebbles (not touching the bottom) to boost humidity naturally. Grouping orchids together also helps—4 plants create their own microclimate. Mist the leaves once a week in dry climates, but avoid misting in low light or cold drafts.
Good airflow prevents rot and pests, so never crowd orchids. A small fan on low speed (just enough to rustle the leaves) mimics their natural tropical environment. Just avoid direct drafts from AC vents or open windows—temperature swings stress them. Keep the room between 65-80°F during the day and 55-65°F at night for best results.
✂️ Step 4: Fertilize and Prune for Long-Term Health
Feed your orchid once a month during spring and summer with a balanced orchid fertilizer (20-20-20 or 10-10-10) diluted to half-strength. In fall and winter, cut back to once every 6-8 weeks—they grow slower then. Always water the plant before fertilizing to avoid root burn. I like to fertilize right after watering so nutrients soak in fully.
After blooms fade, cut the stem above a node (the bump where leaves grow) to encourage new growth. Deadhead spent blooms by snipping the stem just above the third node from the base. This redirects energy to new roots and leaves. If a leaf turns completely yellow, it’s time to trim it at the base—don’t wait until it’s brown.
🪴 Step 5: Repot Every 1-2 Years for Fresh Growth
Orchids need fresh potting mix every 1-2 years to prevent root rot and nutrient depletion. Choose a chunky bark mix (never regular potting soil—it holds too much moisture). Repot in early spring when new roots are just starting to form. Gently remove the plant, trim any mushy or black roots with sterilized scissors, and place it in a pot just 1 inch larger in diameter than the old one.
I like to soak the roots in warm water for 10 minutes before repotting to check for hidden rot. Fill the new pot with fresh mix, position the orchid so the roots fan out naturally, and water lightly afterward. The first few weeks after repotting, reduce watering by half—stressed roots need time to adjust. You’ll see new growth within 4-6 weeks if everything’s right.
Tips & tricks for perfect indoor orchid care
Real talk: Orchids might seem finicky, but these simple tricks will help you keep yours thriving for years without the guesswork.
Light Balance Secret: If you notice your orchid's leaves developing yellow or brown patches near a window, it's getting too much direct sun. Move it back immediately—even just a few inches can make all the difference. I've had orchids recover from sunburn by simply repositioning them to indirect light within a day. For artificial lighting, place your grow lights 6 inches away for stronger growth or 12 inches for gentler exposure, adjusting based on how quickly your orchid responds.
Watering Precision: The 10-15 minute drainage time after watering is non-negotiable—this prevents root rot, which is the #1 killer of indoor orchids. I've learned this the hard way after losing three plants to soggy roots. Pro tip: Use a clear pot for a few weeks to monitor drainage. You'll notice healthy roots are silvery-green, while rotten roots turn mushy and brown. If your potting mix drains too slowly, add a handful of perlite or bark chips to improve airflow.
Humidity Hacks: That pebble tray isn't just decorative—it's a game-changer for humidity. Fill it with water and pebbles, then place your orchid pot on top (never let the bottom touch water). For extra humidity in dry climates, group your orchids together—they create their own microclimate. I keep my orchids on a humidity tray filled with water and pebbles, which raises humidity to the ideal 50-70% range without any extra effort. Just remember to empty and refill the tray weekly to prevent bacterial growth.
Temperature Consistency: Orchids thrive in the same temperature range as humans—65-80°F during the day and 55-65°F at night. The key is avoiding sudden changes. If you have a drafty window or AC vent nearby, move your orchid at least 3 feet away. I've seen orchids stressed by temperature swings develop brown spots on their leaves within days. A simple digital thermometer near your orchid helps track these fluctuations without you having to guess.
Pro Tips for Care For Orchids Indoor
- Real talk: Orchids might seem finicky, but these simple tricks will help you keep yours thriving for years without the guesswork.
- Light Balance Secret: If you notice your orchid's leaves developing yellow or brown patches near a window, it's getting too much direct sun.
- Watering Precision: The 10-15 minute drainage time after watering is non-negotiable—this prevents root rot, which is the #1 killer of indoor orchids.
Frequently asked questions
Got questions about keeping your orchids thriving indoors?
Here are answers to the most common concerns—because even experts start somewhere!
How often should I water my indoor orchids?
Water your orchids every 7–10 days (or when the top inch of soil feels dry). Overwatering is the #1 killer—stick your finger in the pot to check! Pro tip: Use room-temperature water and avoid soggy roots by ensuring pots have drainage holes.
What’s the ideal temperature for orchids?
Most orchids love 60–80°F (15–27°C) during the day and a 10°F (5°C) drop at night to mimic their natural habitat. Keep them away from drafts, AC vents, or radiators—consistency is key!
Why are my orchid leaves turning yellow?
Yellow leaves usually mean overwatering or root rot, but they can also signal underwatering or nutrient deficiency. Check the roots (healthy ones are green/silver; mushy ones are rotten). Adjust your watering schedule and repot if needed.
Can I use tap water for my orchids?
Tap water can work, but chlorine and fluoride may harm orchids. Let it sit out for 24 hours or use filtered/rainwater. If your water is hard (high in minerals), flush the pot monthly with distilled water to prevent buildup.
How do I know when my orchid is ready to bloom again?
After flowering, wait until the spike turns brown and shriveled before trimming it. Healthy orchids (like Phalaenopsis) may rebloom in 3–6 months with proper care. Fun fact: Some varieties bloom multiple times a year!
Wrapping up and next steps
Caring for indoor orchids is simpler than you think—just remember light, humidity, and watering are your best friends! 🌿 With the right balance, your orchids will thrive and reward you with stunning blooms. Start by observing your plants and tweaking their environment as needed.
Ready to level up your orchid game? Pick one tip from this guide and try it this week! Whether it’s adjusting light exposure, misting more often, or repotting, small changes make a big difference. Happy growing! 🌸