
Container Gardens
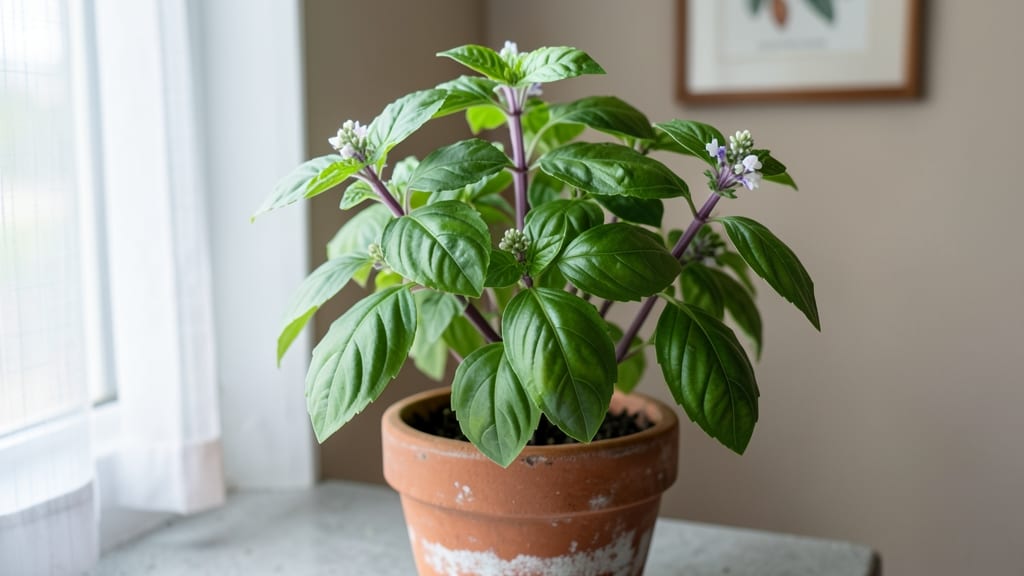
Growing Thai basil indoors means fresh, fragrant leaves year-round—no grocery store substitutes needed. 🌿 I learned this after my first attempt with sweet basil turned bitter and leggy. The secret lies in mimicking its tropical origins with just the right light, soil, and care routine.
You’ll need a 6-inch pot with drainage, well-draining potting mix, and a sunny windowsill or grow light. Thai basil thrives in warmth and humidity, so a kitchen windowsill over the sink works perfectly.
Water when the top inch of soil feels dry, but never let it sit soggy—root rot is the silent killer. By week 4, you’ll harvest your first leaves, and with regular pruning, the plant stays bushy and productive.
The flavor stays bright and anise-like when you avoid overwatering and keep it in bright light. No more store-bought basil that tastes like cardboard! This method works for apartments, offices, or even a sunny bathroom. Just avoid drafts and sudden temperature swings—Thai basil hates being cold.
Let’s get those fragrant stems growing!
📚 In This Guide
- What you need
- Instructions
- Tips and common mistakes
- Wrapping up and next steps
What you need
- ● Thai basil seeds or seedlings: 3–5 seeds (or 1–2 healthy seedlings from a nursery). Look for Ocimum basilicum var. thyrsiflora for that signature anise-like flavor!
- ● Containers: 6–12-inch pots with drainage holes (2–3 pots if starting from seed). Terracotta or fabric pots work best for airflow.
- ● High-quality potting mix: 2–3 quarts of a well-draining, organic mix (avoid garden soil—it compacts!). Add perlite or vermiculite (10–20%) for extra drainage.
- ● Grow lights or sunny windowsill: Natural light: 6+ hours of direct sunlight (south- or west-facing window ideal).
- ○ Grow lights (optional but helpful): A full-spectrum LED (12–16 watts) on a timer (14–16 hours/day) for low-light setups.
- ● Watering can or spray bottle: With a narrow spout to avoid disturbing soil.
- ● Fertilizer: Balanced, water-soluble fertilizer (5-5-5 or 10-10-10) or an organic option like fish emulsion. Dilute to half-strength for young plants.
- ● Humidity tray: A shallow tray with pebbles and water to boost moisture (Thai basil loves 50–70% humidity).
- ● Pruning shears or clean scissors: For harvesting and shaping (sterilize with rubbing alcohol!).
- ● Support stake or small trellis: If your basil grows tall (6–12 inches), a bamboo stake can keep it upright.
- ● Soil moisture meter: To check when roots are thirsty (aim for slightly damp, not soggy, soil).
- ● Compost or worm castings: Mix 10–20% into potting soil for nutrient-rich growth.
Step-by-step instructions for growing Thai basil indoors
Here’s how I grow Thai basil indoors—bright, fragrant, and ready to harvest in just a few weeks.
🌱 Step 1: Choose the Right Container and Soil
Start with a 6-8 inch pot (one per plant) that has drainage holes—Thai basil hates soggy roots. I use a lightweight potting mix with added perlite to keep it airy. Fill the pot halfway, then tap it gently to settle the soil without compacting it too much. The mix should feel like a damp sponge when squeezed.
Thai basil grows best in well-draining soil, so avoid garden soil or anything heavy. If your mix is too dense, mix in a handful of perlite or vermiculite. This ensures roots breathe and water drains properly, preventing root rot. A small pot means you’ll harvest more frequently, too—perfect for fresh Thai dishes!
🌿 Step 2: Plant Seeds or Transplants Correctly
If starting from seeds, plant 2-3 seeds per pot about ¼ inch deep—just enough to cover them lightly. Press the soil gently around them but don’t pack it down. Thai basil seeds germinate best in warmth (70-75°F), so place the pot in a sunny windowsill or under a grow light.
If using transplants, dig a hole just deeper than the root ball and place the plant so the top of the roots sits ½ inch below the soil surface. Water lightly after planting to help settle the soil. Avoid burying the stems too deep—this can cause rot. Within 7-10 days, you’ll see tiny sprouts pushing through the soil.
☀️ Step 3: Provide Bright, Consistent Light
Thai basil thrives on 6-8 hours of direct sunlight daily. A south-facing window is ideal, but if your space lacks natural light, supplement with a grow light kept 4-6 inches above the plant. You’ll notice leggy growth if the light is too weak—this means the plant is stretching toward whatever light it can find.
Rotate the pot a quarter turn every few days so the plant grows evenly. If leaves start yellowing or the stems get spindly, move it closer to the light. Avoid cold drafts, like near windows in winter, which can shock the plant. A warm, bright spot keeps Thai basil lush and flavorful.
💧 Step 4: Water and Fertilize for Maximum Flavor
Water when the top inch of soil feels dry—about every 2-3 days, depending on your home’s humidity. Let excess water drain completely to prevent root rot. I use room-temperature water to avoid shocking the roots. Overwatering is the #1 killer of indoor basil, so err on the side of slightly dry soil.
Feed with a balanced liquid fertilizer (like 10-10-10) every 4-6 weeks during the growing season. You’ll taste the difference—fertilizer boosts the anise-like flavor Thai basil is known for. Stop fertilizing in fall/winter when growth slows. Pinch off any flowers that form—they drain energy from the leaves.
✂️ Step 5: Harvest and Prune for Bushier Growth
Start harvesting when the plant has 4-6 true leaves. Snip the outer stems just above a pair of leaves to encourage branching. This is key—regular pruning keeps Thai basil compact and productive. You’ll see new growth within a week or two after each harvest.
Harvest frequently (every 2-3 weeks) to prevent the plant from flowering, which makes the leaves bitter. Store fresh cuttings in a jar of water on the counter—they’ll last 5-7 days and regrow roots if you replant them. With proper care, one plant can yield enough for 4+ servings of Thai dishes over months.
Tips & tricks for perfect Thai basil growth indoors
Took me a while to figure these out, so here goes—these simple tricks will help your Thai basil thrive like a pro.
Lighting Strategy: If your windowsill doesn't get enough sunlight, invest in a full-spectrum LED grow light. I place mine 4-6 inches above the plant and set a timer for 12-14 hours daily during winter months. This mimics summer sunlight and prevents leggy growth. The key is consistency—Thai basil needs that steady light to develop its signature anise flavor.
Soil Science: The secret to happy roots is that well-draining mix—I swear by a blend of 60% potting soil, 20% perlite, and 20% coconut coir. This combination prevents compaction while retaining just enough moisture. Pro tip: Add a handful of worm castings to the mix for extra nutrients that boost flavor. The soil should crumble easily when dry, not stay in clumps.
Pruning Technique: When harvesting, always cut just above a leaf pair rather than the top stem. This encourages the plant to branch out instead of growing tall and spindly. I harvest every 2-3 weeks and always use clean, sharp scissors—dull blades crush stems and invite disease. The more you prune, the bushier and more productive your plant becomes.
Temperature Watch: Keep your Thai basil in a spot that stays between 65-75°F during the day. Drafts from windows or AC vents can shock the plant, causing leaves to yellow or drop. I place mine on a stable shelf away from direct cold air. If your home gets chilly at night, consider moving it to a warmer room or using a small space heater nearby during winter months.
Pro Tips for Growing Thai Basil Indoors
- Took me a while to figure these out, so here goes—these simple tricks will help your Thai basil thrive like a pro.
- Lighting Strategy: If your windowsill doesn't get enough sunlight, invest in a full-spectrum LED grow light. I place ...
- Soil Science: The secret to happy roots is that well-draining mix—I swear by a blend of 60% potting soil, 20% perlite...
Frequently asked questions
Got questions about growing Thai basil indoors? You’re not alone—this fragrant herb has a few quirks! Here are answers to the most common concerns to help you grow lush, flavorful Thai basil year-round.
How much sunlight does Thai basil need indoors?
Thai basil thrives in 6–8 hours of bright, direct sunlight daily. A south- or west-facing window is ideal, but if natural light is limited, supplement with a grow light (12–16 hours/day). Without enough light, stems will stretch (called "legginess"), and leaves may lose their signature anise flavor. Rotate your pot weekly for even growth!
How often should I water indoor Thai basil?
Water when the top inch of soil feels dry—usually every 5–7 days, but adjust based on humidity and pot size. Overwatering is the #1 killer! Use a pot with drainage holes to prevent root rot. Pro tip: Stick your finger in the soil before watering—if it’s damp, wait a day or two. Yellowing leaves often signal overwatering, while crispy edges mean it’s thirsty!
How long does it take for Thai basil to grow indoors?
From seeds, expect 6–8 weeks for harvest-ready plants, while cuttings may sprout roots in 2–3 weeks and grow fast. Pinch off flowers to encourage leafy growth—once they bloom, the leaves become bitter. With proper care, you’ll harvest every 4–6 weeks, and the plant can live for 1–2 years indoors!
Why are my Thai basil leaves turning yellow or curling?
Yellow leaves often mean overwatering, poor drainage, or nutrient deficiency. Check for:
- Brown/yellow edges → Underwatering or low humidity (mist leaves or use a pebble tray).
- Yellow patches → Overwatering or root rot (let soil dry out, trim damaged roots).
- Curling leaves → Pests (spider mites) or heat stress (wipe leaves with soapy water or move to indirect light).
Fertilize lightly with balanced liquid fertilizer (every 4–6 weeks) to prevent deficiencies.
Can I grow Thai basil from store-bought stems?
Yes, but choose organic, pesticide-free stems for best results. Trim the bottom 2–3 inches, remove lower leaves, and place in water or moist soil. Roots should appear in 1–2 weeks. Avoid stems with flowers—they won’t root as easily. Once rooted, transplant to a pot with fresh soil and keep it bright!
Wrapping up and next steps
Growing Thai basil indoors isn’t just possible—it’s rewarding! With the right setup, you’ll enjoy fresh, aromatic leaves year-round, perfect for pho, salads, or pesto. Start small, stay patient, and soon you’ll be harvesting fragrant bunches like a pro. 🌱
Ready to take the next step? Pick your favorite Thai basil variety and grab those supplies—your kitchen (and taste buds) will thank you! 😊