
Container Gardens
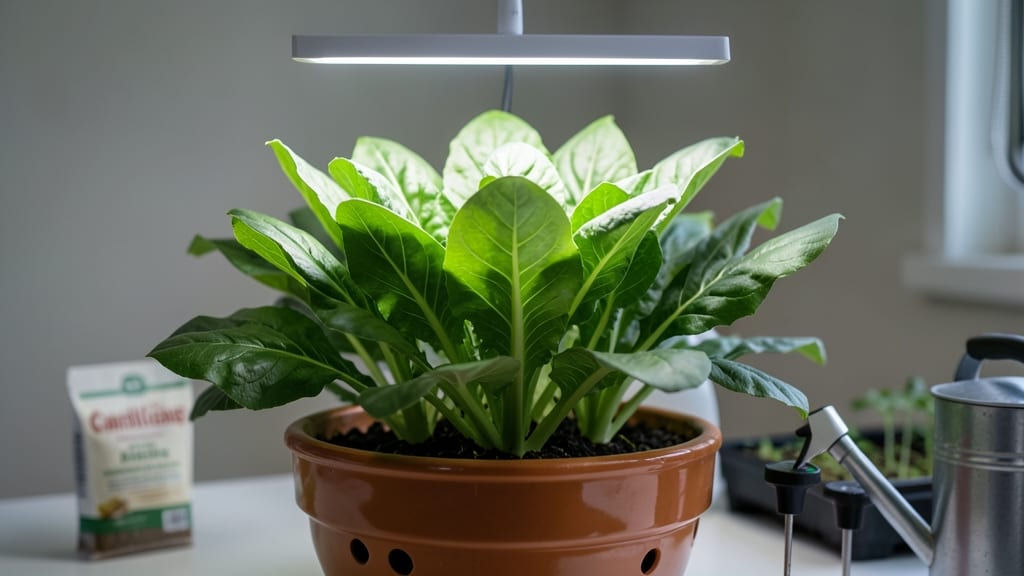
Growing romaine indoors means crisp, homegrown salads year-round—no grocery store wilted bags required. 🌱 I’ve grown this lettuce in my sunniest kitchen window for three winters now, and the difference in texture and flavor is shocking.
The secret isn’t fancy equipment but matching light, water, and space to what romaine actually needs.
You’ll need just three things: a shallow container (at least 6 inches deep), a well-draining potting mix, and a bright spot—whether it’s a south-facing window or a basic grow light.
Romaine thrives in cool temperatures (60-70°F) and stays crisp when you keep the soil consistently moist but never soggy. Most people overwater, and that’s how you get sad, mushy leaves.
By week six, you’ll be harvesting thick, sturdy stems perfect for Caesar salads or wrapping sandwiches. The first few leaves are edible, but the real payoff comes when the plant reaches 8-10 inches tall—that’s when the flavor and texture peak.
Plus, you’ll save money and avoid the bitterness that hits store-bought lettuce by its third day.
This works in tiny apartments or sprawling kitchens—just adjust the container size. Hydroponic setups cut the time even further, but even a basic windowsill garden delivers results. Ready to grow your own crisp romaine?
📚 In This Guide
- What you need
- Instructions
- Tips and common mistakes
- Wrapping up and next steps
What you need
- ● Romaine seeds: Choose a fast-maturing variety like Little Caesar or Parris Island (1–2 packets, ~100–200 seeds).
- ● Growing container: A shallow tray (6–8" deep) or small pots (4–6" diameter) with drainage holes. Pro tip: 💡 Use a seed-starting kit or repurpose a clean plastic bin!
- ● Potting mix: Lightweight, seed-starting mix (1–2 bags, 8–12 qt size). Avoid garden soil—it’s too dense!
- ● Grow lights or sunny window: A full-spectrum LED grow light (12–16 hours/day) or a south-facing window (6+ hours of sunlight).
- ● Watering can or spray bottle: Keep soil consistently moist but not soggy.
- ○ Fertilizer (optional but helpful): Balanced liquid fertilizer (5-5-5 or 10-10-10) or compost tea.
- ● Plant labels: Mark varieties to avoid mix-ups!
- ● Tweezers or small spoon: For gentle seed placement.
- ● Humidity dome or plastic wrap: Keeps seeds cozy until germination (3–7 days).
- ● Scissors or pruners: For harvesting outer leaves to encourage growth.
- ○ Thermometer (optional): Ideal seedling temps: 60–75°F.
Step-by-step instructions for growing romaine indoors
Here's how to coax crisp, homegrown romaine in just six weeks—no greenhouse required.
🌱 Step 1: Select Containers and Prepare Seed Starting Mix
Choose 4-inch deep containers with drainage holes—romaine hates soggy roots. I use 4-cell seed trays for precision, but any pot with at least 2 inches of depth works. Fill each cell with sterile seed-starting mix (never garden soil—it compacts and blocks roots). Moisten the mix until it feels like a damp sponge when squeezed.
Press the soil down gently with your fingers to remove air pockets, but don't compact it. You want the surface to be firm enough to support seeds but still crumbly. I like to tap the tray on the table once to settle everything evenly. This ensures roots can push through without resistance.
🌱 Step 2: Sow Seeds at the Right Depth and Spacing
Plant 2-3 seeds per cell at a depth of ¼ inch—that's roughly the width of a dime. Sowing too deep delays germination because the seedling must push through extra soil. Cover lightly with a sprinkle of additional mix, then mist the surface with a spray bottle until evenly damp.
Here's the thing—romaine seeds are tiny, so I use a toothpick to create tiny holes for each seed. This prevents burying them too deeply or crowding. Once planted, place the tray in a clear plastic bag to create a mini greenhouse effect. This traps warmth and moisture, which speeds up germination.
💧 Step 3: Provide Warmth and Moisture for Germination
Romaine seeds germinate best at 70-75°F, so place the tray on a seedling heat mat if your home runs cooler. Without one, germination may take 10-14 days instead of the ideal 5-7 days. Check daily but resist watering—condensation inside the bag keeps humidity high.
Once 50% of seeds have sprouted, remove the bag immediately. Leaving it on after germination invites damping-off, a fungal disease that collapses seedlings overnight. You'll know it's time when you see tiny green hooks breaking through the soil surface—those are your first true leaves.
☀️ Step 4: Move to Bright Light and Thin Seedlings
The instant seedlings emerge, they need 14-16 hours of bright light daily. A south-facing window rarely provides enough intensity, so I use a full-spectrum LED grow light positioned 3 inches above the plants. Raise it as they grow to maintain that gap—too close causes leggy stems.
When seedlings reach 2 inches tall, thin to the strongest plant per cell using scissors. Pulling weak ones risks disturbing roots. You'll see leggy growth as thin, pale stems with leaves spaced far apart. Strong seedlings have thick stems, deep green color, and compact spacing between leaves—these are your keepers.
🪴 Step 5: Transplant and Maintain for Harvest
After 4-6 weeks, transplant seedlings into 6-inch pots filled with well-draining potting mix. Romaine needs deep containers to develop crisp stems. Water thoroughly after transplanting to settle the roots. Place in bright, indirect light (no harsh midday sun at first) and water when the top inch of soil feels dry.
Harvest outer leaves when they reach 4-6 inches—this encourages continuous growth. You'll know they're ready when the stems feel crisp and the leaves have a slightly wrinkled texture. With proper care, you'll get multiple harvests from each plant over 6-8 weeks. The key is consistency: bright light, even moisture, and regular thinning of older leaves.
Tips & tricks for perfect indoor romaine growth
These insider tricks will help you grow restaurant-quality romaine indoors without the guesswork.
Container Depth Matters: While the instructions specify 4-inch deep containers, I recommend going deeper if possible—6-inch pots prevent root binding and give you more harvestable stems. Romaine roots can grow surprisingly long, and shallow containers restrict growth. If you're working with limited space, at least ensure the minimum 2-inch depth is met, but deeper is always better for crisp stems.
Germination Temperature Hack: The ideal 70-75°F range is critical, but if you don't have a heat mat, try placing your seed tray on top of your fridge or near a sunny window during the day. Even a 5°F warmer environment can cut germination time from 10-14 days to the ideal 5-7 days. Just avoid direct heat sources that could dry out your soil.
Light Positioning Secret: For that 14-16 hours of bright light requirement, I position my grow light on a timer to automatically turn on at 6 AM and off at 10 PMquarter-turn daily so all sides get even exposure—this prevents them from leaning toward the light source.
Transplanting Transition: When moving seedlings to 6-inch pots after 4-6 weeks, I water them thoroughly the day before transplanting. This helps settle the roots more easily and reduces transplant shock. After repotting, place the new containers in bright, indirect light for the first 3-4 days to help them adjust before introducing full-strength light.
Pro Tips for Growing Romaine Indoors
- These insider tricks will help you grow restaurant-quality romaine indoors without the guesswork.
- Container Depth Matters: While the instructions specify 4-inch deep containers, I recommend going deeper if possible—6-inch pots prevent root binding and give you more harvestable stems.
- Germination Temperature Hack: The ideal 70-75°F range is critical, but if you don't have a heat mat, try placing your seed tray on top of your fridge or near a sunny window during the day.
Frequently asked questions
Got questions about growing your own crisp romaine indoors?
Here are some of the most common ones—plus quick, actionable answers to help you succeed!
How much light does romaine really need indoors?
Romaine thrives with 12–16 hours of bright light daily. A south-facing window or a grow light (LED or fluorescent) 6–12 inches above the plants works best. Without enough light, leaves turn leggy or pale. Pro tip: Rotate trays weekly for even growth!
When will I harvest my first romaine leaves?
You can start harvesting outer leaves in 4–6 weeks (when they’re 6–8 inches tall), but full heads take 8–10 weeks. For continuous harvests, snip leaves above the base—the plant keeps producing! Bonus: Baby romaine is ready in just 3–4 weeks.
Why are my romaine leaves turning yellow or bitter?
Yellowing leaves often mean overwatering or nutrient deficiency. Check soil moisture (top inch should dry between waterings) and use a balanced liquid fertilizer (like 10-10-10) every 2–3 weeks. Bitter taste? Too much heat or stress—move to a cooler spot (60–70°F) and ensure good airflow.
Can I grow other leafy greens the same way?
Romaine’s method works for butter lettuce, kale, spinach, and arugula. Adjust timing slightly—arugula grows faster (3–4 weeks), while kale takes longer (8–10 weeks). Key difference: Romaine prefers cooler temps (50–75°F), while arugula loves heat.
Do I need a greenhouse or special setup?
Nope! Romaine grows well in standard containers (5–7" deep) on a sunny windowsill or under a grow light. A humidity dome (for seedlings) and occasional misting help, but it’s low-maintenance. Just avoid drafts and keep soil moist—not soggy.
What if my romaine gets pests like aphids or fungus?
Isolate the plant immediately! Aphids: Spray with soapy water (1 tsp mild soap per quart). Fungus (powdery mildew): Improve airflow, avoid overhead watering, and treat with neem oil. Prevention tip: Use sterile soil and rotate crops if reusing containers.
Wrapping up and next steps
Growing romaine indoors is a rewarding way to enjoy fresh, crisp greens year-round—no matter your space or skill level! 🌱 With just a few supplies, consistent care, and patience, you’ll harvest vibrant leaves in as little as 6 weeks.
Whether you’re a beginner or a seasoned gardener, this method proves that homegrown goodness is always within reach.
Ready to take the next step? Start by planting your seeds this weekend—your future salads will thank you! For extra inspiration, explore indoor gardening communities or share your progress with #IndoorRomaineJourney. Happy growing!