
Container Gardens
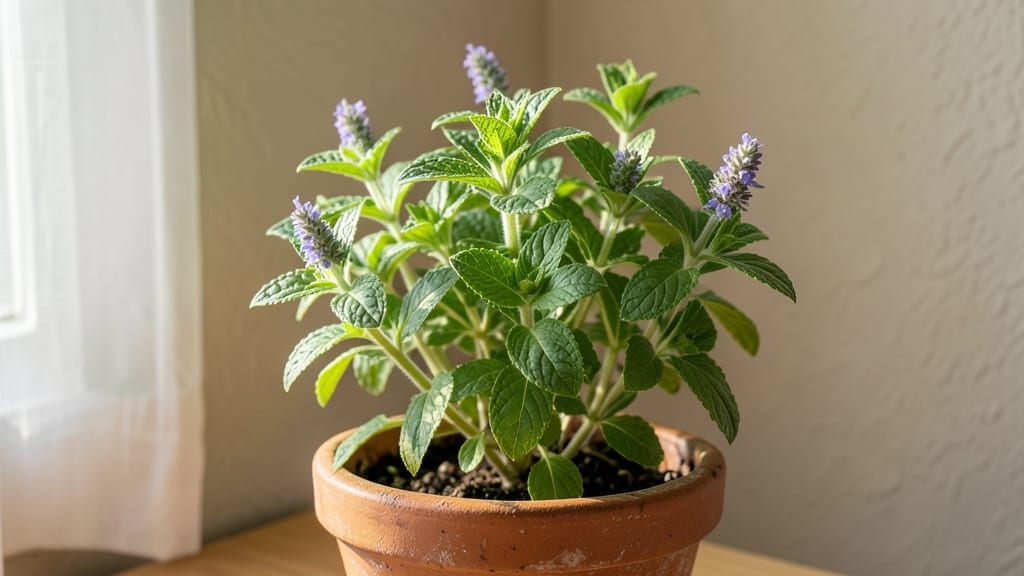
Growing mint indoors is the easiest way to always have fresh leaves for tea, cocktails, or cooking—no more buying wilted bunches at the store. 🌿 I’ve grown mint in every kind of container, from mismatched mugs to ceramic pots, and the secret isn’t fancy setups but matching the plant’s love of moisture and shade.
Most people overwater or cram it in too-small pots, which leads to leggy, sparse growth. The right container, soil, and light fix that instantly.
Start with a 6-inch pot (mint spreads aggressively) and fill it with well-draining potting mix—add a handful of perlite to keep roots from sitting in soggy soil. Place it in a spot with 4-6 hours of indirect light (a north-facing window or under a grow light works best).
Mint thrives in humidity, so mist the leaves or set the pot on a tray of pebbles with water to keep the air moist. Overwatering is the #1 killer, so stick your finger in the soil first—water only when the top inch feels dry.
By week 4, you’ll see lush, vibrant green leaves—double the size of store-bought mint—and the scent will fill your kitchen like a spa. Prune regularly to encourage bushier growth (snip the top sets of leaves) and harvest leaves by pinching them off just above a pair of leaves.
The more you trim, the more it grows—my mint plant now fills a 12-inch pot and never stops producing.
Here’s the best part: mint grows year-round indoors, so you’ll never run out. Just watch for yellow leaves (overwatering) or slow growth (not enough light), and you’ll have a thriving plant that’s impossible to kill. Whether you’re making mojitos or tea, this is the only mint you’ll ever need.
📚 In This Guide
- What you need
- Instructions
- Tips and common mistakes
- Wrapping up and next steps
What you need
- ● Mint plant: A healthy starter plant (preferably from a nursery or organic store) or cuttings (3–5 inches long with leaves and roots).
- ● Container: A pot with drainage holes (minimum 6–8 inches in diameter for 1–2 plants; larger for more). Use terracotta, ceramic, or fabric pots to prevent root rot.
- ● Potting soil: Well-draining, peat-based, or organic potting mix (avoid garden soil—it compacts!). Add perlite or sand (10–20%) for extra aeration.
- ● Watering can or spray bottle: Mint loves moisture but hates soggy soil. A fine-mist spray works great for tender leaves.
- ○ Fertilizer (optional but helpful): Balanced liquid fertilizer (10-10-10 or 20-20-20, diluted to half-strength).
- ● Slow-release granules (like Osmocote) mixed into soil at planting.
- ● Grow lights: If your windowsill gets LED full-spectrum bulb (12–16 hours/day) keeps mint thriving.
- ● Pruning shears: Sharp scissors to trim leggy stems and encourage bushier growth.
- ● Mulch or pebbles: Top soil with gravel or decorative stones to retain moisture and prevent algae.
- ● Humidity tray: A shallow tray with pebbles + water under the pot adds moisture-loving mint a boost.
- ● Label or marker: Mint varieties (like peppermint, spearmint, or chocolate mint) can look alike—keep track!
Step-by-step instructions for growing mint indoors
Here's the simple method I use to grow vigorous mint plants that thrive on my kitchen windowsill.
🌱 Step 1: Choose the Right Container and Soil
Select a container that's at least 6 inches deep with drainage holes—mint hates soggy roots. I prefer terracotta pots because they breathe better than plastic, but any clean container works. Fill it with well-draining potting mix, not garden soil, which compacts and suffocates roots.
Tap the container gently to settle the soil without compacting it. You want it loose enough that water can penetrate easily. The surface should feel slightly firm but still crumbly when you squeeze a handful. This ensures roots can spread without resistance.
🌿 Step 2: Plant Your Mint Cutting or Seedlings
If using a cutting, place it in the soil about 2 inches deep—just enough to cover the lower half of the stem. For seedlings, dig a hole the same depth as the root ball and gently place the plant in. Press the soil around the base firmly to eliminate air pockets.
Mint grows aggressively, so I always plant just one cutting per container. If you use multiple, you'll end up with a tangled mess that's hard to separate later. Water gently right after planting to help settle the soil around the roots.
☀️ Step 3: Position for Bright, Indirect Light
Mint thrives in bright, indirect light—a south or west-facing windowsill is ideal. Too much direct sun scorches the leaves, while too little causes leggy, weak growth. You'll know it's getting enough light when the leaves stay vibrant green and new growth appears regularly.
Rotate the pot a quarter turn weekly so the plant grows evenly instead of leaning toward the light. If you notice the stems stretching upward with large gaps between leaves, move it closer to the window or supplement with a grow light for 12-14 hours daily.
💧 Step 4: Water Consistently Without Overdoing It
Water when the top inch of soil feels dry—stick your finger in to check. Mint likes moisture but won't tolerate soggy soil. I water until water runs freely from the drainage hole, then empty the saucer to prevent root rot. This ensures roots get oxygen while staying hydrated.
Mist the leaves occasionally to boost humidity, especially in dry indoor air. You'll see the leaves perk up and grow faster when the air feels fresh and moist. Avoid letting the soil dry out completely—wilting mint recovers, but the leaves lose flavor and texture.
✂️ Step 5: Prune Regularly for Bushier Growth
Pinch off the top set of leaves when the plant reaches about 4 inches tall. This encourages branching and prevents the stem from getting woody. I also trim any yellow or brown leaves immediately—they sap energy from the plant.
Harvest leaves as needed by snipping just above a leaf node. This promotes new growth and keeps the plant compact. If your mint starts looking leggy, a hard prune back to 2-3 inches often rejuvenates it. Just don't cut more than one-third of the plant at once.
Tips & tricks for perfect indoor mint growth
Real talk: Even the easiest plants need these little tweaks to go from "meh" to "wow."
Container Wisdom: That 6-inch depth requirement isn't arbitrary—mint roots spread aggressively sideways too. If your container feels cramped after a few months, it's time to upgrade. I've seen mint plants double in size in just 3 months, so plan ahead! For extra insurance, choose containers with feet to prevent water pooling at the base.
Light Strategy: The 12-14 hours of grow light I mentioned isn't just about duration—it's about timing too. Set your timer for morning to afternoon (6 AM to 6 PM) to mimic natural daylight patterns. This prevents that "stretched" look from plants reaching for light. If your mint starts leaning, it's already too late—prevent it before it happens.
Pruning Hack: When you pinch those top leaves at 4 inches, don't just snip randomly. Look for the set of leaves just below where the stem starts to branch—this is where new growth will emerge most vigorously. I like to make my cuts at a 45-degree angle to prevent water from pooling on the stem, which can cause rot.
Humidity Boost: Your kitchen's dry winter air is mint's worst enemy. After watering, I place my mint pot on a tray of pebbles with shallow water underneath—this creates natural humidity without soggy soil. You'll notice the leaves staying perky and vibrant all season long.
Pro Tips for Growing Mint Indoors
- Real talk: Even the easiest plants need these little tweaks to go from "meh" to "wow."
- Container Wisdom: That 6-inch depth requirement isn't arbitrary—mint roots spread aggressively sideways too.
- Light Strategy: The 12-14 hours of grow light I mentioned isn't just about duration—it's about timing too.
Frequently asked questions
Got questions about growing mint indoors? Here are some of the most common concerns—and their simple solutions!
How often should I water my indoor mint?
Water your mint when the top inch of soil feels dry to the touch. Since mint loves moisture, aim for consistent dampness (not soggy soil). A self-watering pot or saucer with pebbles can help maintain humidity. Overwatering is the #1 killer—check drainage holes to avoid root rot!
How long does it take for indoor mint to grow?
With proper care, you’ll see new growth in 2–4 weeks and harvestable leaves in 6–8 weeks. Speed up growth with bright, indirect light (6+ hours/day) and a warm spot (60–70°F). Patience pays off—mint grows fast once established!
Can I grow mint in just water (hydroponics)?
Yes! Mint thrives in water with just a few tweaks. Use a jar or vase with fresh water (changed every 3–5 days) and a clipping (stem + leaves) as your starter. Add a splash of hydroponic nutrients for extra vigor. Just watch for mold—keep the water clean and stems submerged!
Why is my indoor mint turning yellow?
Yellow leaves usually signal overwatering or nutrient deficiencies. Let the soil dry slightly between waterings, and trim yellowed leaves to redirect energy. Check for pests (like spider mites) on the undersides of leaves. Boost growth with a balanced liquid fertilizer every 4–6 weeks.
How do I keep mint from spreading aggressively?
Mint’s invasive roots can overpower containers! Prune regularly (trim stems by ⅓ when crowded) and grow it in a small, shallow pot (6–8 inches deep). For extra control, plant it in a divided container with a root barrier (like a mesh liner).
Wrapping up and next steps
Growing mint indoors is a rewarding and refreshing way to enjoy fresh herbs year-round—no green thumb required! Whether you’re a beginner or a seasoned plant parent, a sunny windowsill and a little care can yield a thriving mint plant.
Now that you’ve got the know-how, why not take the plunge? Start with a single pot, experiment with varieties, or even share cuttings with friends. Your kitchen (and taste buds) will thank you! 🌿✨
Next steps:
- Pick your favorite mint variety and gather supplies.
- Plant, water, and watch it grow—then harvest and enjoy!