
Container Gardens
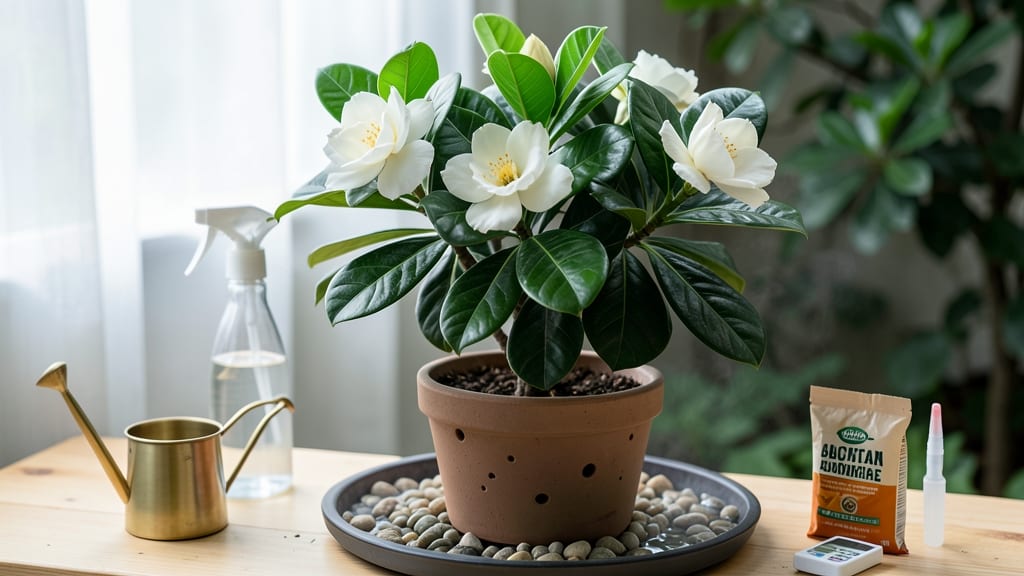
Growing gardenias indoors lets you enjoy their intoxicating scent year-round—though I’ve learned the hard way that these divas demand patience and precision. 🌿 The key isn’t just sunlight or water; it’s mimicking their tropical homeland’s humidity and warmth.
My first plant nearly died from dry indoor air, but once I cracked the code, the glossy leaves and creamy blooms became my home’s signature fragrance.
You’ll need bright, indirect light (east or west windows work best) and a pot with drainage—terracotta helps wick away excess moisture. The soil should stay slightly moist but never soggy, and a humidity tray or pebble tray beneath the pot works wonders if your home feels dry.
Prune lightly after blooming to encourage bushier growth, but never cut more than a third of the plant at once.
With the right care, you’ll reward yourself with months of fragrant blooms—that first whiff of gardenia in winter is unbeatable. The secret’s in the balance: too much water and roots rot; too little, and the leaves yellow.
But get it right, and your gardenia will thrive, filling your space with sweet, creamy perfume that’s impossible to resist.
Perfect for apartments, greenhouses, or sunrooms—just avoid drafts and temperature swings. Here’s how to keep yours blooming like a pro, even in the dead of winter.
📚 In This Guide
- What you need
- Instructions
- Tips and common mistakes
- Wrapping up and next steps
What you need
- ● Gardenia plant: A healthy, potted gardenia (choose a variety like G. jasminoides for indoor growing).
- ● Well-draining potting mix: A blend of 50% peat moss or coconut coir, 30% perlite or pumice, and 20% sand or orchid bark (sterilized). Approx. 2-3 gallons per 12-inch pot.
- ○ Pot with drainage holes: A terracotta or ceramic container (12-16 inches in diameter) to prevent root rot. Optional: Add a saucer for humidity control.
- ● Fertilizer: A balanced, acidic fertilizer (e.g., 10-10-10 or 20-20-20) or a citrus-specific formula with micronutrients. Use every 4-6 weeks during spring/summer.
- ● Humidity tray or humidifier: To maintain 50-70% humidity. DIY option: Fill a tray with pebbles and water, place pot on top.
- ○ Grow lights (optional but helpful): A full-spectrum LED grow light (12-16 hours/day) if natural light is <2-3 hours/day.
- ● Pruning shears: Sharp, sterilized shears for trimming dead blooms or leggy growth.
- ● pH testing kit: To monitor soil pH (ideal range: 4.5-5.5). Adjust with sulfur or vinegar if needed.
- ● Spray bottle: For misting leaves (use room-temperature water to avoid shock).
- ○ Glove and mask: For handling soil or pruning (optional but recommended).
- ● Patience & consistency: Gardenias thrive on routine—light, water, and humidity are key!
- ● Epsom salt: 1 tsp per gallon of water monthly for magnesium boost.
- ● Compost tea: Organic liquid fertilizer for a nutrient kick.
- ● Decorative pebbles: For aesthetics in the humidity tray.
- ● Automatic timer: For grow lights (to mimic natural daylight cycles).
Step-by-step instructions for growing gardenias indoors
Here's how to coax those intoxicating gardenia blooms from your houseplant.
🪴 Step 1: Select the Right Pot and Soil Mix
Gardenias need excellent drainage, so choose a pot with drainage holes and add a layer of ¼-inch pebbles at the bottom. I use a 6-8 inch pot for each plant since they're shallow-rooted but need space to grow. Fill the pot with a mix of 50% acidic potting soil and 50% perlite or orchid bark—this keeps roots aerated and prevents waterlogging.
Don't skimp on the soil mix. Gardenias hate soggy roots, and the wrong soil will cause leaves to yellow and drop faster than you can say "overwatered." Tap the pot gently after filling to settle the mix without compacting it. The surface should feel slightly firm but still crumbly when you squeeze it.
🌱 Step 2: Plant and Water for Initial Establishment
Remove the gardenia from its nursery pot and gently loosen the roots if they're circling. Place it in the center of your prepared pot and fill in around the roots with the soil mix, pressing lightly to eliminate air pockets. Water thoroughly until water runs freely from the drainage holes—this ensures the roots make full contact with the moist soil.
After watering, let the plant sit in a tray of water for 15-20 minutes to help the soil absorb moisture evenly. This initial deep watering mimics their natural tropical habitat. Place the pot in a location with bright, indirect light—think filtered sunlight, not harsh midday rays. You'll know the light is right when new growth appears within 4-6 weeks without the leaves scorching.
☀️ Step 3: Provide Ideal Light and Humidity
Gardenias crave morning sun and afternoon shade, so position your plant near an east-facing window or under a sheer curtain on a south-facing window. If you notice leaves turning pale or stems stretching toward the light, it's time to move it closer to the window—within 2 feet is ideal. In winter, supplement with a grow light for 12-14 hours daily to prevent leggy growth.
Humidity is non-negotiable for gardenias. Aim for 50-70% humidity by placing the pot on a tray filled with pebbles and water (keep the water level below the pot's base). Mist the leaves 2-3 times weekly, but avoid wetting the flowers—this can cause brown spots. You'll see the difference in 2-3 weeks when leaves stay glossy and blooms last longer.
💧 Step 4: Water and Feed for Continuous Blooms
Water gardenias when the top 1-2 inches of soil feel dry to the touch. Stick your finger in the soil—if it's damp past your first knuckle, wait another day. Overwatering is the #1 killer of indoor gardenias, so I use a moisture meter to double-check. Always water at the base, never from above, to keep foliage dry and prevent fungal issues.
Feed your gardenia with a balanced, acidic fertilizer (like 6-6-6 or 8-3-9) every 4-6 weeks during spring and summer. Dilute the fertilizer to half-strength to avoid burning roots. You'll notice new buds forming within 6-8 weeks of consistent feeding. In fall and winter, reduce feeding to once every 8-10 weeks—this mimics their natural dormancy period.
✂️ Step 5: Prune and Maintain for Long-Term Health
Prune gardenias right after flowering to encourage bushier growth. Use clean, sharp pruners to trim back leggy stems by ⅓ of their length, cutting just above a leaf node. Remove any yellow or brown leaves immediately—they sap energy from the plant. Deadhead spent blooms by snipping the stem ¼ inch above the next set of leaves to redirect the plant's energy into new flowers.
Rotate the pot a quarter turn weekly so the plant grows evenly toward the light. Gardenias naturally grow toward the sun, so this prevents lopsided growth. Every 2-3 years, repot into a container 1-2 inches larger to give roots room to spread. You'll know it's time when roots circle the pot or grow through the drainage holes—this is a sure sign your gardenia is ready for an upgrade.
Tips & tricks for perfect indoor gardenia care
Between us, these little details make the difference between a struggling gardenia and one that blooms like crazy. Let me share what I've learned after years of trial and error.
Soil Mix Secret: That 50/50 mix of acidic potting soil and perlite/orchid bark isn't just arbitrary—it's about aeration. I've found that adding 10% coconut coir to the mix improves moisture retention without compacting. This helps maintain the right balance between hydration and airflow that gardenia roots crave. The key is keeping that surface slightly crumbly—if it feels dense when you squeeze it, add more perlite.
Light Positioning: The east-facing window rule is solid, but here's what nobody tells you—rotate your plant a quarter turn weekly even if it's in perfect light. I learned this the hard way when my gardenia grew lopsided toward the window. The 12-14 hours of grow light in winter should be positioned 18 inches away from the plant to avoid leaf burn. You'll notice the difference in just 2-3 weeks with straighter stems and fuller foliage.
Humidity Hack: That pebble tray method works, but for faster results, I place a small humidifier near my gardenia during winter months when indoor air gets dry. The goal is maintaining 50-70% humidity—you can check this with a hygrometer. A quick test: if your leaves feel dry to the touch after a few hours, you need more humidity. Just avoid misting the flowers directly, as this causes those unsightly brown spots.
Pruning Timing: The instructions say to prune right after flowering, but here's my game-changer: I do a light trim of any dead or yellowing leaves immediately after repotting (every 2-3 years). This gives your plant a fresh start and prevents energy drain. When deadheading, always cut ¼ inch above a leaf node—this encourages new growth from that exact spot. I've seen buds form within 4-6 weeks of proper pruning.
Pro Tips for Growing Gardenias Indoors
- Between us, these little details make the difference between a struggling gardenia and one that blooms like crazy.
- Soil Mix Secret: That 50/50 mix of acidic potting soil and perlite/orchid bark isn't just arbitrary—it's about aeration.
- Light Positioning: The east-facing window rule is solid, but here's what nobody tells you—rotate your plant a quarter turn weekly even if it's in perfect light.
Frequently asked questions
Got questions about keeping your gardenias thriving indoors?
Here are answers to the most common ones—so you can enjoy their intoxicating scent without the fuss.
Can gardenias grow indoors year-round?
With the right light (bright, indirect sunlight), humidity (40-60%), and care, gardenias can bloom indoors for months. Just avoid drafts and temperature swings—keep them between 60–75°F (15–24°C) for best results.
Why are my indoor gardenia leaves turning yellow?
Yellow leaves usually signal overwatering or nutrient deficiency. Let the top inch of soil dry out between waterings, and fertilize lightly with an acid-loving plant food (like citrus mix) every 4–6 weeks. Check for pests too—spider mites love dry indoor air!
How long does it take for an indoor gardenia to bloom?
Patience is key! Mature gardenias (3+ years old) may bloom within 6–12 months indoors, but younger plants focus on foliage first. Boost blooms by pinching back leggy growth in spring and ensuring they get 6+ hours of bright light daily.
What’s the easiest gardenia variety for beginners?
Start with ‘Kleim’s Hardy’ or ‘Radicans’—they’re compact, drought-tolerant, and adapt well to indoor conditions. Avoid tropical varieties like ‘Veitchii’ unless you’re ready for high-maintenance humidity needs. Pro tip: Dwarf varieties (under 3 ft) fit small spaces perfectly!
Can I grow gardenias from cuttings indoors?
Yes! Take 4–6 inch cuttings in spring/summer, dip in rooting hormone, and place in moist perlite or water. Keep humidity high (use a plastic bag!) and wait 4–8 weeks for roots. Transplant once rooted, but expect slower growth than mature plants.
Bonus Tip:
Struggling with low humidity? Group plants together, use a pebble tray with water, or invest in a humidifier. Gardenias thrive in tropical conditions—mimic their natural habitat for happier blooms!
Wrapping up and next steps
Growing gardenias indoors is a rewarding way to enjoy their intoxicating fragrance and lush beauty year-round—with the right care, your plant can thrive even in cozy, low-light spaces. 🌿✨ Remember to prioritize bright, indirect light, consistent humidity, and gentle watering techniques to keep your gardenia happy and blooming.
Now that you’re armed with these tips, why not take the next step? Try propagating a cutting or experimenting with a new care routine to see what works best for your space!