
Companion Plants
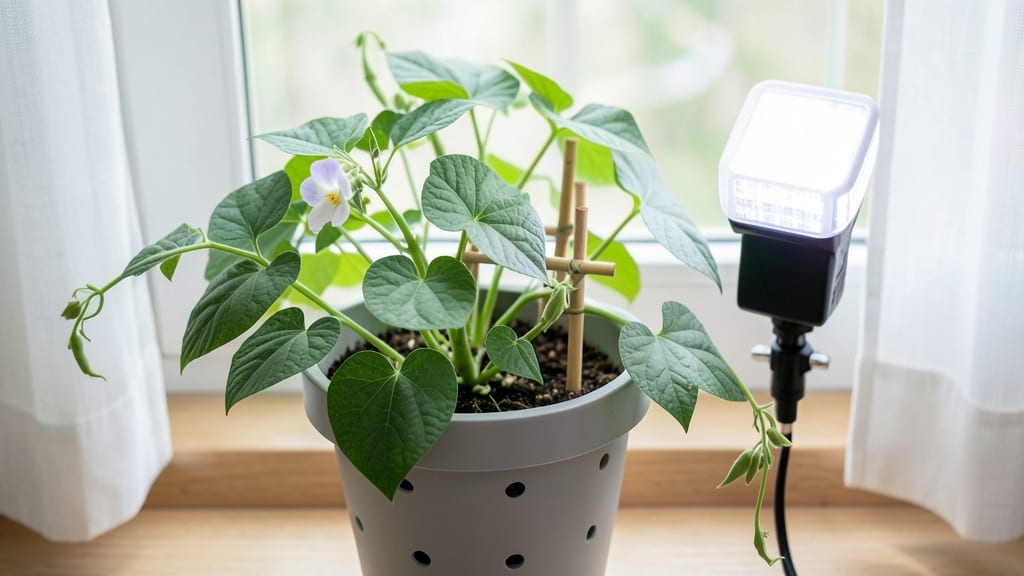
Growing bean plants indoors gives you fresh harvests even when winter locks the garden in ice. 🌱 I’ve grown bush beans on my kitchen windowsill for years, and the secret isn’t fancy setups—it’s choosing the right varieties and mimicking their natural growing conditions.
Dwarf beans like ‘Mascotte’ or ‘Blue Lake’ thrive in containers, producing tender pods in just 6 weeks from seed.
You’ll need a 6-8 inch deep container (beans hate shallow roots), well-draining potting mix, and a spot with at least 6-8 hours of sunlight daily. South-facing windows work best, but if yours is dim, a grow light on a timer solves the problem.
Start seeds indoors 1-2 weeks before your last frost date—or anytime if you’re growing year-round—and keep the soil moist but never soggy.
By week 3, you’ll see those first true leaves, and by week 6, you’ll be harvesting 1-2 inch pods straight from the plant. The flavor? Crisp, sweet, and impossible to beat compared to store-bought.
Plus, beans fix nitrogen in the soil, so they’re great for container gardens where nutrients get used up fast.
Works for apartments, offices, or even a sunny hallway—just avoid drafts and keep the soil warm. Here’s how to troubleshoot common issues like leggy seedlings or yellowing leaves, so your harvest stays on track.
📚 In This Guide
- What you need
- Instructions
- Tips and common mistakes
- Wrapping up and next steps
What you need
- ● Bean Seeds: Choose fast-growing varieties like Bush Bean (e.g., 'Blue Lake' or 'Contender') or Pole Bean (e.g., 'Scarlet Runner'). Quantity: 3–5 seeds per container (or 1–2 seeds if using a larger pot).
- ● Containers: Small pots (6–8" diameter) for bush beans, or
- ● Tall containers (10"+ deep) for pole beans (with trellis support).
- ● Potting Mix: High-quality, well-draining seed-starting mix or a blend of 50% potting soil + 50% perlite/vermiculite. Quantity: Enough to fill containers to 1–2" below the rim.
- ● Trellis or Support: For pole beans, use a 5–6 ft tall stake, bamboo stick, or mesh trellis (secure with soft ties or twist ties).
- ○ Grow Lights (Optional but Helpful): A full-spectrum LED grow light (12–16" above plants) for 12–14 hours/day if natural light is <10 hours/day.
- ● Fertilizer: Balanced liquid fertilizer (10-10-10) or compost tea for nutrient boosts. Dilute to half-strength to avoid burning roots. 🌿
- ● Humidity Dome: A clear plastic cover or DIY dome (e.g., cut plastic bottle) to retain moisture during germination.
- ● Spray Bottle: For gentle watering (especially during seedling stage).
- ● Companion Plant Seeds: Try planting basil, marigolds, or radishes nearby to deter pests naturally!
Step-by-Step instructions for growing bean plants indoors
Here's how to coax a thriving bean harvest from your windowsill—no greenhouse needed.
🌱 Step 1: Choose the Right Variety and Prepare Containers
Select bush bean varieties like 'Blue Lake' or 'Contender'—they thrive in containers and produce faster than pole beans. Avoid heirloom types; they often need more space and support. For 4 plants, use 5-gallon fabric grow bags (they prevent root circling) or 12-inch deep pots with drainage holes. I like fabric because it wicks moisture better and mimics outdoor conditions.
Fill each container with sterile potting mix (never garden soil—it compacts and suffocates roots). Mix in 1 cup perlite per 5 gallons to improve drainage. Press the soil down gently to remove air pockets, but don’t compact it. The surface should feel like a damp sponge—not rock-hard or powdery.
💧 Step 2: Sow Seeds at the Correct Depth and Temperature
Plant 2-3 seeds per container, about 1 inch deep and 2 inches apart. Beans need warmth to germinate—place pots in a spot where the soil stays at 70-80°F. A seedling heat mat speeds this up, but a sunny windowsill near a south-facing wall often works if your home stays above 65°F. Water gently after planting to settle the soil around the seeds.
Cover the pots with clear plastic wrap to retain moisture and warmth. Check daily for condensation—if it’s heavy, remove the wrap for 30 minutes to prevent mold. Germination takes 7-14 days, depending on temperature. You’ll know it’s working when tiny white radicles (root tips) push through the soil first, followed by the shoot.
☀️ Step 3: Provide Light and Support for Vertical Growth
Once seedlings emerge, remove the plastic and move them to the sunniest windowsill—south or west-facing is ideal. Beans need 6-8 hours of direct light daily. If your windowsill doesn’t get enough, supplement with a full-spectrum LED grow light kept 6 inches above the plants. You’ll spot leggy growth (long, weak stems) if light is insufficient—this is your cue to adjust.
Install bamboo stakes or small trellises (4-6 inches tall) as soon as seedlings show first true leaves. Gently tie the main stem to the support with soft plant ties or strips of old fabric. This prevents stems from snapping as they grow. Water 1 inch per week, letting the top 2 inches of soil dry between waterings. Overwatering leads to root rot, which beans hate.
🌿 Step 4: Fertilize and Monitor for Pests
When plants reach 6 inches tall, switch to a balanced liquid fertilizer (10-10-10) diluted to half strength. Apply every 2 weeks—beans fix nitrogen in the soil, but early growth benefits from a boost. I mix it with water in a spray bottle for even distribution. Avoid high-nitrogen fertilizers later; they promote leafy growth at the expense of pods.
Watch for aphids or spider mites on the undersides of leaves. Wipe them off with a damp cloth or spray with neem oil solution (1 tsp neem oil + 1 quart water). Yellowing leaves usually mean overwatering or poor drainage—check the pot’s bottom for soggy soil. Beans wilt easily, so keep them evenly moist but never soggy.
⏰ Step 5: Harvest and Encourage Continuous Production
Harvest begins 6-8 weeks after planting when pods are 4-6 inches long and firm. Pick regularly—this encourages more flowers and pods. Use clean scissors to snip stems, leaving ½ inch of stem attached. The first harvest is the sweetest; after that, flavor declines if pods aren’t picked promptly. I harvest every 2-3 days in peak season to keep plants productive.
After harvest, let plants continue flowering by trimming back any yellow leaves and adding a light mulch (like shredded leaves) to retain moisture. If your indoor space gets cool (<60°F), move pots to a warmer spot or use a small space heater to extend the season. With care, you can coax 3-4 harvests from one planting before the plants naturally decline.
Tips & tricks for growing bean plants indoors
Here's what nobody tells you about coaxing a thriving harvest from your windowsill—these details make all the difference.
The Heat Factor: That 70-80°F soil temperature range in Step 2 is non-negotiable for germination. I learned this the hard way after struggling with cold windowsills—beans simply won't sprout below 65°F. If your home runs cooler, place containers on top of a refrigerator or use a small heating pad set to low. The key is consistent warmth at seed level, not ambient room temperature.
Light Strategy: The 6-8 hours of direct light in Step 3 is a minimum, not a maximum. If your plants start looking leggy (stems stretching toward the light), they're starving for more. Rotate pots every 2-3 days so all sides get equal exposure. South-facing windows get the most light, but west-facing windows in the afternoon can work too—just supplement with a grow light if needed. I've seen dramatic growth improvements when I add just 2 extra hours of artificial light.
Watering Wisdom: The "1 inch per week" guideline in Step 3 is perfect, but timing matters more than quantity. Water in the morning so excess moisture evaporates during the day, preventing fungal issues. Stick your finger 2 inches into the soil—if it's dry, water thoroughly until it runs from the drainage holes. The top layer should feel like a damp sponge, not bone-dry or soggy. Overwatering is the #1 killer of indoor beans.
Harvest Hack: Those 6-8 weeks until harvest in Step 5 can feel like forever, but you'll know it's time when you see tiny white flowers appear. The pods will be ready just 3-5 days after flowering. Here's my secret: I harvest every morning during peak season (every 2-3 days) and store them in the fridge. This keeps them fresh for up to 5 days while encouraging the plant to produce more flowers and pods.
Pro Tips for Growing Bean Plants Indoors
- Here's what nobody tells you about coaxing a thriving harvest from your windowsill—these details make all the differe...
- The Heat Factor: That 70-80°F soil temperature range in Step 2 is non-negotiable for germination. I learned this the ...
- Light Strategy: The 6-8 hours of direct light in Step 3 is a minimum, not a maximum. If your plants start looking leg...
Frequently asked questions
Got questions about growing beans indoors? You’re not alone! Here are answers to the most common concerns—so you can grow lush, productive plants without stress.
Can I grow beans indoors without sunlight?
Most beans need at least 6–8 hours of sunlight daily. If your windowsill is dim, supplement with a grow light (LED or fluorescent) 12–16 inches above plants for 12–14 hours/day. Dwarf varieties like Blue Lake or Mascotte adapt better to low light than pole beans.
How long does it take for indoor beans to produce pods?
With ideal conditions, you’ll see flowers in 4–6 weeks and pods ready to harvest in 6–8 weeks. Speed up growth by keeping soil warm (70–80°F), using a balanced fertilizer (10-10-10), and pruning lower leaves to focus energy upward. Patience pays off—harvest pods when they’re firm but still tender!
What’s the best container for indoor beans?
Beans need deep containers (12+ inches) for roots and support. Use:
- 5-gallon buckets (great for pole beans with trellises)
- Fabric grow bags (prevents root circling)
- Wooden crates (aesthetic + drainage holes)
Ensure drainage holes are present to avoid root rot. For bush beans, a 10-inch pot works, but add a trellis to save space!
Why are my indoor bean leaves turning yellow?
Yellow leaves usually signal overwatering, nutrient deficiency, or pests. Check these fixes:
- Watering: Let soil dry 1 inch deep between waterings. Yellowing lower leaves? It’s normal aging—trim them!
- Nutrients: Feed with compost tea or a low-nitrogen fertilizer (beans fix their own nitrogen).
- Pests: Inspect for aphids or spider mites. Spray with neem oil or rinse leaves with water.
If only new leaves are yellow, it’s likely magnesium deficiency—sprinkle Epsom salt (1 tbsp/gallon) into soil.
Can I grow beans indoors year-round?
Yes! Indoors, you bypass seasonal limits. Start seeds every 2–3 months for continuous harvests. Use LED grow lights in winter to maintain 12+ hours of light. Just watch for legume-specific pests (like Mexican bean beetles) and rotate crops every season to refresh soil.
Wrapping up and next steps
Growing bean plants indoors is a rewarding journey that brings fresh, homegrown goodness to your table in just six weeks! 🌱 With the right setup—sunlight, containers, and a little care—you’ll enjoy crisp, flavorful beans without stepping outside.
Whether you’re a beginner or a seasoned gardener, this method proves that any space can be a garden.
Ready to take the next step? Start with a few seeds, track your progress, and soon you’ll be harvesting your own nutrient-packed harvest. Happy growing—your future meals will thank you! 🌟