
Container Gardens
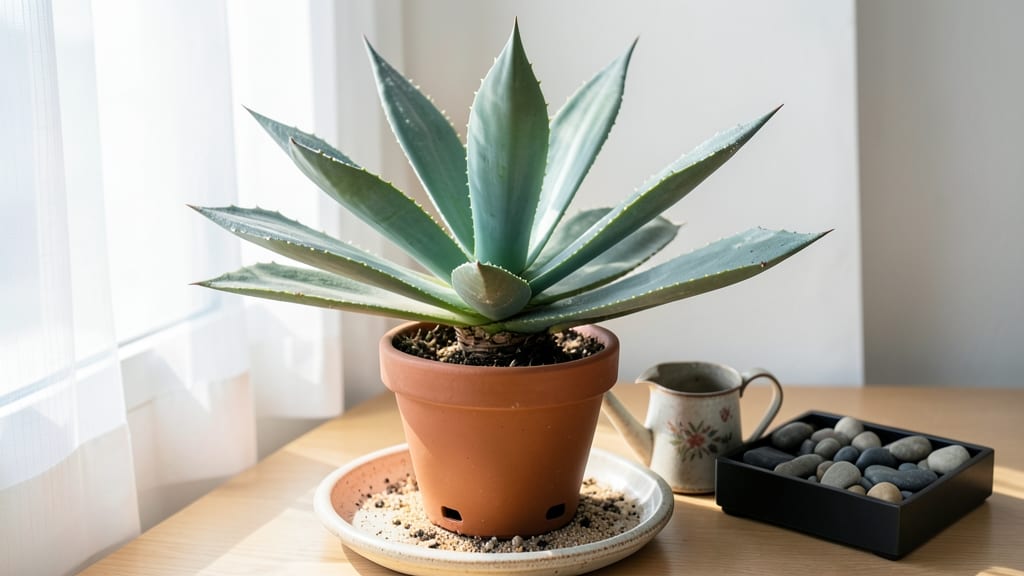
Growing agave indoors means bringing desert drama into your living space—those striking spikes thrive in apartments with the right care. 🌵 I’ve turned my sunroom into a mini agave collection, and the secret isn’t complicated: bright light, minimal water, and a pot that lets roots breathe.
Most people overwater, which is how I lost my first two plants. But once you get the rhythm, these plants reward you with bold foliage and almost zero fuss.
The key is mimicking their natural habitat: south-facing windows or grow lights for 6+ hours daily, a well-draining cactus mix, and a terracotta pot with drainage holes. Skip the fancy soil—agave hates soggy feet.
Stick your finger in the soil first: if it’s dry an inch down, it’s time to water. Overwatering is the #1 killer, so I set a reminder every 3-4 weeks in winter (when growth slows).
What you’ll end up with is a sun-loving centerpiece that stays compact indoors—no need for a greenhouse. The leaves stay crisp, the color deepens to blue-green or variegated gold, and you’ll avoid the root rot that plagues so many indoor succulents.
My ‘Blue Glow’ agave even bloomed indoors after three years (yes, it’s rare but possible!).
Works for any apartment, balcony, or office with decent light. The only adjustment? In winter, you might need to supplement natural light—otherwise, these plants are foolproof once you nail the basics. Ready to try?
📚 In This Guide
- What you need
- Instructions
- Tips and common mistakes
- Wrapping up and next steps
What you need
- ● Agave plant: Choose a small, healthy specimen (3–6 inches tall) from a nursery or online retailer. Pro tip: Look for varieties like Agave parryi or Agave victoria-reginae, which thrive indoors! 💡
- ● Pot: A terracotta or ceramic container (6–10 inches in diameter) with drainage holes. Why? Agave hates soggy roots! ✨
- ● Well-draining cactus/succulent mix: 1–2 gallons of soil blend (e.g., 50% potting soil + 50% perlite/pumice). Avoid garden soil—it’s too dense!
- ● Drainage tray or saucer: To catch excess water and prevent root rot.
- ○ Gloves (optional but recommended): Agave spines can be sharp—protect your hands!
- ● Trowel or small shovel: For repotting or adjusting soil.
- ● Watering can with a narrow spout: Precision matters when watering succulents!
- ● Spray bottle: For occasional misting (agave prefers dry air).
- ○ Grow lights (optional): A full-spectrum LED (12–14 hours/day) if natural light is limited.
- ○ Fertilizer (optional): A balanced, diluted succulent fertilizer (e.g., 5-5-5) for spring/summer growth.
- ● A sunny spot near a south- or west-facing window (6+ hours of light daily). No bright window? A grow light will save the day! 🌞
- ● Patience: Agave grows slowly—enjoy the journey!
- ● Dedication to minimal watering: Overwatering is the #1 killer of indoor agave.
Step-by-step instructions for growing agave indoors
Here's how to nurture a sun-loving agave into a striking indoor centerpiece—no greenhouse required.
🪴 Step 1: Select the Right Container and Soil Mix
Agave thrives in pots with excellent drainage, so choose a container with multiple drainage holes—terracotta is ideal. The pot should be just slightly larger than the plant's root ball to prevent excessive moisture retention. I like to use a 6-8 inch diameter pot for mature agave, as they prefer being root-bound.
Fill the bottom third of the pot with cactus/succulent mix—this ensures rapid drainage. Mix in 20% perlite or pumice to further improve aeration. Agave roots need air as much as they need soil, and compacted mixes lead to rot. Tap the pot gently after filling to settle the mix without compacting it.
☀️ Step 2: Position for Maximum Light Exposure
Agave demands bright, direct light—at least 6-8 hours daily—to prevent etiolation (that sad, stretched growth). Place your plant within 1-2 feet of a south-facing window or under grow lights for 14-16 hours daily. If natural light is insufficient, supplement with a full-spectrum LED grow light positioned 6-12 inches above the plant.
Rotate the pot quarter-turn weekly to encourage even growth. You'll notice leaves leaning toward the light? That's your cue to reposition the plant or adjust the grow light angle. Agave grown in low light develops weak, pale foliage and may never flower.
💧 Step 3: Water Sparingly and Only When Necessary
Water agave only when the top 2-3 inches of soil are completely dry—this usually means every 2-3 weeks in winter and every 1-2 weeks in summer. Overwatering is the #1 killer of indoor agave. Stick your finger 1 inch deep into the soil: if it feels dry, water thoroughly until it drains from the bottom holes. Discard any excess water in the saucer to prevent root rot.
Agave stores water in its leaves, so it's far better to underwater than overwater. You'll know your watering is on point when the leaves remain plump and upright. If leaves pucker or feel soft, you've watered too much. In winter, reduce watering to once a month—agave enters a natural dormancy period.
✂️ Step 4: Fertilize Lightly and Prune Dead Foliage
Feed your agave once in spring with a balanced, diluted fertilizer (half-strength 10-10-10). Agave doesn't need frequent feeding—too much fertilizer causes weak growth and attracts pests. I mix the fertilizer with water and apply it to the soil, avoiding the leaves entirely. After fertilizing, water thoroughly to prevent salt buildup in the root zone.
Remove any dead or dying leaves by twisting them gently at the base—never cut with scissors, as this can introduce bacteria. Healthy agave leaves should be firm, upright, and free of brown edges. If you notice yellowing at the base, it's a sign of overwatering or poor drainage. Prune only what's necessary; agave is a low-maintenance plant that thrives on minimal intervention.
🌱 Step 5: Propagate Pups for Free New Plants
When your agave produces pups (baby plants at the base), they're ready to propagate. Wait until they're at least 1/3 the size of the mother plant before separating. Gently remove the pup with a clean knife, ensuring it has some roots attached. Let the cut surfaces dry for 1-2 days to prevent rot before planting in its own pot with fresh cactus mix.
Keep newly potted pups in bright, indirect light for the first week to reduce stress. Water lightly only when the soil is completely dry. Pups establish quickly and often flower within 2-3 years—far faster than mother plants. This is how I've expanded my collection from one agave to a sun-filled gallery wall of spiky beauty.
Tips & tricks for perfect indoor agave care
Here's what nobody tells you about keeping your agave thriving in apartment conditions—without the guesswork.
Container Selection: Terracotta pots aren't just decorative—they breathe, helping prevent moisture buildup that leads to root rot. If you must use plastic, add extra drainage holes yourself with a heated nail. The 6-8 inch size recommendation is ideal because agave grows slowly and prefers being slightly root-bound. I've seen plants in 10-inch pots still struggling with soggy centers.
Light Exposure Reality Check: That 6-8 hours of direct light isn't just a suggestion—it's non-negotiable for healthy growth. If your south-facing window doesn't get enough sun, invest in a quality grow light. I've had agave stretch toward windows like sad sunflowers when they didn't get enough light, and it took months to recover. The quarter-turn weekly rotation prevents that lopsided growth where leaves all point one way.
Watering Secret: The finger test in Step 3 is crucial, but here's the pro move: use a chopstick or popsicle stick inserted into the soil. Mark the stick at 1 inch depth—when the soil at that mark feels completely dry, it's time to water. This gives you a visual reference rather than guessing. And remember, agave can survive weeks without water, but not days with excess moisture.
Fertilizer Timing: That single spring feeding isn't just about nutrients—it's about timing the plant's natural growth cycle. Agave grows most actively in spring and summer, so feeding then gives it the boost it needs. I've seen plants with fertilizer burns from applying it in winter when the plant is dormant. Always dilute to half-strength to avoid shocking the roots, and water thoroughly after to prevent salt buildup.
Pro Tips for Growing Agave Indoors
- Here's what nobody tells you about keeping your agave thriving in apartment conditions—without the guesswork.
- Container Selection: Terracotta pots aren't just decorative—they breathe, helping prevent moisture buildup that leads to root rot.
- Light Exposure Reality Check: That 6-8 hours of direct light isn't just a suggestion—it's non-negotiable for healthy growth.
Frequently asked questions
Got questions about growing agave indoors?
You’re not alone! Here are answers to the most common queries—from sunlight struggles to space-saving hacks.
Can agave survive indoors without direct sunlight?
Agave thrives on bright, indirect light—think south- or west-facing windows. Without it, leaves may stretch (etiolate) or turn pale. Supplement with a grow light (12–14 hours/day) if natural light is weak. Rotate the pot monthly for even growth!
How long does it take for indoor agave to grow?
Growth is slow but steady! Expect 1–3 inches per year under ideal conditions. Patience pays off—some varieties (like Agave americana) take 5–10 years to flower indoors. Focus on care consistency over speed!
What’s the best small-space agave for apartments?
Opt for compact varieties like Agave parryi (blue-green, 1–2 ft wide) or Agave victoria-reginae (rosette-shaped, 1 ft tall). These fit snugly on shelves or countertops. Avoid giant species like Agave americana unless you have tall ceilings!
Why is my indoor agave’s leaves turning yellow or mushy?
Overwatering is the #1 culprit! Agave stores water in its leaves—let soil dry completely between waterings. Yellowing edges? Check for root rot (trim affected roots, repot in fresh, gritty mix). Brown tips? Low humidity—mist occasionally or use a pebble tray.
Can I propagate my indoor agave’s pups?
Once pups reach 1/3 the size of the mother plant, gently twist or cut them off (use sterilized tools). Let the cut end callus for 1–2 days, then plant in cactus/succulent mix. Keep soil barely moist until roots establish (4–6 weeks).
Wrapping up and next steps
Growing agave indoors is a rewarding way to bring a touch of desert charm into your space—no greenhouse required! 🌵 With the right light, soil, and care, you’ll enjoy its striking foliage and low-maintenance nature.
Start small, stay patient, and soon you’ll have a thriving agave that’s as tough as it is beautiful.
Ready to take the next step? Pick your favorite variety and give it a try—your indoor jungle just got a stylish upgrade! 🌟 Happy growing!