
Propagation
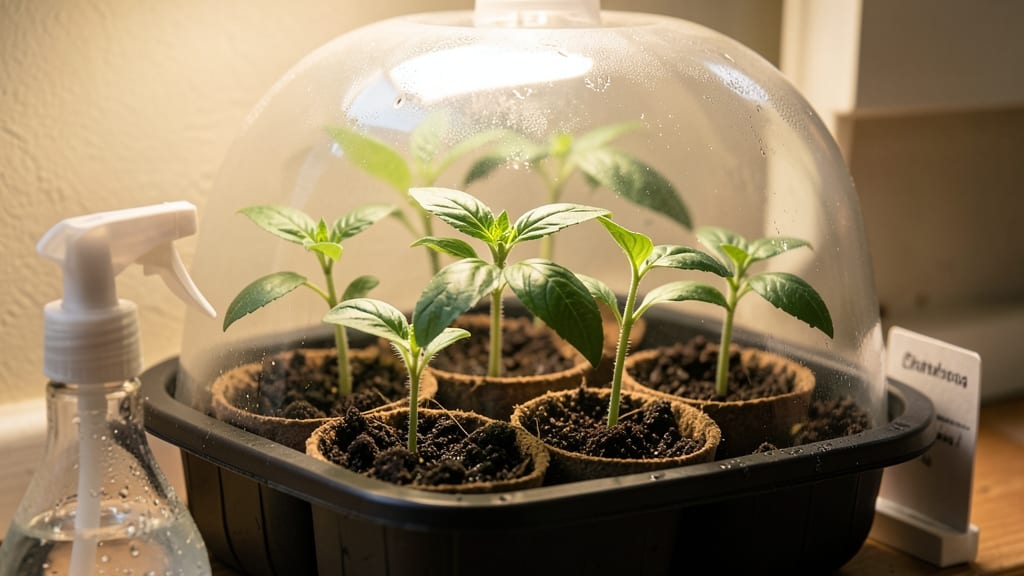
Germinating seeds indoors turns a slow spring into a head start you can't get from store-bought plants. 🌱 The secret isn't just patience—it's controlling warmth, moisture, and light to coax those first green shoots through soil faster than nature would outside.
I've gone from waiting for frost dates to harvesting homegrown herbs by Memorial Day, and you can too with the right setup.
You only need four things: a seed-starting tray or recycled containers, moistened seed-starting mix (not garden soil), a heat mat or warm spot, and patience. The mix should feel like a damp sponge—not soggy, not dry—so water it thoroughly before planting.
Most seeds need warmth between 70-85°F to sprout, and a simple heat mat under your tray does the trick without fancy equipment.
Within a week, you'll see tiny roots breaking through, followed by those first leaves reaching for light. The key is keeping that soil consistently moist (not wet) and moving seedlings to bright indirect light once they sprout.
No more waiting for the last frost to plant—just a steady supply of homegrown veggies and flowers all season long.
This method works for anything from slow-starting tomatoes to fast-sprouting basil. Even if you've killed seedlings before, these tricks make it foolproof. Let's get those seeds growing!
📚 In This Guide
- What you need
- Instructions
- Tips and common mistakes
- Wrapping up and next steps
What you need
- ● Seeds: Choose high-quality, fresh seeds (check the packet for germination rates). Pro tip: Start with easy-to-germinate varieties like beans, peas, or lettuce if you’re new!
- ● Seed trays or small pots: 2–4" deep with drainage holes (or use recycled containers like egg cartons or plastic clamshells). Quantity: 1 per seed type or 12+ cells for bulk sowing.
- ● Potting mix: Lightweight, sterile seed-starting mix (avoid garden soil—it’s too dense!). Quantity: Enough to fill your trays/pots to ~1" below the rim.
- ○ Water: Room-temperature, filtered, or distilled water (chlorine can inhibit germination). Optional: A spray bottle for gentle misting.
- ○ Heat mat (optional but highly recommended): A germinating heat mat (70–80°F range) to speed up sprouting. Size: Fit your seed tray dimensions.
- ● Plastic wrap or humidity dome: To retain moisture while seeds sprout. Alternative: A clear plastic bag with holes for ventilation.
- ● Grow lights or sunny windowsill: A full-spectrum LED grow light (12–16 hours/day) or a south-facing window (6+ hours of sunlight). Height: Keep lights 2–4" above seedlings.
- ● Labels and markers: To track seed varieties and planting dates. Pro tip: Use toothpicks + masking tape for DIY labels!
- ● Small hand trowel or spoon: For planting tiny seeds without over-deepening.
- ● Misting spray bottle: To keep soil evenly moist without flooding.
- ○ Thermometer (optional): To monitor soil temperature (ideal range: 70–85°F for most seeds).
- ○ Fan (optional): A small clip-on fan for gentle airflow to strengthen seedlings.
Step-by-step instructions for germinating seeds indoors
Here’s how I guarantee faster, healthier sprouts—no fancy equipment needed.
🌱 Step 1: Prep Seeds for Faster Germination
Start by soaking seeds overnight in lukewarm water to soften their outer coating. Most seeds double their germination speed this way—especially tough shells like peas or beans. Use a small bowl or container, cover with a damp paper towel, and let them sit for 12-24 hours. You’ll know they’re ready when the outer layer looks slightly puffed.
For delicate seeds (like lettuce or snapdragons), skip soaking—just plant them dry. The key is keeping them moist without drowning them. If using a paper towel method, fold it around the seeds and place it in a sealed plastic bag to trap humidity. Check daily for mold—if you see fuzzy spots, toss them and start fresh.
💧 Step 2: Set Up the Perfect Moisture Environment
Fill your seed-starting trays with moistened (not soggy) potting mix—press it down lightly so it’s firm but still airy. I like to use a spray bottle for even moisture, avoiding heavy watering that can bury seeds too deep. Plant seeds at the correct depth: twice the seed’s diameter is the rule of thumb. Tiny seeds (like basil) go just under the surface, while larger ones (like beans) need ½ inch of coverage.
Cover the tray with a clear plastic dome or plastic wrap to lock in warmth and humidity. Place it in a warm spot—I use the top of my fridge (around 75-85°F) or a seedling heat mat if I have one. Check daily for condensation inside the dome. If the inside fogs up, you’ve got the right moisture level. If it stays dry, mist lightly again.
☀️ Step 3: Monitor for Sprouts and Adjust Conditions
Germination time varies—5-14 days is normal, depending on the seed type. Watch for the first tiny green shoot (the radicle) breaking through the soil. Once you see 50% of seeds sprouted, remove the dome immediately. Too much humidity after this stage causes damping-off, a fungal disease that collapses seedlings overnight.
Move the tray to a bright, indirect light spot (like a south-facing window) or under a grow light. Avoid direct sun—it overheats the soil and can scorch delicate sprouts. You’ll know light is right when seedlings grow sturdy and upright instead of stretching toward the window. If they look leggy (thin stems, far-apart leaves), they need more light or less heat.
⏰ Step 4: Thin and Care for Strong Seedlings
Once seedlings have 2-3 true leaves (not just the first cotyledons), thin them to one per cell if using a tray. Use scissors to snip weak ones at soil level—pulling risks disturbing roots. Keep the soil evenly moist but never soggy. Water from the bottom if possible to avoid fungal issues.
After thinning, give the tray 14-16 hours of light daily. Rotate it daily so seedlings don’t lean. If you notice yellowing leaves, reduce watering slightly—overwatering is the #1 killer of young plants. In 4-6 weeks, they’ll be ready for transplanting outdoors or into larger pots. Harden them off first by gradually exposing them to outdoor conditions.
Tips & tricks for perfect indoor seed germination
Here's what I learned after watching my first batch of seeds fail—don't let this happen to you.
Soaking Strategy: The 12-24 hour soaking window is your best friend for tough seeds like peas or beans, but delicate varieties like lettuce need zero soaking. I've ruined batches by over-soaking—just check for that slight puffiness in the outer layer. For extra insurance, place your soaking container in a warm spot (like your fridge's top shelf) to speed up the process.
Temperature Matters: That 75-85°F range isn't just a suggestion—it's the sweet spot for most seeds. If your kitchen runs cooler, try placing your seed tray on top of your refrigerator or use a seedling heat mat. I've seen germination times cut in half when keeping seeds warm consistently. Just avoid extreme heat—above 90°F can actually inhibit sprouting.
Light Transition: The moment you see 50% of seeds sprouted, remove that dome immediately—this prevents damping-off disease. I've lost entire trays to this silent killer. After removing the dome, move your tray to bright, indirect light. A south-facing window works great, but if you notice seedlings stretching toward the light (called "legginess"), they need more light or less heat. Rotate your tray daily to prevent this.
Thinning Technique: When you reach the 2-3 true leaves stage and it's time to thin, use clean scissors instead of pulling. This prevents disturbing the roots of your remaining seedlings. I always thin in the morning so any damaged plants have time to recover before evening. Keep soil evenly moist but never soggy—bottom watering is your best friend here.
Pro Tips for Germinating Seeds Indoors
- Here's what I learned after watching my first batch of seeds fail—don't let this happen to you.
- Soaking Strategy: The 12-24 hour soaking window is your best friend for tough seeds like peas or beans, but delicate ...
- Temperature Matters: That 75-85°F range isn't just a suggestion—it's the sweet spot for most seeds. If your kitchen r...
Frequently asked questions
Got questions about germinating seeds indoors?
You’re not alone! Here are answers to the most common concerns—from timing to troubleshooting—to help you grow confidently.
How long does it take for seeds to germinate indoors?
Germination time varies by seed type—fast growers like radishes sprout in 3–7 days, while slower ones (e.g., tomatoes) take 7–14+ days. Warmth, moisture, and darkness speed things up. Check your seed packet for specifics!
What if my seeds aren’t sprouting?
First, check moisture—soil should stay damp (not soggy). If seeds are old (<2 years), viability drops. Try scratching the seed coat (for hard shells) or using a seed starter gel for better contact. Still stuck? Test a few seeds in warm water—if they sink, they’re likely viable.
Can I use regular potting soil for indoor germination?
Yes, but seed-starting mix is lighter and drains better, reducing rot risk. Avoid garden soil (too dense) or compost-heavy mixes (can harbor mold). For a budget fix, mix 50% potting soil + 50% perlite/vermiculite for airflow.
When should I move seedlings to light?
Once sprouts emerge and cotyledons (first leaves) appear, it’s time for light! Keep them under grow lights (12–16 hrs/day) or a sunny window. Until then, darkness (or a dark box) helps prevent leggy growth.
Are there cheap alternatives to heat mats?
Try these:
- DIY heat mat: Use a warm water bottle wrapped in a towel under the tray.
- Bottom warmth: Place the tray on top of your refrigerator (gentle heat source).
- Group seeds: Cluster trays together to share warmth.
Wrapping up and next steps
Germinating seeds indoors is a rewarding way to kickstart your gardening journey—whether you're a beginner or a seasoned green thumb! 🌱 With the right balance of warmth, moisture, and patience, you’ll soon watch tiny sprouts break through the soil, ready to thrive.
Now that you’ve got the tricks to speed up the process, it’s time to roll up your sleeves and start planting—your future harvest (or lush houseplants!) is just a few days away.
Ready to take the next step? Pick your favorite seeds, gather your supplies, and create your own indoor germination station today! 🌿