
Container Gardens
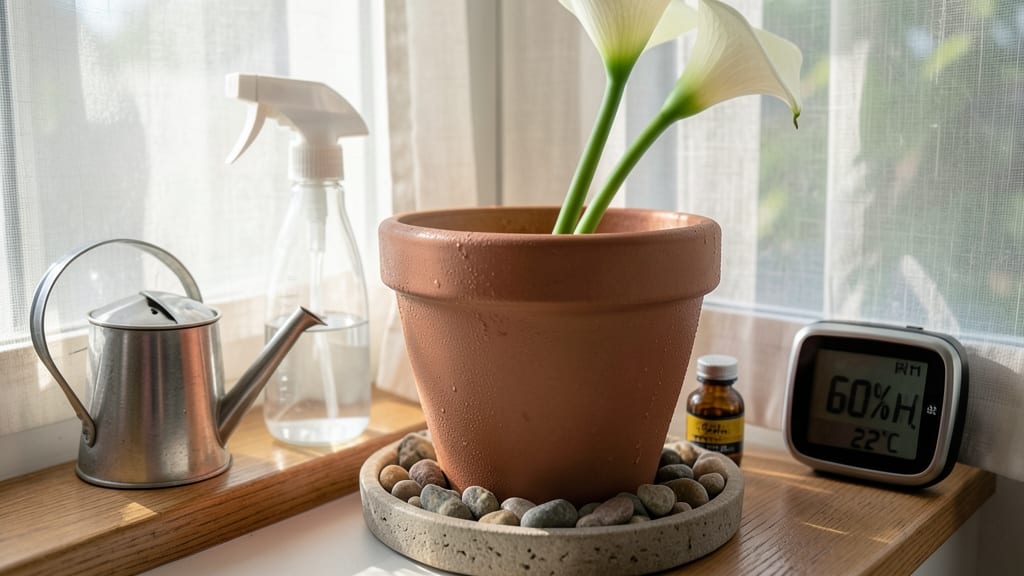
The care of calla lilies indoors brings that dramatic elegance to any space without needing a greenhouse. 🌿 I've kept mine thriving for years by mastering their light, water, and humidity quirks—turns out, they're far easier to please than most houseplants think.
The key is understanding their natural tropical habits and mimicking them indoors.
These plants crave bright, indirect light—think east-facing windows or a few feet from a south window. Too much direct sun scorches their leaves, while too little makes them stretch leggy.
Water only when the top inch of soil feels dry, and always use room-temperature water to avoid shocking their roots. A peaty, well-draining potting mix keeps them happy without fuss.
With the right care, your calla lilies will reward you with bold, velvety blooms for months. Mine produce flowers from spring through fall, and with proper winter rest, they bounce back stronger each year.
The secret? A cool, slightly drier period in winter mimics their natural dormancy—no complex tricks, just patience.
Whether you're dealing with yellowing leaves or brown tips, most issues stem from light or water mistakes. I'll walk you through troubleshooting, seasonal adjustments, and how to repot them every few years for long-term success. Let's get those calla lilies looking their best all year.
📚 In This Guide
- What you need
- Instructions
- Tips and common mistakes
- Wrapping up and next steps
What you need
- ● Calla Lily Bulbs: 1–3 high-quality, dormant bulbs (depending on pot size). Choose Zantedeschia aethiopica (white) or Zantedeschia elliottiana (pink/red) for indoor-friendly varieties.
- ● Container: A pot with drainage holes, 12–16 inches in diameter (for 1–3 bulbs). Terracotta or ceramic works best for airflow.
- ● Potting Soil: 1–2 gallons of well-draining, peat-based potting mix (amend with perlite or orchid bark for aeration). Avoid garden soil—it’s too dense!
- ● Watering Can or Spray Bottle: A gentle-mist option to avoid bulb rot. A can with a narrow spout is ideal for deep watering.
- ● Fertilizer: A balanced liquid fertilizer (10-10-10) or slow-release granular fertilizer (like 14-14-14) for blooming plants.
- ○ Grow Lights (Optional but Helpful): A full-spectrum LED grow light (12–16 hours/day) if natural light is less than 6 hours/day.
- ● Pruning Shears: Sharp, clean shears (or scissors) for trimming dead foliage or spent blooms.
- ○ Mulch (Optional): A thin layer of orchid bark or coconut coir to retain moisture and regulate temperature.
- ○ 🌡️ Temperature Control: A thermometer (optional but handy) to monitor 65–80°F—calla lilies hate drafts!
- ● 🔄 Dormancy Prep: If overwintering, gather paper bags or breathable fabric to cover bulbs during their rest period.
- ● 🛡️ Pest Defense: Keep neem oil or insecticidal soap on hand for aphids or spider mites.
Step-by-Step instructions for caring for calla lilies indoors
With the right light and a little attention, your calla lilies will reward you with bold blooms all year long.
🪴 Step 1: Choose the Right Spot for Bright, Indirect Light
Calla lilies thrive in bright, indirect light—think east-facing windows or a few feet back from a south window. Direct afternoon sun scorches their leaves, turning them crispy at the edges. I place mine near a sheer curtain that diffuses the light just enough to keep them happy.
Watch for signs of too little light: leggy stems and sparse foliage mean they're stretching toward any available light source. If you notice this, move them closer to the window or supplement with a grow light for 12-14 hours daily. The ideal spot keeps leaves a rich, deep green without any yellowing or browning.
💧 Step 2: Water Consistently Without Overdoing It
Keep the soil evenly moist but never soggy—callas hate wet feet. Stick your finger 1 inch deep into the soil; if it feels dry, it's time to water. I use room-temperature water and pour it directly onto the soil until it drains freely from the bottom of the pot.
Yellowing leaves often signal overwatering, while crispy edges mean underwatering. Let the top ½ inch of soil dry out slightly between waterings in winter, when growth slows. Always use a pot with drainage holes—no exceptions. I swear by terracotta because it breathes and prevents root rot.
✂️ Step 3: Prune Spent Blooms and Yellow Leaves
Deadhead faded blooms by cutting the stem ¼ inch above the next leaf node with clean, sharp scissors. This redirects energy to new growth instead of seed production. I do this every 2-3 days during peak bloom season to keep the plant looking fresh and encourage more flowers.
When leaves turn yellow, don't yank them—snip them at the base with sterilized shears. This prevents disease from spreading through open wounds. If more than 25% of the foliage yellows at once, your plant may be struggling from overwatering or poor light. Adjust care immediately and monitor closely.
☀️ Step 4: Fertilize Lightly During Growing Season
Feed your calla lilies every 4-6 weeks in spring and summer with a balanced liquid fertilizer (like 10-10-10) diluted to half-strength. I skip fertilizing in fall and winter when growth slows. Over-fertilizing burns roots and causes salt buildup in the soil—always water thoroughly after feeding.
Look for new leaves and flower buds as signs your plant is happy. If growth stalls or leaves develop brown tips, flush the soil with water to remove excess salts. I swear by a monthly foliar spray of diluted fish emulsion in summer for extra nutrients without stressing the roots.
⏰ Step 5: Adjust Care for Seasonal Changes
In winter, reduce watering to every 7-10 days and stop fertilizing entirely. Calla lilies enter a natural dormancy period, and forcing growth will exhaust them. Keep them in the brightest spot you have—even if it means moving them under a grow light for 8-10 hours daily.
If your calla lily drops all its leaves in winter, don't panic. This is normal! Just keep the soil barely moist and wait for new shoots to emerge in early spring. I bring mine out of dormancy by gradually increasing water and light over 2-3 weeks—no sudden shocks. Watch for the first signs of new growth: small, tight buds at the base of the plant.
Tips & tricks for perfect calla lily care
Real talk: The difference between thriving calla lilies and struggling ones often comes down to these small but critical details.
Lighting Strategy: If you don't have an east-facing window, rotate your plant quarter-turn weekly to ensure even growth. I've seen callas develop lopsided growth when kept in one spot too long—this simple rotation keeps them balanced. For north-facing windows, supplement with a grow light for those critical 12-14 hours daily mentioned in Step 1. The goal is consistent light exposure without direct sunburn.
Watering Wisdom: I learned this the hard way after losing a prized plant: terracotta pots are your best friend. They wick away excess moisture through their porous walls, preventing that deadly root rot. If you're using plastic pots, water 20% less frequently—they trap moisture longer. And always use room-temperature water to avoid shocking the roots, which can happen with cold water straight from the tap.
Pruning Precision: When deadheading those spent blooms in Step 3, make your cuts at a 45-degree angle just above the leaf node. This creates more surface area for new growth to emerge. I keep a small pair of sterilized scissors dedicated just to my callas—this prevents cross-contamination with other plants. For yellow leaves, wait until they're completely yellow before removing; this gives the plant time to redirect nutrients back to healthy growth.
Seasonal Transition: That 2-3 week gradual increase in light and water when bringing callas out of dormancy is crucial. I start by moving them to a brighter spot for just 1 hour daily, then slowly increase. Sudden changes shock the plant—think of it like waking up from a long nap. The first signs of new growth (those tiny buds) usually appear within 7-10 days of starting this process.
Pro Tips for Care Of Calla Lilies Indoors
- Real talk: The difference between thriving calla lilies and struggling ones often comes down to these small but criti...
- Lighting Strategy: If you don't have an east-facing window, rotate your plant quarter-turn weekly to ensure even grow...
- Watering Wisdom: I learned this the hard way after losing a prized plant: terracotta pots are your best friend. They ...
Frequently asked questions
Got questions about keeping your calla lilies thriving indoors? You’re not alone! Here are some of the most common concerns—and their solutions—to help you maintain those stunning, elegant blooms year-round.
How often should I water my indoor calla lilies?
Water your calla lilies only when the top 1–2 inches of soil feel dry. Overwatering is their #1 enemy—it causes root rot. Use room-temperature water and avoid letting them sit in soggy soil. A well-draining pot with drainage holes is a must!
Can calla lilies survive winter indoors?
Calla lilies are perennial and can thrive indoors year-round if given the right care. In winter, reduce watering slightly and keep them in a spot with bright, indirect light. Avoid cold drafts or sudden temperature drops below 60°F (15°C).
Why are my calla lily leaves turning yellow?
Yellow leaves usually signal overwatering or poor drainage. Check the roots—if they’re mushy or black, trim the rotten parts and repot in fresh, well-draining soil. Underwatering can also cause yellowing, so find that sweet spot!
How do I encourage more blooms?
For maximum blooms, provide bright, indirect light (like an east or north-facing window) and fertilize every 4–6 weeks with a balanced liquid fertilizer during spring and summer. Deadhead spent blooms to redirect energy to new growth.
Are calla lilies toxic to pets?
Yes, calla lilies are toxic to cats and dogs if ingested. Keep them out of reach or opt for pet-safe alternatives like spider plants or Boston ferns. Watch for symptoms like drooling, vomiting, or lethargy if you suspect poisoning—contact your vet immediately.
Can I grow calla lilies from cuttings?
Not easily! Calla lilies don’t root well from cuttings. Instead, propagate them by dividing the rhizomes (underground stems) every 2–3 years in spring. Gently separate healthy sections with roots and replant in fresh soil.
Wrapping up and next steps
Caring for calla lilies indoors is all about balancing their love for bright, indirect light and consistent moisture—without overcomplicating it! With the right pot, soil, and a little attention to their quirks (like those dusty leaves or occasional pests), you’ll enjoy their striking blooms year-round. 🌿✨
Now that you’re armed with the know-how, grab your plant and get growing! Start by giving your calla lily a fresh look with a gentle prune or a nutrient boost—your next step could be experimenting with propagating offsets or styling them in your favorite indoor space. Happy gardening!