
Tools
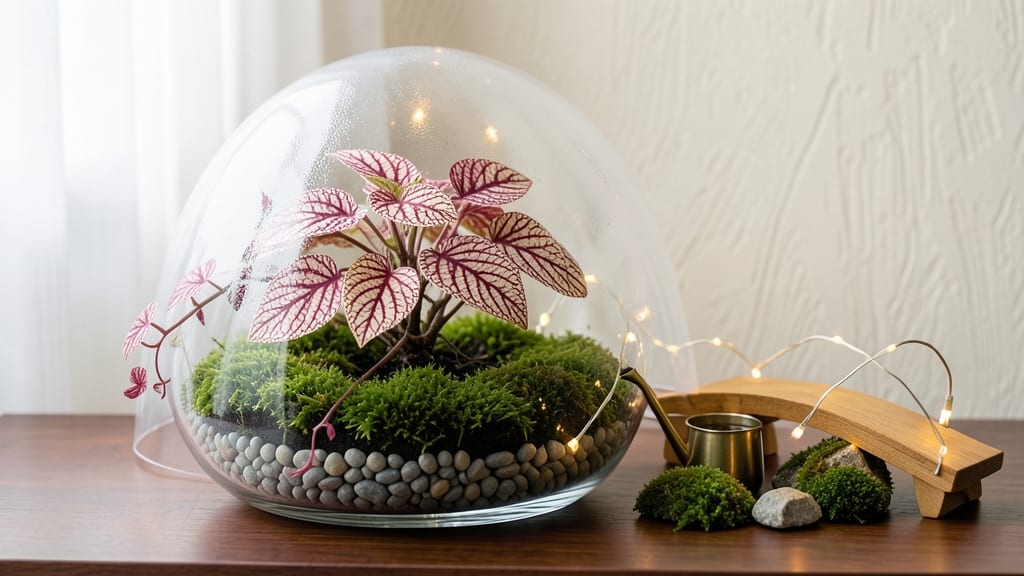
Creating an indoor miniature garden transforms any corner into a lush, whimsical world—no yard required. 🌿 I started mine after seeing how tiny mossy landscapes brought unexpected joy to my living room, and now it’s the centerpiece of my space.
The key is balancing scale with care: choose plants that thrive in small spaces, containers that match the vision, and a theme that sparks creativity. Fairy gardens, terrariums, or bonsai-inspired setups all work beautifully, but the magic lies in the details.
A single 4-inch pot can become a miniature forest with pebbles, miniature trees, and a tiny bridge. For tropical vibes, opt for ferns and moss; for desert charm, use succulents and sand. The possibilities are endless, and the maintenance is surprisingly simple once you get the hang of it.
You’ll end up with a self-contained ecosystem that’s easier to maintain than a full-sized garden. Lighting, watering, and occasional pruning keep it thriving year-round, and the satisfaction of nurturing something so small but so impactful is unmatched.
Plus, it’s a conversation starter—everyone who sees it wants to know how it’s done. Perfect for apartments, offices, or even kids’ rooms. Let’s dive into how to bring this tiny world to life!
📚 In This Guide
- What you need
- Instructions
- Tips and common mistakes
- Wrapping up and next steps
What you need
- ● Container: A shallow tray, glass terrarium, or decorative pot (6"–12" wide, with drainage holes if planting soil).
- ● Soil: 1–2 cups of well-draining potting mix (cactus/succulent mix for drought-tolerant plants).
- ● Plants: 3–5 small, low-maintenance plants (e.g., Fittonia, Peperomia, or Moss).
- ● Gravel/Decor: ½ cup of small pebbles or activated charcoal (for drainage and aesthetics).
- ● Watering Can/Spritz Bottle: A fine-mist sprayer (to avoid overwatering).
- ● Scissors: Small pruners or sharp scissors (for trimming plants).
- ● Miniature figurines, rocks, or driftwood (for a whimsical touch).
- ● LED grow lights (if natural light is limited).
- ● Humidity tray (for tropical plants).
- ● Fertilizer (balanced liquid fertilizer, diluted to half-strength).
Step-by-step instructions for creating your indoor miniature garden
Here's how to craft a delicate, self-contained world that stays lush indoors all year.
🪴 Step 1: Select and Prepare Your Containers
Choose shallow containers with drainage—think ceramic bowls, glass terrariums, or repurposed trays with holes drilled in the bottom. I prefer 6-8 inch diameter options for four distinct plants. Clean them thoroughly with mild soap and water to remove any residue that could inhibit root growth. For glass containers, add a ½ inch layer of small pebbles first to create drainage space and prevent root rot.
If using a single large container, divide it into sections with decorative rocks or small partitions. This keeps each plant's root system contained while allowing you to create distinct zones. The key here is balance—your miniature garden should look intentional, not crowded. I like to use containers that match the aesthetic I'm going for, whether it's rustic wood slices or sleek modern glass.
🌱 Step 2: Layer Soil and Choose Miniature Plants
Fill each section with well-draining cactus and succulent mix (or regular potting soil amended with perlite for moisture control). Press it down gently—you want firm enough to support tiny plants but loose enough for roots to penetrate. For four plants, use about 2 cups of mix per section. I always add a slow-release fertilizer pellet to each planting hole to give my miniatures a nutrient boost without overfeeding.
Select plants that naturally stay small: fittonia, polka dot plants, miniature ferns, or tiny calatheas. These thrive in confined spaces and create that whimsical, fairy-tale effect. Space them 2-3 inches apart—close enough to look lush but not so crowded they compete for resources. Remember, these plants will never outgrow their containers, so choose varieties that stay compact even when mature.
☀️ Step 3: Position for Ideal Light and Humidity
Place your miniature garden in bright, indirect light—think east or north-facing windows where light is gentle but abundant. Avoid harsh midday sun, which can scorch delicate leaves. If natural light is limited, supplement with a grow light placed 6-12 inches above for 12-14 hours daily. You'll notice leaves darkening or stretching toward light if they're not getting enough—this is your cue to adjust.
For humidity-loving plants, create a mini greenhouse effect by placing the container on a tray of pebbles with water. As the water evaporates, it creates a humid microclimate. Mist the plants 2-3 times weekly with room-temperature water, focusing on the leaves rather than the soil. The goal is to keep the air around them consistently moist without making the soil soggy—this is where many beginners go wrong and cause root rot.
💧 Step 4: Water and Maintain With Precision
Water from the bottom by placing the container in a tray of ½ inch of water for 10-15 minutes. This ensures even moisture without disturbing the plants. Let excess water drain completely before returning to its spot. Check soil moisture by sticking your finger ½ inch deep—if it feels dry, it's time to water again. Overwatering is the #1 killer of miniature gardens, so I err on the side of underwatering, especially in winter when plants need less.
Feed your plants every 4-6 weeks with a ½-strength liquid fertilizer diluted to half the recommended strength. This gentle feeding prevents salt buildup in the soil that can damage tiny root systems. I also rotate my garden ¼ turn weekly so all sides get equal light exposure. This prevents plants from leaning toward the window and keeps their growth even and symmetrical.
✂️ Step 5: Prune and Refresh Seasonally
Trim leggy growth or yellowing leaves with clean scissors to encourage bushier growth. For fittonia or other trailing plants, gently tuck stems back into the soil to root them in place—this creates that lush, overgrown look. Do this every 2-3 months to maintain shape. I also remove any dead leaves immediately to prevent mold and keep the garden looking fresh.
Every 3-4 months, refresh the top ½ inch of soil with fresh mix. This replenishes nutrients and prevents compaction. It's also a good time to check for pests—tiny whiteflies or spider mites love miniature gardens. If you spot any, isolate the plant and treat with neem oil spray applied in the evening when bees aren't active. Prevention is key: I always inspect new plants before adding them to my garden.
Tips & tricks for perfect indoor miniature garden
Creating a thriving miniature garden takes more than just placing plants in a container—it's about crafting a delicate ecosystem. Here's what I've learned to keep my tiny gardens lush and vibrant.
Container Selection Wisdom: When choosing containers, prioritize those with drainage holes—this is non-negotiable for preventing root rot. I've found that ceramic containers with a slightly ribbed texture provide better grip for delicate plants when rotating for even light exposure. For glass terrariums, that ½-inch layer of pebbles isn't just decorative—it's essential for creating proper drainage space. I like to test drainage by filling the container with water and timing how quickly it drains completely; anything slower than 2 minutes concerns me.
Soil Preparation Technique: The 2 cups of well-draining mix per section is perfect, but here's my secret: I always pre-moisten the soil slightly before adding plants. This helps settle the mix and prevents air pockets that can suffocate roots. For the soil mix, I recommend using a blend that's 60% cactus/succulent mix and 40% perlite—this ratio gives you the perfect balance of moisture retention and aeration. When pressing the soil down, aim for firmness similar to a well-packed snowball; it should hold its shape but still be soft enough to penetrate with your finger.
Light Positioning Strategy: That 12-14 hours of grow light is crucial, but placement matters just as much. I position my grow light at the 8-inch mark for delicate plants like fittonia, and move it back to 12 inches for hardier varieties like miniature ferns. The key is to observe your plants' response—if you notice leaves darkening or stretching toward the light (a condition called etiolation), you're either not getting enough light or the distance is too great. I also rotate my grow light position weekly to ensure even light distribution across all plants in the garden.
Watering Precision: The 10-15 minute bottom-watering technique is brilliant, but timing is everything. I've found that 12 minutes is the sweet spot for most miniature gardens—long enough to thoroughly hydrate the soil without creating waterlogged conditions. After removing from the water tray, I always tip the container slightly to one side and let it sit for 5 minutes to ensure any excess water can drain completely. This prevents those pesky root rot issues that plague so many indoor gardens.
Pro Tips for Indoor Miniature Garden
- Creating a thriving miniature garden takes more than just placing plants in a container—it's about crafting a delicat...
- Container Selection Wisdom: When choosing containers, prioritize those with drainage holes—this is non-negotiable for...
- Soil Preparation Technique: The 2 cups of well-draining mix per section is perfect, but here's my secret: I always pr...
Frequently asked questions
Got questions about creating your own indoor miniature garden? You’re not alone! Here are some of the most common queries—plus quick, practical answers to help you grow with confidence.
What’s the best lighting for an indoor miniature garden?
Use a grow light (LED or fluorescent) for 12–16 hours daily, or place your garden near a south-facing window for natural light. Avoid direct sunlight, which can scorch delicate plants. For low-light setups, opt for shade-tolerant species like ferns or moss.
How long does it take to see growth in a miniature garden?
Most miniature plants (like succulents or air plants) show signs of growth in 2–4 weeks, while slower growers (e.g., bonsai trees) may take months. Patience is key—focus on consistent care (water, light, humidity) for best results!
How often should I water my indoor miniature garden?
Water when the top inch of soil feels dry—typically every 5–7 days, but adjust based on plant type and humidity. Overwatering is the #1 killer! Use a spray bottle for delicate plants or a small watering can for deeper roots. Less is more!
Can I use regular potting soil for a miniature garden?
Nope! Regular soil is too dense. Use a lightweight mix like cactus/succulent soil (for drought-tolerant plants) or a peat-based blend for moisture-loving varieties. Add perlite or sand for drainage—your tiny garden’s roots will thank you!
What do I do if pests appear in my miniature garden?
Start with neem oil or insecticidal soap for mild infestations. Isolate affected plants and check soil moisture (pests love overwatered conditions). For stubborn bugs, try yellow sticky traps or introduce beneficial insects like ladybugs. Act fast—tiny gardens are prime pest real estate!
How can I make my miniature garden look more “finished”?
Add miniature decor like pebbles, moss, or tiny figurines for texture. Play with height variation (use stacked trays or shelves) and trim overgrown plants regularly. A small water feature (like a tiny fountain) or LED fairy lights can elevate the vibe too!
Wrapping up and next steps
Creating an indoor miniature garden is more than just a hobby—it’s a way to bring nature’s tranquility into your home, no matter the season. With the right materials, a little creativity, and consistent care, you’ll cultivate a thriving, tiny green sanctuary that elevates your space and your spirit. 🌿
Ready to dive in? Start small—pick a container, gather your greens, and let your imagination grow! Whether you’re a beginner or a seasoned plant parent, every tiny leaf is a step toward a more vibrant, peaceful living space. What’s your first plant going to be?