
Plants
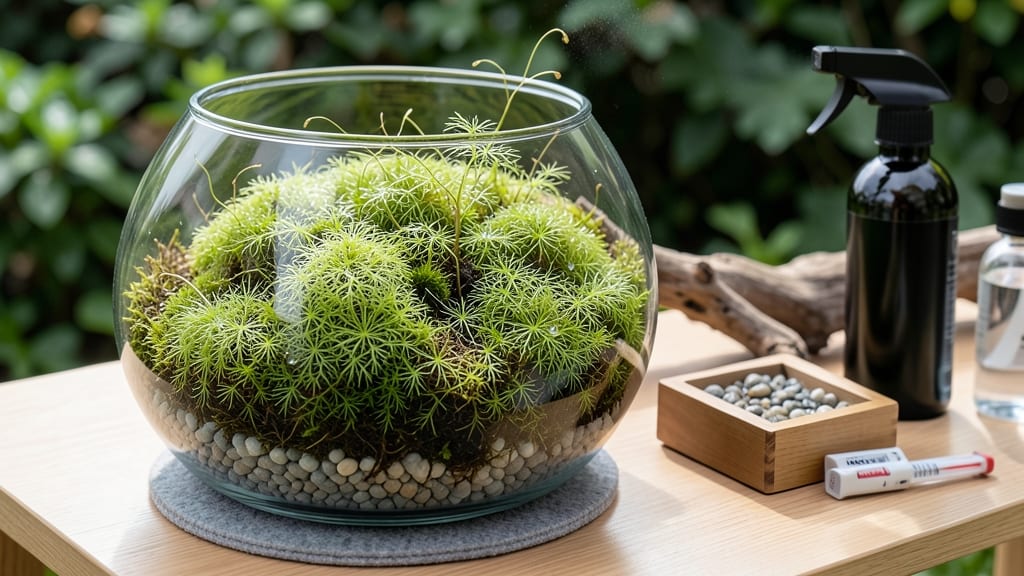
Creating a lush indoor moss garden by growing moss indoors feels like bringing a tiny forest inside your home—soft, green, and full of life. 🌿 I’ve turned my living room into a mini ecosystem with moss that thrives year-round, and you can too, even if your space is small or your light is dim.
The secret isn’t complicated: moss loves moisture, shade, and a little patience. You’ll need just a few supplies—a spray bottle, a shallow container, and the right moss type—and within weeks, you’ll see that velvety green take over. No fancy tools or expensive setups required.
By the end, you’ll have a self-sustaining green wall that purifies the air, adds texture, and stays vibrant with minimal effort. The best part? It’s impossible to overwater (a first for me!), so even beginners can nail this.
Whether you’re framing it in a terrarium or mounting it on a wall, moss adapts to almost any indoor space. Let’s get your green sanctuary started!
📚 In This Guide
- What you need
- Instructions
- Tips and common mistakes
- Wrapping up and next steps
What you need
- ● Moss: 1–2 cups of live moss (e.g., Sheet Moss (Hypnum), Cushion Moss (Leucobryum), or Meadow Moss (Bryum)). Buy from a nursery or forage ethically (avoid pesticides!).
- ● Growing Medium: 1 part peat moss or coco coir (holds moisture well)
- ● 1 part perlite or pumice (for drainage, ¼–½ cup)
- ● Container: A shallow tray, terrarium, or geotextile fabric (for vertical gardens). Size depends on your moss volume—aim for at least 2–3 inches deep.
- ● Watering Tools: Spray bottle (16 oz, with a fine mist nozzle)
- ○ Watering can with a rosehead (optional, for larger setups)
- ● Lighting: Indirect light source (e.g., grow lights on a timer for 12–14 hours/day or a north-facing window).
- ○ Optional Extras for Flourish: Decorative stones or pumice (for aesthetics + drainage)
- ● Small fan (to prevent mold, 5–10 mins/day)
- ● Humidity tray (pebbles + water under the container)
- ● Patience: Moss grows slowly—expect visible growth in 4–8 weeks!
- ● Consistency: Keep the medium damp (not soggy). Test by squeezing a handful—water should drip, not pool.
- ● Clean Workspace: Disinfect containers with rubbing alcohol (70% or higher) to prevent mold.
- ● Temperature Control: Ideal range: 50–75°F (10–24°C). Avoid drafts or heaters.
Step-by-Step instructions for creating indoor moss walls
Here's how to transform any space with easy-to-follow moss growing techniques.
🌱 Step 1: Select and Prepare Your Moss
Start with sheet moss (like Hypnum or Thuidium), which grows well indoors and forms dense mats. Collect it from a clean, shaded forest floor—avoid moss growing near roads or polluted areas. Rinse it thoroughly under lukewarm water to remove debris, then soak for 10-15 minutes to soften and hydrate the strands.
Drain the moss in a colander and gently squeeze out excess water without compacting it. The goal is damp, not dripping—think of a wrung-out sponge. Spread the moss on a clean towel to air-dry slightly until it feels slightly springy but not stiff. This prep ensures your moss will stick to surfaces and establish roots quickly.
🪴 Step 2: Choose and Prepare Your Growing Surface
Moss thrives on non-toxic, breathable surfaces like cork panels, untreated wood, or even a deep foam board. Cut your base to size—most indoor moss walls use 12x12-inch panels for manageable sections. For extra adhesion, lightly rough up the surface with sandpaper or apply a thin layer of moss glue (a mix of water and unflavored gelatin).
Place your prepared moss directly onto the surface, pressing it into place with your fingers. Work in small sections to avoid shifting. For a seamless look, overlap edges slightly and trim excess with sharp scissors. Once fully adhered, mist the moss with water until it feels uniformly damp—you’ll see it curl slightly as it rehydrates. This is your signal it’s ready for the next step.
☀️ Step 3: Create the Ideal Growing Environment
Place your moss wall in indirect, bright light—think east or north-facing windows or under a grow light set to 12-14 hours daily. Direct sunlight will dry it out too quickly, while dim light slows growth. Keep humidity high by misting the moss 2-3 times daily or placing a tray of water nearby. Aim for 50-70% humidity—you’ll know it’s right when the moss stays consistently green and doesn’t crisp at the edges.
Moss loves cool temperatures, ideally between 50-65°F. If your home runs warmer, place a small fan nearby to create gentle airflow—this mimics forest-floor conditions. Avoid drafts, though, as sudden temperature swings stress moss. Within 2-4 weeks, you’ll see new growth at the edges, signaling your moss is happy and thriving.
💧 Step 4: Maintain and Expand Your Moss Wall
Once established, mist your moss daily in dry climates or every other day in humid conditions. Test moisture by pressing a finger into the moss—it should feel damp but not soggy. Trim any brown or crispy edges with scissors to encourage fresh growth. If your moss starts to thin, gently press in new moss patches along the edges or in bare spots.
To expand your wall, repeat the process with additional panels. Moss spreads naturally, so you can even connect sections by overlapping edges and securing them with a bit of moss glue. With consistent care, your indoor moss wall will grow denser and greener, creating a living, low-maintenance centerpiece that purifies air and adds serenity to any space.
Tips & tricks for perfect indoor moss walls
Here's what nobody tells you about keeping your moss thriving once you've got it growing.
The Hydration Test: After your 10-15 minute soak in Step 1, test the moss's readiness by gently squeezing a small handful. It should hold its shape when released but still feel damp to the touch. If it crumbles, soak another 2-3 minutes. Over-soaking can wash away nutrients, while under-soaking means poor adhesion to your surface. Think "wrung-out washcloth" texture—not dripping, not bone-dry.
Surface Prep Secret: For Step 2, if you're using smooth surfaces like foam board, create tiny grooves with a fork or sandpaper before applying moss glue. These micro-textures give the moss tiny roots something to grip onto, preventing slippage. I learned this the hard way when my first attempt slid right off the wall after a week! Also, avoid plastic surfaces—moss can't breathe through them and will die within days.
Lighting Hacks: When setting up your grow light in Step 3, position it 12-18 inches above the moss and use a timer to maintain those 12-14 hours daily. If you notice brown patches after a few weeks, your light's too close—move it back. For natural light, rotate your moss wall quarter-turn weekly to ensure even growth. Moss grows toward light, so consistent positioning prevents lopsided growth patterns.
Humidity Troubleshooting: If your moss starts turning crispy at the edges despite daily misting, you're likely dealing with low humidity. Try placing a shallow tray filled with pebbles and water beneath your moss wall (not touching the moss). The evaporation creates a natural humid microclimate. For extra insurance, group plants together—they all release moisture through transpiration, boosting local humidity levels naturally.
Pro Tips for Growing Moss Indoors
- Here's what nobody tells you about keeping your moss thriving once you've got it growing.
- The Hydration Test: After your 10-15 minute soak in Step 1, test the moss's readiness by gently squeezing a small han...
- Surface Prep Secret: For Step 2, if you're using smooth surfaces like foam board, create tiny grooves with a fork or ...
Frequently asked questions
What’s the fastest way to grow moss indoors?
For quick results, use Sheet Moss or Cushion Moss—they grow faster than others. Keep conditions ideal (high humidity, indirect light, and consistent moisture) to see noticeable growth in 2–4 weeks. Avoid overwatering, though, or you’ll risk mold instead of moss!
How long does it take for moss to establish indoors?
Moss is patient! Expect 4–8 weeks for initial rooting, with full coverage taking 3–6 months depending on species and care. Peat Moss (used as a base) may take longer to break down and support growth—be consistent with misting and patience pays off!
Can I use tap water to grow moss?
Tap water can work, but rainwater or distilled water is best—moss is sensitive to chlorine and minerals. If you must use tap water, let it sit out for 24 hours to evaporate chemicals. Avoid hard water (high in calcium/magnesium), which can stunt growth over time.
What’s a good alternative if moss won’t grow in my home?
Try ferns (like Boston ferns) or air plants (tillandsias) for similar humidity-loving vibes. If moss fails, check your space: low light? Move to a brighter (but indirect) spot. Too dry? Upgrade to a humidifier or pebble tray.
Why is my moss turning brown or dying?
Brown moss is usually a sign of overwatering, low humidity, or direct sunlight. Trim the dead parts and adjust care: mist 2–3 times daily, move to shade, and ensure airflow. If mold appears (fuzzy spots), increase ventilation and reduce watering. Moss is resilient—give it time to recover!
Can I reuse moss from outdoors?
Yes! Wild-harvested moss is perfect for indoor growth. Just clean it thoroughly (rinse to remove debris) and avoid pesticides/herbicides. Pro tip: Collect from shady, moist areas (like forest floors) for hardier varieties. Sterilize your container first to prevent pests!
Wrapping up and next steps
Growing moss indoors is a rewarding way to bring nature’s tranquility into your space—no green thumb required! 🌿 With the right setup, patience, and a little care, you’ll soon enjoy a thriving, low-maintenance green wall that purifies the air and soothes the soul.
Start small, experiment with placement, and watch your moss flourish into a stunning centerpiece.
Ready to take the next step? Pick your favorite moss type, gather your supplies, and dive in! Whether you’re a beginner or a plant enthusiast, your indoor jungle awaits—happy growing! 🌱