
Container Gardens
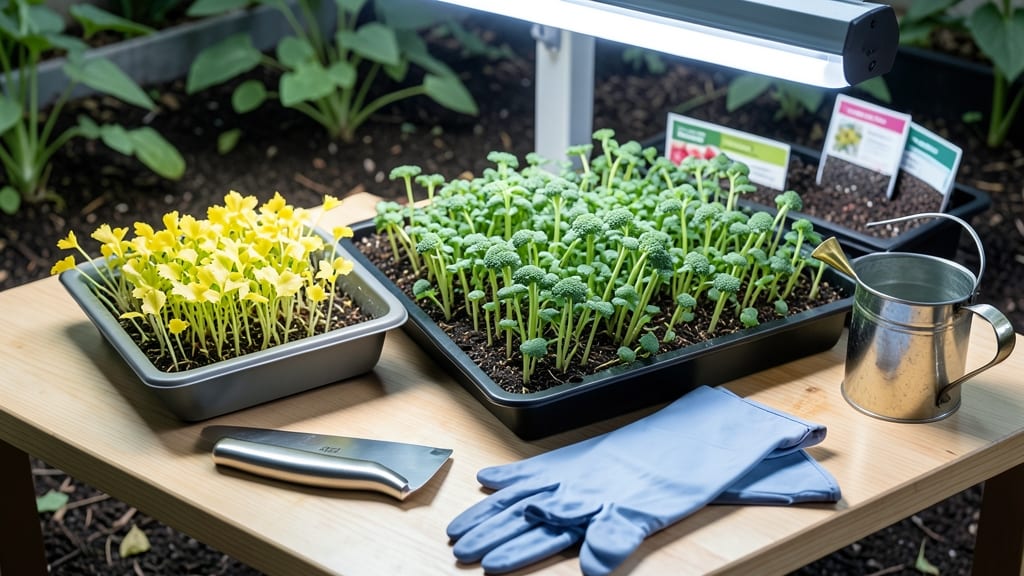
Growing microgreens indoors can produce nutrient-packed greens in just 10 days—no yard needed. 🌱 I’ve grown microgreens on my kitchen counter for years, and the secret is simple: the right seeds, a shallow tray, and consistent moisture. These tiny greens pack a flavor punch and grow faster than almost any other plant, making them perfect for small spaces or busy schedules.
The beauty of microgreens is their simplicity—you don’t need fancy equipment, just a shallow tray, some growing medium (like soil or a damp paper towel), and seeds. Most varieties sprout in 3-7 days and are ready to harvest in 10-14 days, giving you fresh, vibrant greens without the wait.
They thrive in indirect light or under a basic grow light, so even apartments with limited sunlight can succeed.
By the time you’re ready to harvest, you’ll have bright, flavorful greens that add color and nutrition to any meal. They’re packed with vitamins, minerals, and antioxidants, and their fast growth means you can keep a steady supply going year-round.
Plus, they’re fun to grow—kids and adults alike love watching them sprout and grow in just a few days.
Whether you’re a beginner or a seasoned gardener, microgreens are a foolproof way to add fresh greens to your diet without the space or time commitment of a full garden. Let’s get those seeds sprouting!
📚 In This Guide
- What you need
- Instructions
- Tips and common mistakes
- Wrapping up and next steps
What you need
- ● Seeds: Choose fast-growing varieties like broccoli, radish, sunflower, or pea shoots. Buy organic, non-GMO seeds labeled for sprouting/microgreens (e.g., blank">True Leaf Market or local seed shops). Quantity: 1–2 tbsp per 10"x20" tray.
- ○ Growing Tray: A shallow, rigid container with drainage holes (e.g., 10"x20" plastic or wooden trays). Optional: Stackable trays for vertical space.
- ● Growing Medium: Organic potting soil (seed-starting mix) or coco coir (sterilized coconut fiber). Avoid garden soil—it may harbor pathogens. Depth: 1–2" layer.
- ○ Spray Bottle: For gentle watering (avoid over-saturation). Optional: A fine-mist setting helps prevent mold.
- ● Light Source: Natural light: A sunny windowsill (south-facing ideal) with 6+ hours of direct light daily.
- ○ Grow lights (optional but recommended): LED or fluorescent (e.g., blank">Spectrum 24" T5) for 12–16 hours/day, 6" above trays.
- ● Cover: A black plastic sheet or damp paper towel to keep seeds moist during germination.
- ● Scissors or Knife: For harvesting (sharp, clean tools only!).
- ● Humidity Dome: A clear plastic lid or DIY cover (e.g., sealed container) to retain moisture during germination.
- ● Thermometer/Hygrometer: Monitor ideal temps (60–75°F) and humidity (40–70%).
- ● Fertilizer: Diluted fish emulsion or seaweed extract (1 tsp/gallon) for a nutrient boost after 3–4 days.
- ● Tweezers: For easy seed placement (great for precision!).
- ● Food Scale: Weigh harvests for consistency (microgreens are 40x more nutritious than mature greens!).
Step-by-step instructions for growing microgreens indoors
Here's how to grow vibrant microgreens in just 10 days using your brightest window.
🌱 Step 1: Prepare Your Trays and Growing Medium
Line your 4-inch deep trays with dampened paper towels or germination mats—I prefer the latter because they hold moisture better. Soak them in warm water for 10 minutes until thoroughly damp but not dripping. Drain excess water completely to prevent mold.
Spread the towels or mats evenly across the tray bottom, smoothing out any wrinkles. The goal is a flat, even surface so seeds distribute properly. If using paper towels, layer 2-3 sheets for better moisture retention. Leave the tray uncovered for now—you'll add seeds next.
🌱 Step 2: Sow Seeds Evenly for Optimal Growth
Scatter 1 tablespoon of seeds evenly across the tray surface. I like to tap the seed packet gently over the tray while moving it in small circles—this prevents clumping and ensures even coverage. For 4-inch trays, aim for 20-25 seeds per square inch; too few means sparse growth, too many leads to competition.
Lightly press the seeds into the damp medium with your fingers until they make contact with the surface. Don't bury them—microgreens need light to germinate, and covering them would delay sprouting. Once seeded, mist the surface with lukewarm water until the medium looks uniformly damp but not saturated.
💧 Step 3: Provide Warmth and Moisture for Germination
Cover the tray with a clear plastic dome or wrap tightly with plastic wrap to create a humid environment. Place it in a location with room temperature (70-75°F)—a sunny windowsill works perfectly. Germination typically begins in 24-48 hours, but some varieties like sunflower take slightly longer.
Check daily for condensation on the cover—this means your humidity is ideal. If the medium looks dry, mist lightly again, but avoid overwatering. The first true leaves (cotyledons) will appear in 3-5 days. Once they emerge, remove the cover immediately to prevent mold and encourage sturdy growth.
☀️ Step 4: Position for Maximum Light Exposure
Move the tray to the brightest window in your home, ideally a south-facing one. Microgreens need 12-16 hours of light daily—if natural light is insufficient, supplement with a grow light placed 6 inches above the tray. You'll know they're getting enough light when the stems are thick and upright, not stretched or leggy.
Rotate the tray a quarter turn daily to ensure even growth. Watch for first true leaves (the second set of leaves after the initial cotyledons)—this signals they're ready for 1-2 inches of height. At this stage, they're vulnerable to drying out, so mist the medium lightly every 1-2 days.
✂️ Step 5: Harvest at Peak Freshness
Harvest when microgreens reach 1-3 inches tall, typically 7-10 days after sowing. Use clean, sharp scissors to cut just above the soil line—this leaves the roots intact for a second harvest if you're using a fast-growing variety like radish or broccoli.
Rinse the tray immediately after harvest to remove any debris, then let it dry completely before reusing. Store harvested microgreens in a sealed container in the fridge for up to 5 days. For best flavor, use them within 3 days—they're at their peak freshness right after cutting.
Tips & tricks for perfect indoor microgreen growth
These little-known details make all the difference between wimpy sprouts and vibrant harvests.
Medium Selection: Germination mats outperform paper towels because they maintain consistent moisture without sogging. If using paper towels, opt for unbleached varieties—they're less likely to leach chemicals that could inhibit growth. I've found that layering 2 sheets creates the ideal balance between moisture retention and airflow. The 10-minute soak is crucial: any longer risks mold, while shorter soaks leave seeds too dry to germinate.
Seed Spacing Secret: The 20-25 seeds per square inch guideline prevents overcrowding, but here's the pro move: use a fine-mesh sieve to distribute seeds evenly. Tap the sieve gently over the tray while shaking it in small circles—this creates a more uniform spread than hand-scattering. For varieties like sunflower, which grow faster, you can reduce density slightly to 18-20 seeds per square inch to prevent competition.
Light Optimization: South-facing windows provide the most consistent light, but if yours isn't ideal, supplement with a grow light on a 12-hour timer. Place it 6 inches above the tray and adjust height as plants grow—closer light prevents legginess, while distance prevents burning. Rotate trays daily to ensure even exposure, especially if using natural light. You'll notice stems grow thick and upright when light is sufficient.
Harvest Timing: The 1-3 inch height range is ideal, but harvest radish or broccoli microgreens at 1-2 inches for maximum tenderness. Use clean, sharp scissors to avoid crushing stems, and always cut just above the soil line. For second harvests, wait until new sprouts reach 1 inch—they'll be smaller but still flavorful. Store in sealed containers with a paper towel to absorb excess moisture and extend freshness.
Pro Tips for Growing Microgreens Indoors
- These little-known details make all the difference between wimpy sprouts and vibrant harvests.
- Medium Selection: Germination mats outperform paper towels because they maintain consistent moisture without sogging....
- Seed Spacing Secret: The 20-25 seeds per square inch guideline prevents overcrowding, but here's the pro move: use a ...
Frequently asked questions
How much light do microgreens really need indoors?
Microgreens thrive with 6–8 hours of bright, indirect light daily—a south-facing window or a grow light works best. Avoid direct sunlight (which can scorch tender leaves) or dim corners (leading to leggy, weak sprouts). If natural light is lacking, supplement with a LED grow bulb (12–16 watts per square foot) for consistent growth.
Can I harvest microgreens in less than 10 days?
While most microgreens are ready in 7–14 days, some varieties (like radish or broccoli) can be harvested as early as 5–7 days for baby greens. Check seed packets for specific timelines—harvest when the first true leaves appear (usually 1–2 inches tall). Rushing may yield smaller, less flavorful sprouts, so patience pays off!
Why are my microgreens turning yellow or moldy?
Yellowing or mold (fuzzy gray/green spots) usually signals overwatering or poor airflow. Let the soil stay consistently moist (not soggy) and avoid misting—water gently at the base. Improve airflow by spacing trays apart or using a small fan (2–3 hours daily). Discard moldy batches immediately to prevent spread.
What’s the best way to store harvested microgreens?
Store microgreens in an airtight container with a paper towel to absorb moisture, and refrigerate for 5–7 days. For longer shelf life, rinse, dry thoroughly, and store in a sealed bag with minimal air. Pro tip: Use them within 3 days for peak freshness and nutrients!
Are there easy microgreen varieties for beginners?
Start with fast-growing, forgiving varieties like:
- Radish (spicy, ready in 5–7 days)
- Broccoli (mild, nutrient-packed)
- Pea shoots (sweet, resilient)
- Sunflower (crunchy, great for salads)
Wrapping up and next steps
Growing microgreens indoors is a rewarding, fast, and nutrient-packed adventure that anyone can master—even with just a sunlit windowsill! 🌱 With the right setup, you’ll harvest vibrant greens in just 10 days, adding fresh flavor and nutrition to your meals without breaking the bank.
Whether you’re a beginner or a seasoned gardener, this method proves that homegrown goodness is always within reach.
Ready to take the next step? Start small—pick one variety (like radish or pea shoots) and experiment with flavors. Once you’ve got the hang of it, expand your indoor garden with trays, LED grow lights, or even a vertical setup. Your kitchen (and taste buds) will thank you!