
Container Gardens
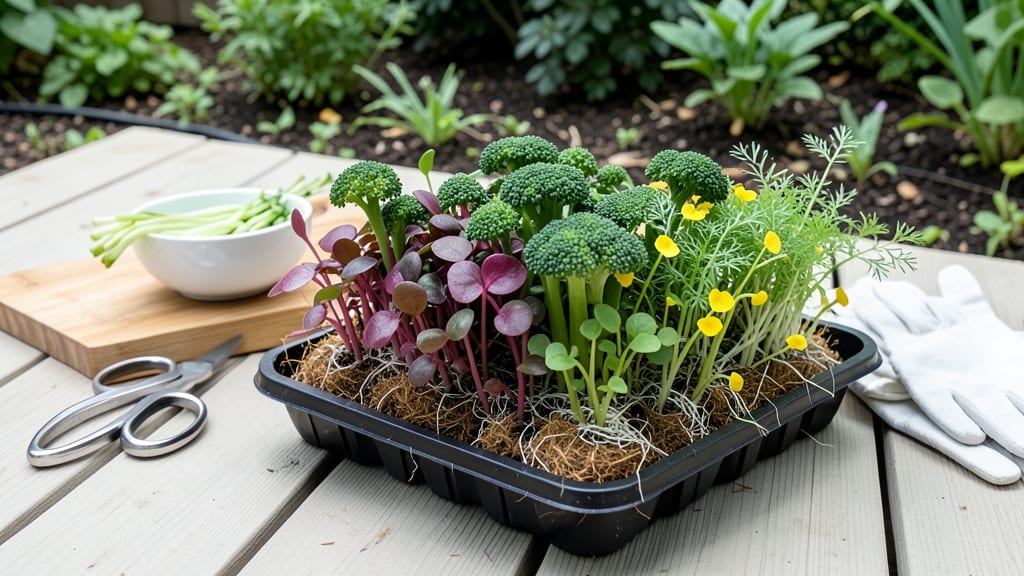
Growing micro herbs indoors gives you fresh, flavorful greens in just 3 weeks—no garden, no soil, and no excuses. 🌱 I first tried this after burning out a windowsill full of basil, and now I have crisp microgreens for salads and garnishes year-round without the mess.
The secret is simplicity: a shallow tray, a bit of water or a hydroponic mat, and bright light. You’ll skip the soil, the weeds, and the waiting—just place your tray under a grow light or sunny window, keep it damp, and watch those tiny leaves emerge in days.
No fancy equipment needed, just a few basic supplies. By week 3, you’ll harvest enough for a week’s worth of meals, and the process is so clean, you can even set it up on a kitchen counter.
The flavor is more intense than full-sized herbs, and the texture stays tender and crisp. Works for basil, cilantro, parsley, and more—perfect for small spaces, busy schedules, or anyone tired of wilted store-bought herbs. Let’s get those trays growing!
📚 In This Guide
- What you need
- Instructions
- Tips and common mistakes
- Wrapping up and next steps
What you need
- ● Growing Trays or Containers: 1-2 shallow trays (5"–8" deep) with drainage holes (or reusable seedling trays)
- ● Alternative: Clean, food-safe containers (e.g., egg cartons, plastic clamshells, or repurposed takeout boxes)
- ● Growing Medium: 1–2 cups of soil-free growing medium (e.g., coconut coir, hemp mats, or hydroponic clay pebbles)
- ● Pro tip: Sterilize with a light spray of hydrogen peroxide (3%) to prevent mold. 💡
- ● Micro Herb Seeds: 1–2 packets of high-quality microgreen/micro herb seeds (e.g., cilantro, basil, parsley, or radish sprouts)
- ● Quantity: ~1–2 tbsp per tray (follow seed packet instructions)
- ● Misting Bottle or Spray Nozzle: For gentle, even watering (avoid over-saturating!)
- ● Light Source: Grow Lights: 1–2 LED grow bulbs (full-spectrum, 6400K) or a sunlight window (6+ hours/day)
- ○ Optional: A small grow tent for controlled conditions
- ● Scissors or Knife: For harvesting (sharp, clean pair to avoid crushing stems)
- ● pH Test Kit – Ensures your growing medium is neutral (6.0–7.0)
- ● Humidity Dome – Speeds up germination (place a clear plastic bag over the tray for the first 2–3 days)
- ● Fertilizer (Diluted) – A seaweed or fish emulsion (1 tsp per gallon of water) for a nutrient boost
- ● Labeling Tags – Mark trays with herb names and planting dates
How to grow micro herbs indoors in 3 weeks
Skip the soil and grow fluffy, flavorful microgreens with this fast, space-saving method.
🌱 Step 1: Soak and Prepare Your Seeds
Start by soaking 1 tablespoon of seeds (like cilantro, radish, or sunflower) in a bowl of lukewarm water for 8-12 hours. This softens the outer shell so they sprout faster. I like to use a fine-mesh strainer to drain excess water—just shake off the moisture until the seeds feel damp but not dripping.
While they soak, lay out a clean paper towel on a flat surface. Spread the seeds evenly in a single layer, about ½ inch apart. Fold the towel over them like a sandwich—this keeps them moist without drowning. Place the folded towel in a sealed plastic bag to trap humidity. Check after 12 hours; you’ll see tiny white sprouts peeking out.
💧 Step 2: Transfer to Growing Tray and Mist Daily
Once sprouts appear, unfold the towel and gently transfer them to a 10x20-inch growing tray lined with a fresh paper towel. Space them evenly, about 1 inch apart, so they have room to expand. Mist the tray lightly with water until the paper towel feels damp but not soggy—you want the seeds to stay hydrated without sitting in puddles.
Place the tray in a warm spot, ideally between 65-75°F. A sunny windowsill works, but if your home runs cooler, prop the tray on a heating pad set to low. You’ll see first true leaves (not the initial sprouts) in 3-5 days. This is your cue to flip the tray daily—it ensures even light exposure and prevents leaning.
☀️ Step 3: Provide Bright Light for Fluffy Growth
After the first leaves emerge, move the tray to the brightest spot in your home. South-facing windows are ideal, but if natural light is weak, supplement with a grow light placed 6 inches above the tray. Keep it on for 12-14 hours daily—micro herbs need plenty of light to stay compact and vibrant.
Mist the tray every 24 hours to maintain moisture. Avoid overwatering—you’ll know it’s right when the paper towel feels damp but not wet. In 10-14 days, the herbs will reach 1-2 inches tall with lush, tender leaves. This is peak harvest time for most varieties.
✂️ Step 4: Harvest and Store for Maximum Freshness
Use clean scissors to snip the herbs just above the soil line. For cilantro or radish, harvest when leaves are 1-2 inches tall—this keeps them tender. Rinse gently under cool water, then pat dry with a paper towel. Store in an airtight container lined with a damp paper towel in the fridge for up to 5 days.
Real talk: If you see yellowing leaves or leggy stems, your light isn’t strong enough. Move the tray closer to the window or grow light immediately. With this method, you’ll get 4 full trays ready in just 3 weeks—no soil, no mess, just fresh flavor.
Tips & tricks for perfect micro herb growth
Took me a while to figure these out, so here goes—your secret weapon for lush, flavorful micro herbs without the soil.
Soaking Precision: The 8-12 hour soak is non-negotiable for fast sprouting, but I learned the hard way that lukewarm water (around 75°F) works best—too hot and you risk damaging delicate seeds. After draining, give them a quick shake in the strainer to remove excess water; seeds should feel damp like a wrung-out sponge, not dripping. This prevents mold while keeping them hydrated during the 12-hour towel phase.
Light Strategy: That 12-14 hours of daily light in Step 3 is critical for preventing leggy growth. If your herbs start stretching toward the light, they're starving for photons! Move the tray closer to the window or grow light immediately—within 6 inches is ideal. For windowsill growers, rotate the tray 180 degrees daily so all sides get even exposure. Uneven light causes one-sided growth that ruins the aesthetic (and flavor).
Temperature Troubleshooting: The 65-75°F range in Step 2 is perfect, but if your home runs cooler, a heating pad on low is your best friend. Cold drafts from windows or AC vents can stall growth—keep trays away from these. For warm climates, place trays on a cooling rack over ice packs if temps exceed 80°F to prevent wilting. The goal is consistent warmth without overheating.
Harvest Timing: Those 1-2 inch leaves in Step 4 are your sweet spot for flavor and texture. Wait too long and herbs become bitter; harvest too early and you miss peak nutrition. For continuous harvests, stagger planting: start a new tray every 3-4 days so you always have fresh micro herbs on hand. Store harvested batches in sealed containers with a damp paper towel to maintain crispness for up to 5 days.
Pro Tips for Growing Micro Herbs Indoors
- Took me a while to figure these out, so here goes—your secret weapon for lush, flavorful micro herbs without the soil.
- Soaking Precision: The 8-12 hour soak is non-negotiable for fast sprouting, but I learned the hard way that lukewarm ...
- Light Strategy: That 12-14 hours of daily light in Step 3 is critical for preventing leggy growth. If your herbs star...
Frequently asked questions
about growing micro herbs indoors—because even the greenest thumbs need a little clarity! Here are answers to the most common queries to help you cultivate confidence (and crispy microgreens) with ease.How long does it take to grow micro herbs indoors?
Most micro herbs are ready to harvest in just 1–3 weeks! Fast-growing varieties like peppergrass or red amaranth sprout in 7–10 days, while leafy greens like baby arugula take 14–21 days. The key? Start with high-quality seeds and keep them moist in a warm, sunny spot.
Can I grow micro herbs indoors without sunlight?
Use a grow light (LED or fluorescent) 12–16 hours daily, positioned 2–4 inches above your tray. South-facing windows work too, but supplement with light if your space is dim. Pro tip: Rotate trays daily for even growth!
Why are my micro herbs turning yellow or moldy?
Yellowing? Likely overwatering or poor drainage—let the topsoil dry slightly between waterings. Mold (fuzzy spots)? Reduce humidity by spacing trays apart or adding a small fan. Always use sterilized soil or coco coir to prevent fungal issues.
What’s the best soil for micro herbs?
Skip heavy garden soil—opt for a lightweight, sterile mix like:
- Coco coir + perlite (50/50) for drainage
- Potting soil + vermiculite (70/30) for moisture retention
- Hydroponic clay pebbles for soil-free growth
How do I harvest micro herbs for cooking?
Snip with clean scissors just above the soil line when leaves are 1–3 inches tall (usually 1–2 weeks in). Rinse gently if needed, then pat dry. Store in a sealed container with a paper towel to absorb moisture—they’ll stay fresh for 5–7 days!
Wrapping up and next steps
Growing micro herbs indoors is a rewarding way to enjoy fresh, nutrient-packed greens in just 3 weeks—no soil or garden required! 🌱 Whether you're saving space, cutting costs, or craving homegrown flavor, this method proves that big harvests start small.
With the right setup and a little care, you’ll have vibrant herbs ready to elevate any dish.
Ready to take the next step? Start with one container—try cilantro, basil, or parsley—and watch your confidence (and harvest) grow! 🌟 Happy growing!