
Propagation
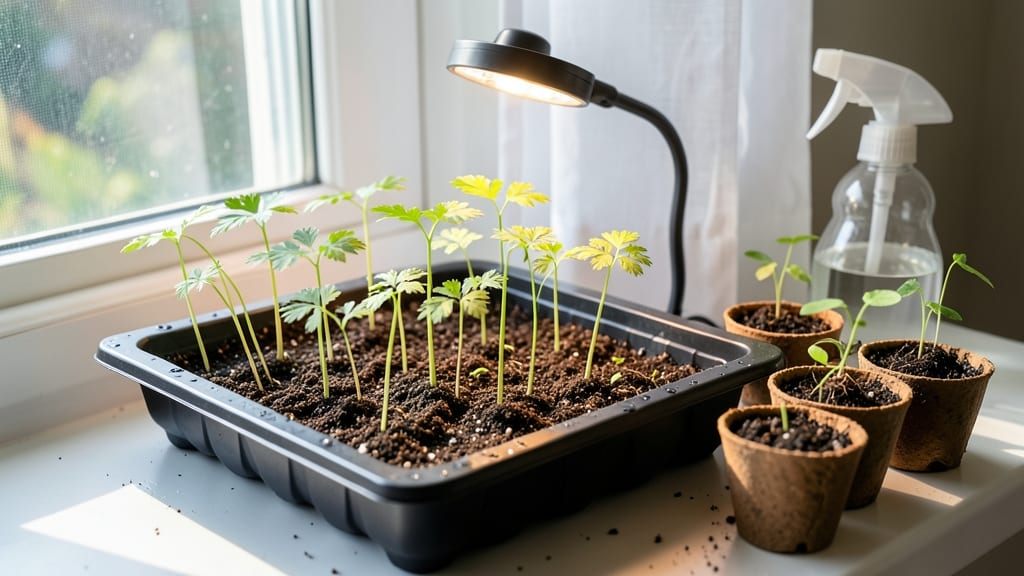
Growing asparagus from seed indoors lets you beat the 3-year wait for outdoor harvests by giving seedlings a head start. 🌱 I’ve tried this twice, and the second time—when I used a heat mat and grow lights—my seedlings emerged in just 2 weeks instead of the usual 6.
The key is patience and the right setup.
You’ll need a warm spot (70-75°F), bright light (14+ hours daily), and a deep container (at least 6 inches) with well-draining soil. Asparagus seeds are stubborn—don’t expect quick results.
Most gardeners give up here, but if you keep the soil consistently moist (not soggy) and avoid moving the tray, you’ll see those first pale shoots push through.
By the time you transplant outdoors in spring, your seedlings will be 6-8 inches tall and ready to establish faster than store-bought crowns. The real payoff? Your first harvest comes a full year earlier than if you’d planted seeds directly in cold soil.
Just be ready for the fern-like foliage—it’s normal and means they’re storing energy for future spears.
This method works best for zones 3-8, but even in warmer climates, the indoor start gives you an edge. The biggest challenge is keeping humidity high during germination—cover the tray with plastic wrap until sprouts appear. Once you’ve mastered this, you’ll never buy asparagus crowns again.
📚 In This Guide
- What you need
- Instructions
- Tips and common mistakes
- Wrapping up and next steps
What you need
- ● Asparagus seeds: 10–20 seeds (choose a variety like Mary Washington or Jersey Knight for reliability).
- ● Seed-starting trays: 1–2 (72-cell or 1020 trays work well).
- ● Seed-starting mix: 1–2 bags (sterilized, well-draining mix like Pro-Mix or coco coir).
- ● Grow lights: 1–2 full-spectrum LED lights (12–16 hours/day, 6–12 inches above seedlings).
- ○ Heat mat (optional but helpful): 1 (70–75°F range to speed germination).
- ● Misting bottle: 1 (to keep soil moist without drowning seeds).
- ● Plastic wrap or dome: 1 (to retain humidity during germination).
- ● Fertilizer: 1 bottle (balanced liquid fertilizer, 10-10-10 or 5-5-5, diluted to half-strength).
- ● Small pots or cell packs: 10–20 (3–4 inch pots for transplanting seedlings).
- ● Labels & markers: 1 set (to track planting dates and varieties).
- ● Humidity dome: 1 (for faster germination).
- ● pH test kit: 1 (ideal soil pH: 6.5–7.5).
- ● Osmocote or slow-release fertilizer: 1 bag (for long-term nutrient release).
- ● Growing journal: 1 (to log progress and adjustments).
- ● Support stakes or trellis: 1 (for vertical growth as seedlings mature).
Step-by-Step instructions for growing asparagus from seed indoors
Here's how to kickstart asparagus from seed indoors—patience is key, but the payoff is worth every month.
🌱 Step 1: Prepare the Seed Starting Mix and Containers
Asparagus seeds need a loose, sterile mix to germinate properly. Combine 2 parts peat moss with 1 part perlite in a clean container—this ensures excellent drainage while retaining enough moisture. Fill a shallow tray or seed-starting cells with this mix, leaving ½ inch of space at the top to avoid spillage.
Press the mix down lightly so it's firm but not compacted. Asparagus seeds are tiny, so I use a fine-mesh sieve to spread a thin layer of mix over the tray before sowing. This creates an even surface for planting. Moisten the mix with lukewarm water until it feels like a damp sponge—no puddles, just consistent moisture.
🌱 Step 2: Sow Seeds and Maintain Germination Conditions
Sprinkle the asparagus seeds evenly over the prepared mix—aim for about ¼ inch apart. Cover them with a thin layer of additional mix, no more than ⅛ inch deep. Press gently to ensure good seed-to-soil contact, which is critical for germination. I use a small paintbrush to lightly sweep the surface, ensuring seeds aren't buried too deeply.
Place the tray in a plastic bag or cover it with a clear lid to retain humidity. Asparagus seeds thrive at 70-75°F, so I set the tray on a seedling heat mat to maintain consistent warmth. Germination can take 2-4 weeks, so be patient—you'll know it's working when tiny green shoots push through the soil.
☀️ Step 3: Provide Light and Thin Seedlings
Once the first true leaves appear (not the initial cotyledons), remove the plastic cover and move the seedlings to a bright location. Asparagus needs 12-14 hours of light daily, so a south-facing window or a grow light setup is essential. If seedlings stretch toward the light, they're not getting enough intensity—adjust the light source within 4 inches of the tray.
When seedlings reach 2-3 inches tall, thin them to 2 inches apart to reduce competition. Use small scissors to snip excess seedlings at soil level, leaving the strongest ones. This step prevents overcrowding, which can lead to weak, leggy plants. Water gently from the bottom to avoid disturbing the roots.
🪴 Step 4: Transplant to Individual Pots and Encourage Growth
After 6-8 weeks, when seedlings have 4-5 leaves, transplant them into 6-inch pots filled with a mix of 50% potting soil and 50% compost. Dig a hole slightly deeper than the root ball and place the seedling in, firming the soil gently around it. This encourages root development downward, which is crucial for asparagus.
Place the pots in a location with full sun exposure and keep the soil consistently moist but not soggy. Asparagus is a perennial, so it needs time to establish a strong root system before you can expect harvests. Fertilize lightly with a balanced organic fertilizer every 4-6 weeks to support steady growth.
⏰ Step 5: Overwinter and Prepare for Outdoor Transition
Asparagus is cold-hardy, but indoor-grown seedlings need to be acclimated before moving outdoors. In late winter, reduce watering slightly to simulate dormancy, but keep the soil from drying out completely. By early spring, when soil temperatures reach 60°F, you can transplant the seedlings outdoors into a permanent bed.
Choose a sunny spot with well-draining soil and space the plants 12-18 inches apart. The first year, focus on establishing roots—avoid harvesting spears until the third year. With patience, your indoor-started asparagus will reward you with fresh, homegrown harvests for decades.
Tips & tricks for perfect indoor asparagus growth
These game-changing insights will help you navigate the delicate balance of warmth, light, and patience required for thriving indoor asparagus.
Soil Preparation Secret: The 2:1 peat moss to perlite ratio in Step 1 isn't just about drainage—it's about creating an oxygen-rich environment for those microscopic seeds. I've found that adding a handful of vermiculite to this mix (about 10% of the total volume) further improves moisture retention without compacting, which is crucial since asparagus seeds need consistent hydration but hate soggy conditions. The key is to moisten until it feels like a damp sponge—you should be able to squeeze out just a few drops when you gently press the mix.
Germination Temperature Hack: While the instructions specify 70-75°F, I've discovered that maintaining the tray at the higher end of this range (closer to 75°F) significantly speeds up germination from the 2-4 week window. Place a small thermometer near the tray to monitor—any lower than 70°F and you might be waiting weeks longer. Pro tip: If your heat mat doesn't have temperature control, prop the tray on top of a small appliance like a nightlight (set to low) to create a micro-climate of warmth without direct heat.
Light Intensity Check: The 12-14 hours of daily light requirement in Step 3 is non-negotiable, but what's often overlooked is the light quality. Asparagus seedlings will stretch dramatically (a condition called etiolation) if they're not getting sufficient intensity within that timeframe. Test your light source by holding your hand about 4 inches away—if you can comfortably read text, your seedlings are getting enough light. For window-grown plants, rotate the tray 180 degrees daily to ensure even growth and prevent lopsided seedlings.
Transplanting Technique: When transplanting to 6-inch pots in Step 4, I've found that creating a small trench (about 1 inch deep) before placing the seedling encourages the roots to grow downward immediately. This is particularly important for asparagus, which develops a deep taproot. After transplanting, give the pots a gentle shake to help settle the soil around the roots, then water thoroughly from the bottom to prevent air pockets. The 50/50 potting soil to compost mix should be moist but never waterlogged—think of it as maintaining the same "damp sponge" consistency you achieved in Step 1.
Pro Tips for Growing Asparagus From Seed Indoors
- These game-changing insights will help you navigate the delicate balance of warmth, light, and patience required for ...
- Soil Preparation Secret: The 2:1 peat moss to perlite ratio in Step 1 isn't just about drainage—it's about creating a...
- Germination Temperature Hack: While the instructions specify 70-75°F, I've discovered that maintaining the tray at th...
Frequently asked questions
about growing asparagus from seed indoors—because every gardener deserves clarity! Here are answers to the most common queries to help you avoid pitfalls and maximize success.How long does it take for asparagus seeds to germinate indoors?
Asparagus seeds can take anywhere from 2 to 4 weeks to germinate indoors, depending on warmth and moisture. Keep soil consistently moist (not soggy) and maintain temperatures between 70–75°F (21–24°C). Patience is key—slow starters are normal!
Can I harvest asparagus indoors the first year?
Nope! Asparagus is a perennial crop that needs 2–3 years to establish strong roots before harvesting. Focus on nurturing healthy foliage indoors first—it’ll reward you with spears later. Think of Year 1 as "training wheels" for your future harvest!
What’s the best indoor setup for asparagus if I don’t have a greenhouse?
Use a south-facing window with supplemental grow lights (12–14 hours/day) or a seed-starting mat for warmth. A 5-gallon pot with drainage holes works well, and a humidity dome speeds up germination. No greenhouse? No problem!
Why are my asparagus seedlings turning yellow or wilted?
Yellowing leaves often signal overwatering or poor drainage. Wilting can mean underwatering or root stress (check for compacted soil). Ensure pots have drainage holes, use well-draining soil, and water only when the top inch feels dry. Adjust light if leaves stretch too tall!
Do I need to harden off asparagus before transplanting outdoors?
Yes! After 6–8 weeks indoors, acclimate seedlings to outdoor conditions over 7–10 days. Start with 1–2 hours of shade, then gradually increase sun exposure. Skip this step, and your plants may shock—like moving from a cozy blanket to a snowstorm!
Wrapping up and next steps
Growing asparagus from seed indoors is a rewarding journey that blends patience with the joy of nurturing life from scratch. While it takes time—years, to be exact—your dedication will soon pay off with fresh, homegrown spears.
Start small, stay consistent, and soon you’ll be harvesting your own nutrient-packed bounty year-round!
Ready to take the next step? Transplant your seedlings outdoors (or keep them thriving indoors) and watch your asparagus garden flourish. Happy growing! 🌱✨